Your yard decides which of these projects fits: a bare fence or blank wall wants the mirror or the dragonfly, a patio with no soil wants a container water garden, and a lawn with open light can hold a window greenhouse built from salvaged panes.
Costs run from free, with gathered rocks for the painted snake, to the price of paint, tile or plants. Effort ranges from a nail-punched tin can to a build that needs matching windows collected first.
1. Painted Garden Rocks
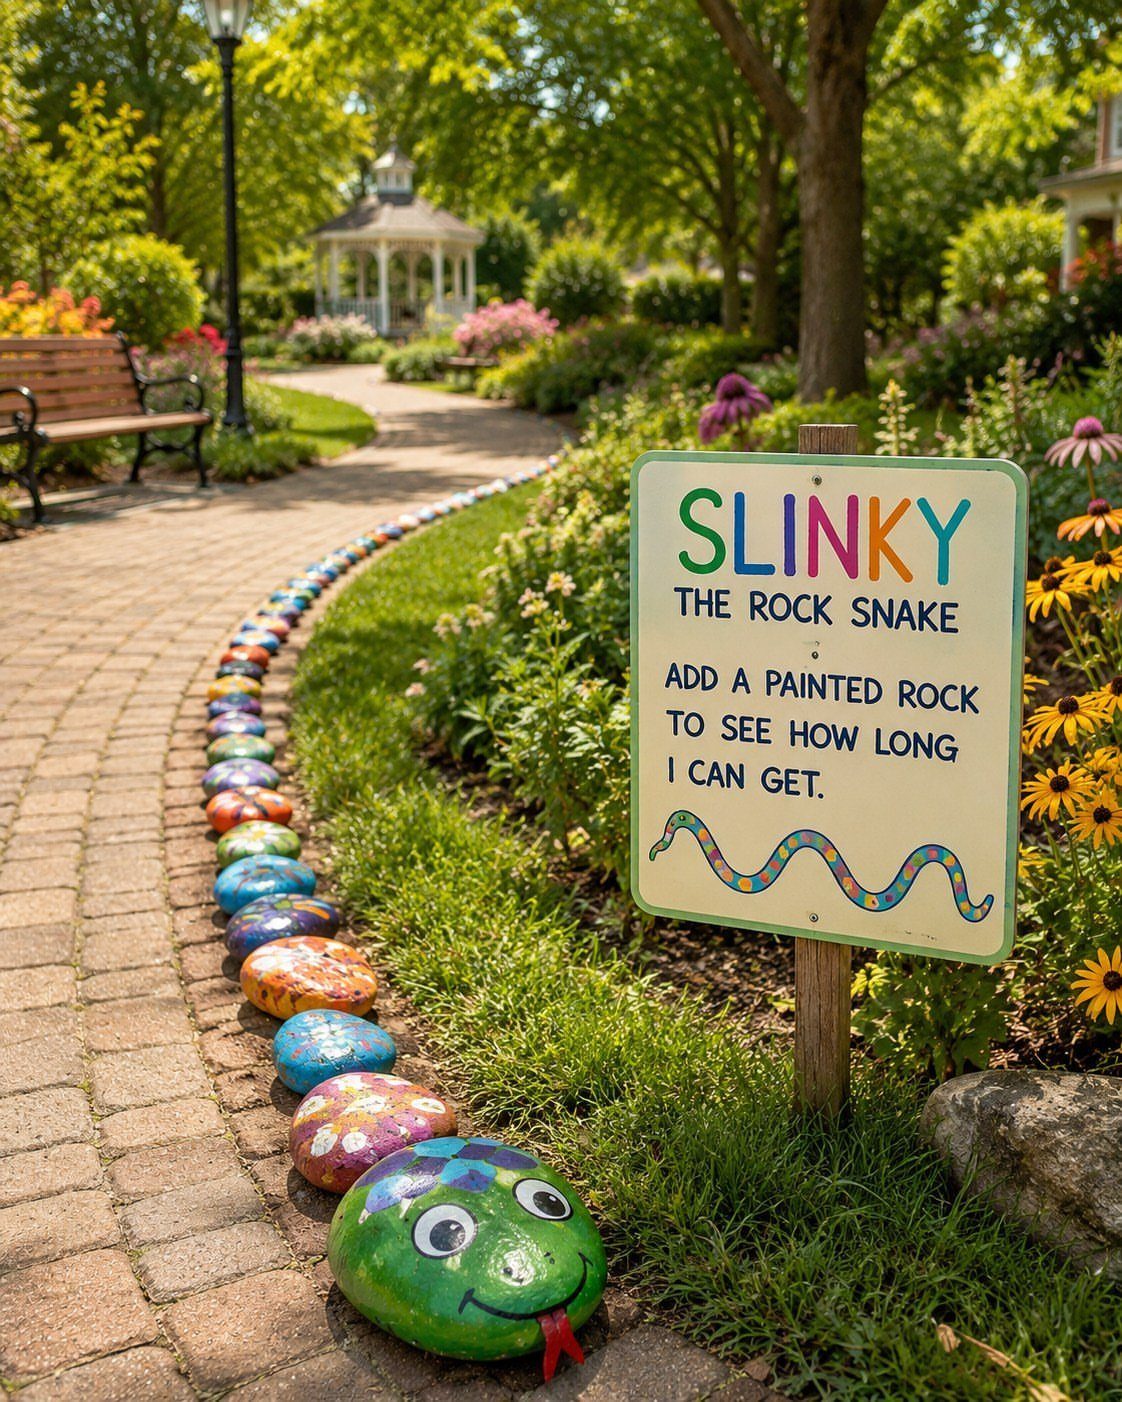
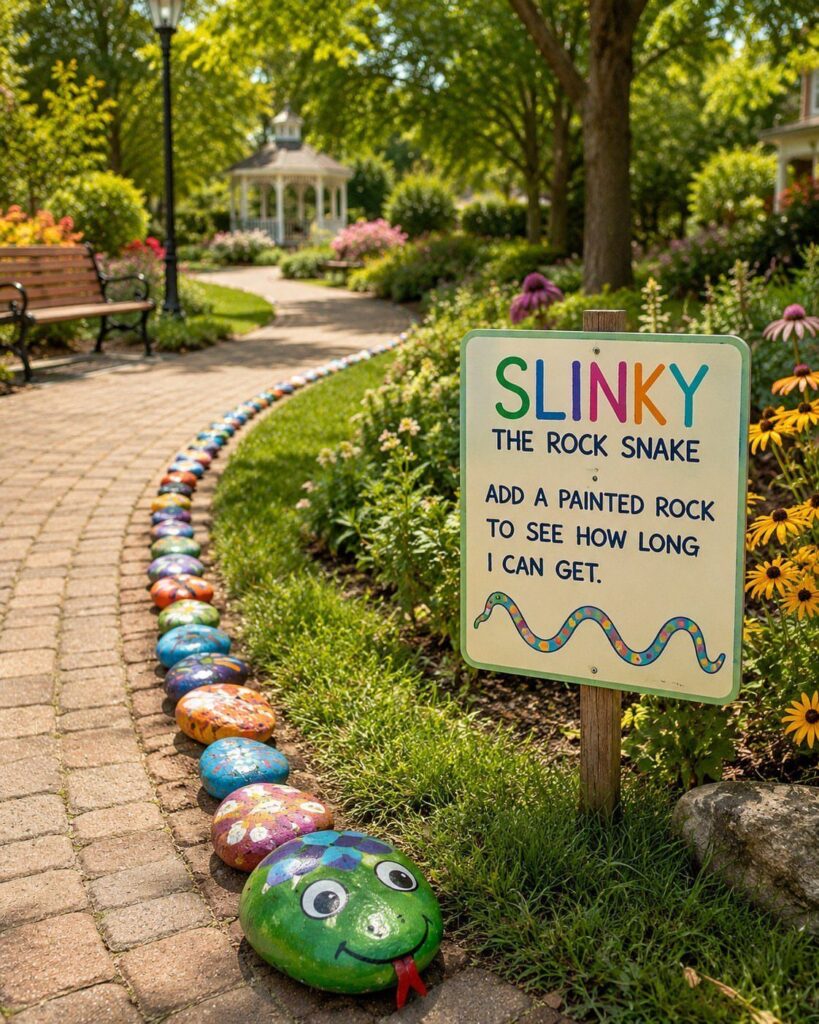
A rock snake works because the shape does the heavy lifting: a line of stones in graduated sizes reads as a creature the moment you add a head and a sign.
Painting each stone a different bright color keeps it cheerful against green foliage.
Lay the stones along a path edge, as this one does beside the bricks, so the body curves with the walkway.
A hand-lettered name sign, like "Slinky," gives it personality for almost no money. Rocks cost nothing if you gather them, and paint is the only real spend.
2. Mosaic Stepping Stones
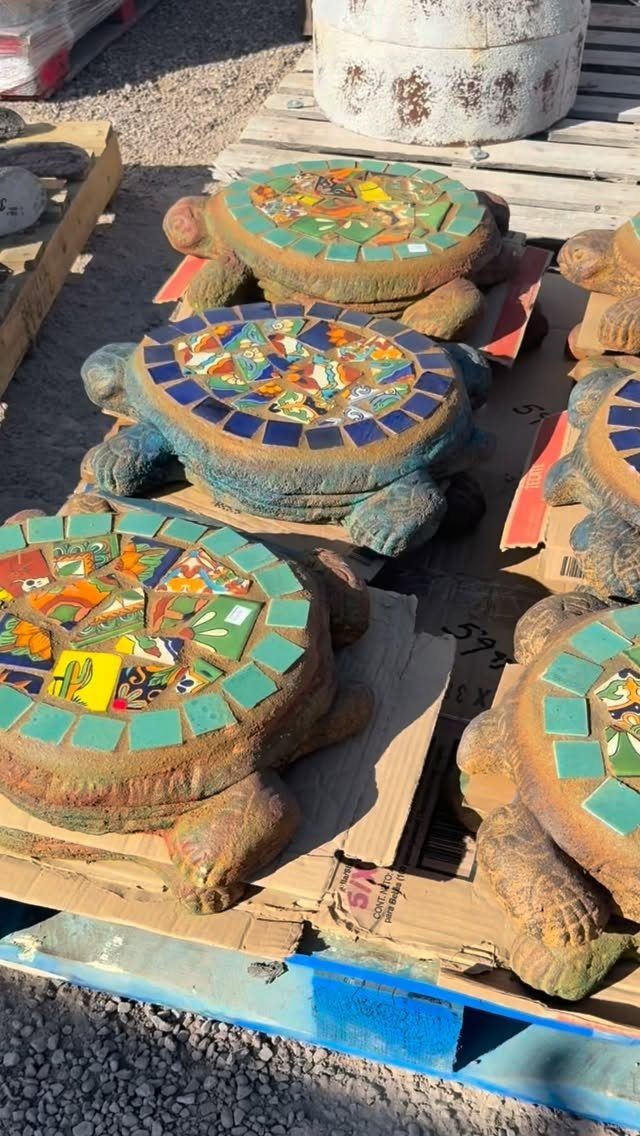
Turtle-shaped stepping stones give you a built-in design: the shell is a ready-made canvas for mosaic tile. Press colorful pieces into the wet concrete in a pattern radiating from the center, and the shell segments almost draw themselves.
Leave mosaic stepping stones on cardboard while they cure: it keeps the underside clean and lets you move them without fuss.
A turtle mold means the shape is set before you start, so your effort goes into choosing tile colors. Mix bright shades with one calmer tone so the shell doesn’t look busy.
3. Fairy Garden
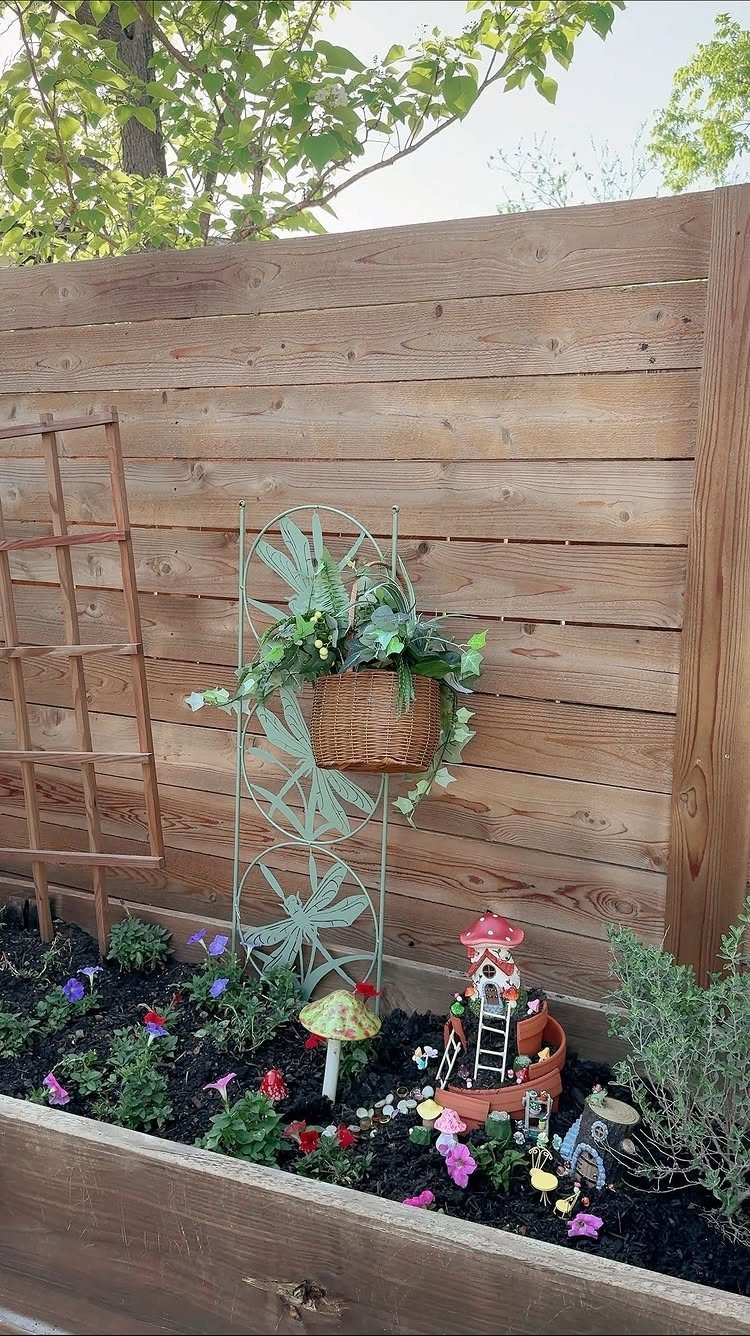
Small scale does the work in a fairy garden, and a wooden bed against a fence gives it a backdrop and a defined edge.
One mushroom, one little house and a hanging basket above make three layers of height, which is why this one feels full without much stuff.
Keep the figurines few.
Crowding a bed with a dozen accessories flattens the effect, while a single focal house with plants around it reads as a tiny village. Real plants softening the edges of the house make it look lived in rather than staged.
4. Miniature Garden Living Plants
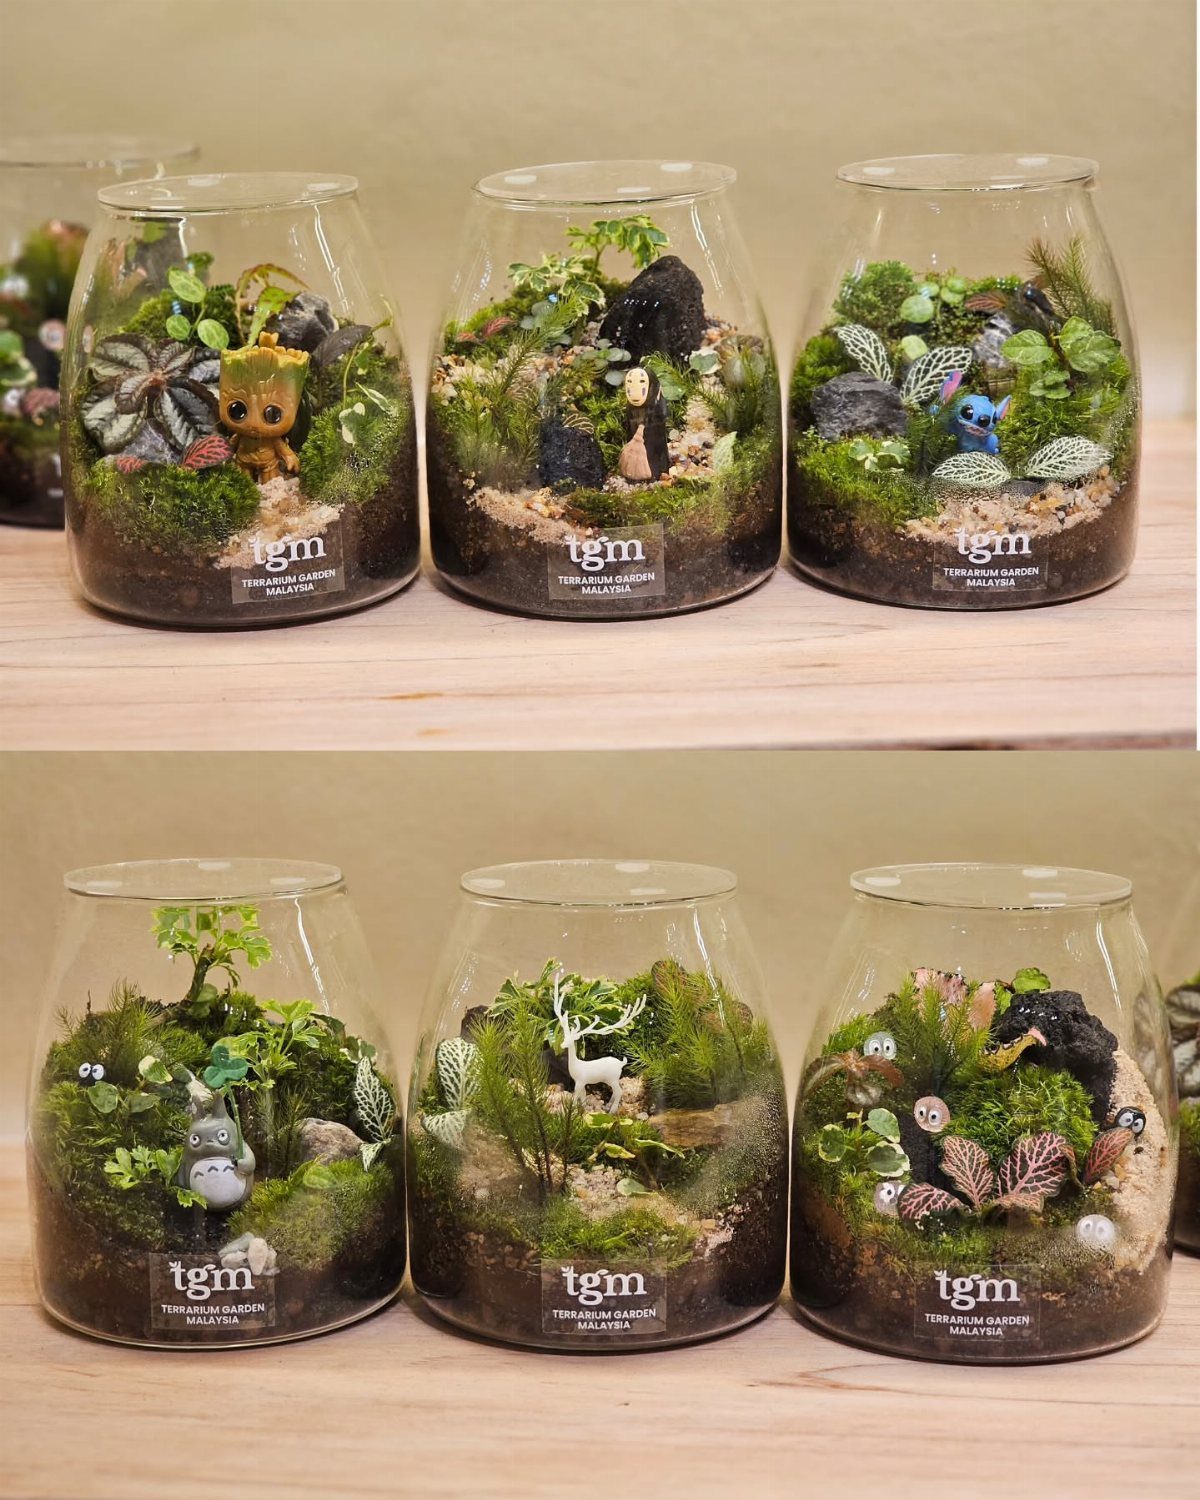
Glass terrariums turn plant choice into the main event.
Each jar holds soil, living plants and one small figure, so pick plants that stay in proportion with the figure: tiny leaves make a character look big, while a large leaf swallows it.
Line up several jars of the same size on a shelf so the figures become the variety.
Pairing each character with a different plant gives every jar its own scene. Start with one jar to test your plant pairing before filling a whole shelf.
5. Upcycled and Repurposed Outdoor Decor
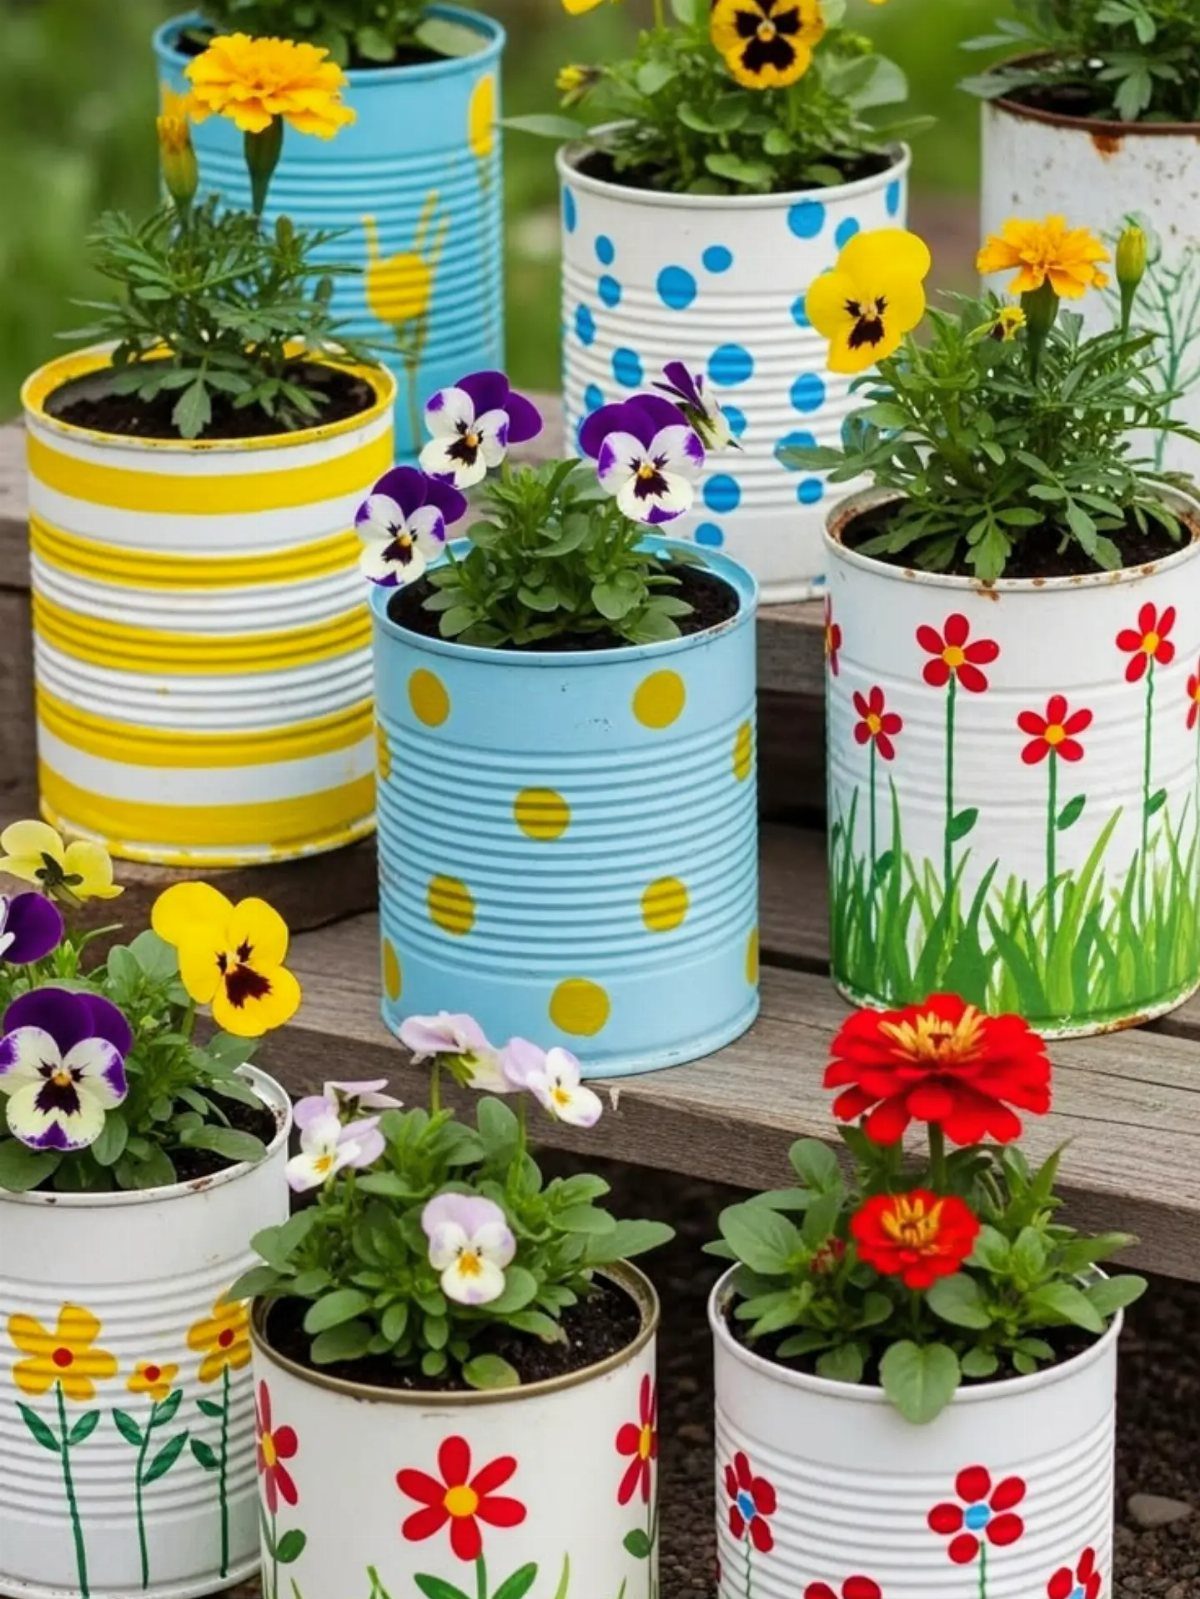
Upcycling needs very little: a can, some paint and soil are enough to make a planter. The ridges catch color nicely, and a row of them in different shades looks deliberate on a plain wooden surface.
Choose one paint family for the set, or a bold mix like this one, and let the flowers supply the rest.
Cans cost next to nothing, so this suits a tight budget and a single afternoon. Group them at varied heights on a bench or step for the best effect.
6. Tin Can Garden Lanterns
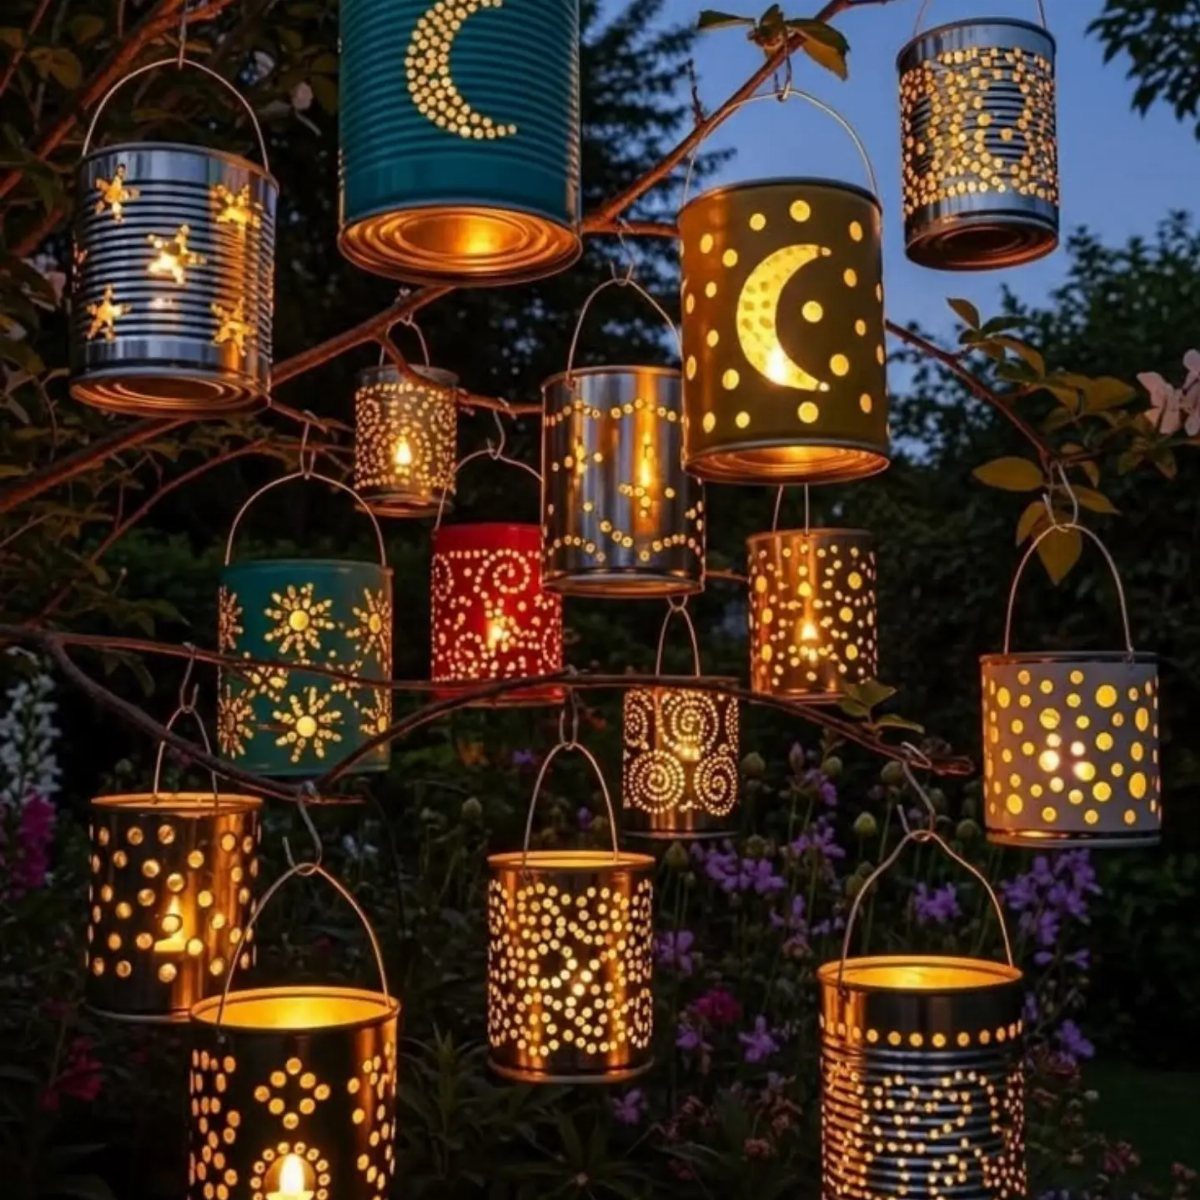
Punched patterns turn a plain tin can into a lantern: stars and moons let light spill out in dots once dusk arrives. Painting the cans in different colors, as these are, adds a second layer of glow.
Hanging them from tree branches puts the light overhead, which I prefer to ground placement because it feels like a canopy.
Glass jars and wine bottles work the same way if you want a softer, rounder glow. Cans are the cheapest route, and a nail does the punching.
7. Bird Bath
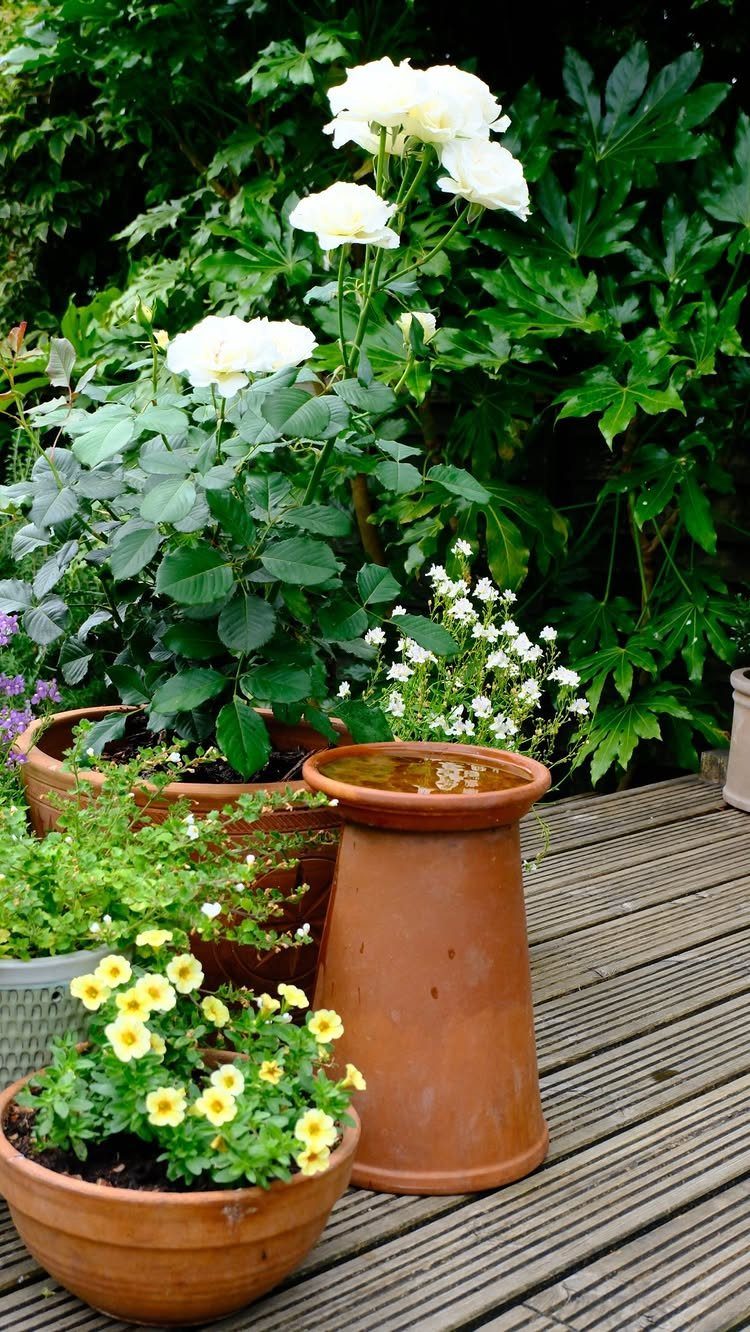
A terracotta pot makes a bird bath with no building at all: fill it with water and set it where birds can see it.
Any wide, shallow basin you already own or salvage can do the same job. Keep the water fresh, and put the bath beside plants so birds have somewhere to perch nearby.
8. Bed Frame Flower Garden
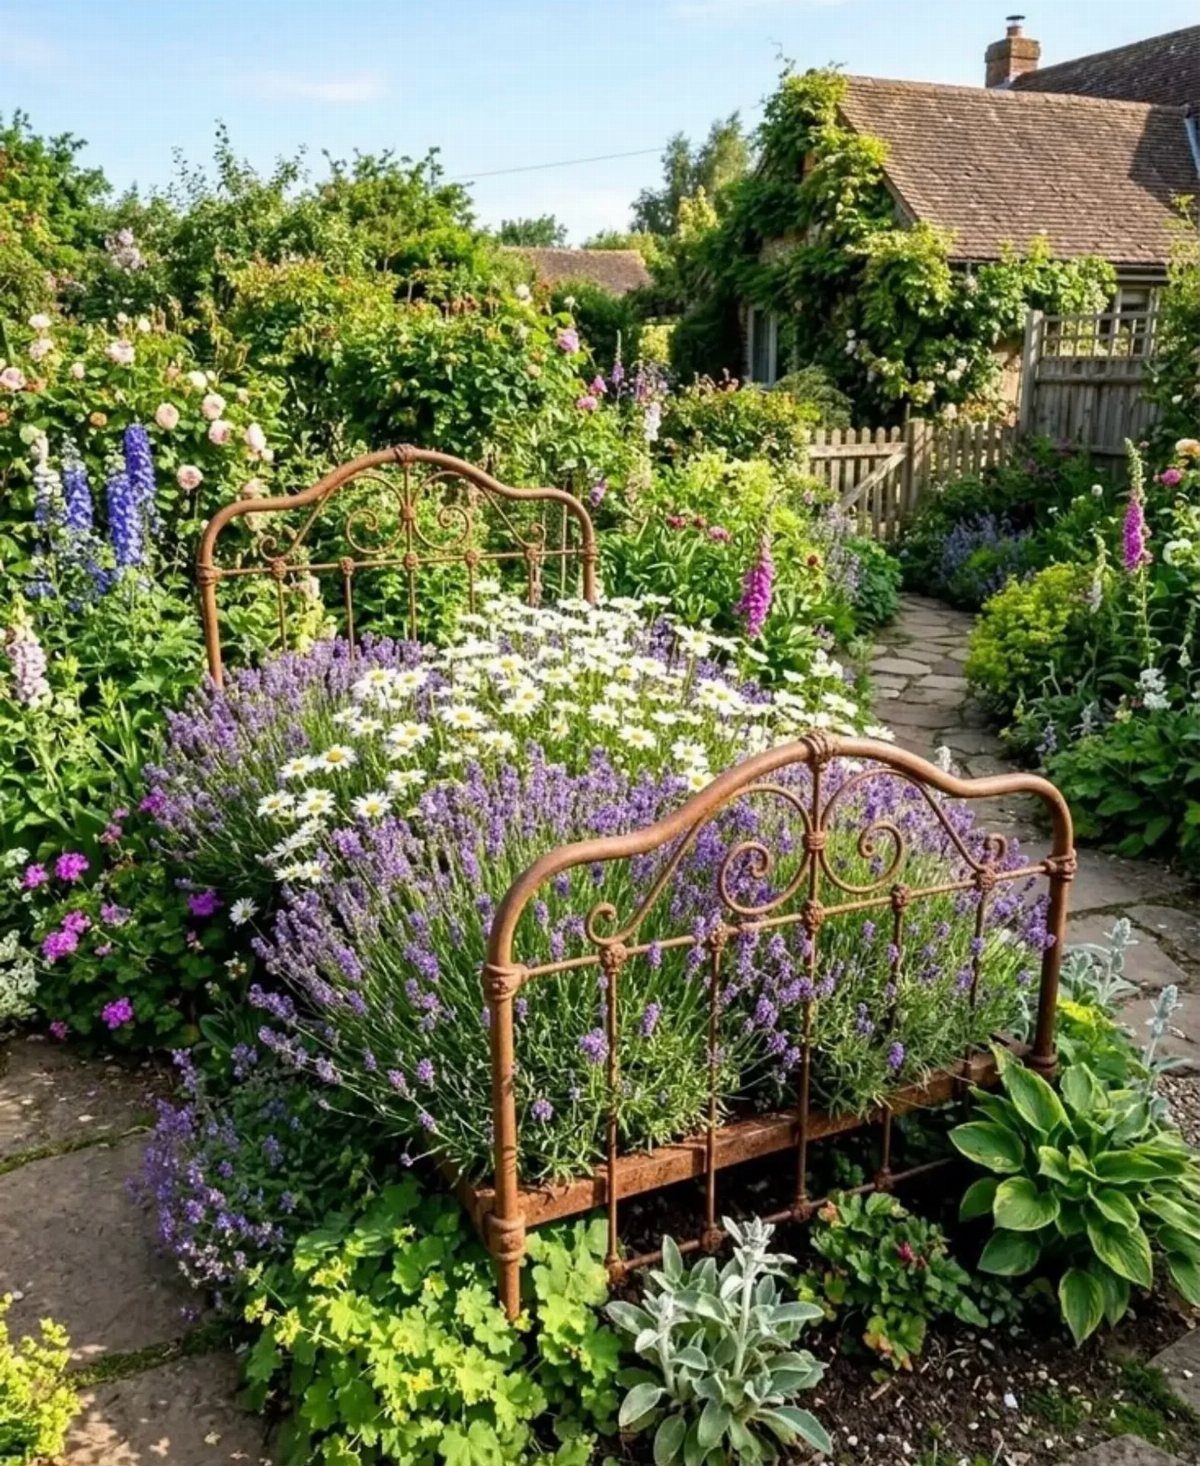
An old metal bed frame turns into a flower bed with its ornate scrollwork left fully visible.
I would plant inside the frame and let the headboard and footboard stand as the edges, so the bed shape reads at a glance.
Plants spilling over the rails soften the metal. Frames are often cheap or free secondhand, which keeps this one kind to a small budget.
9. Garden Art Dragonfly
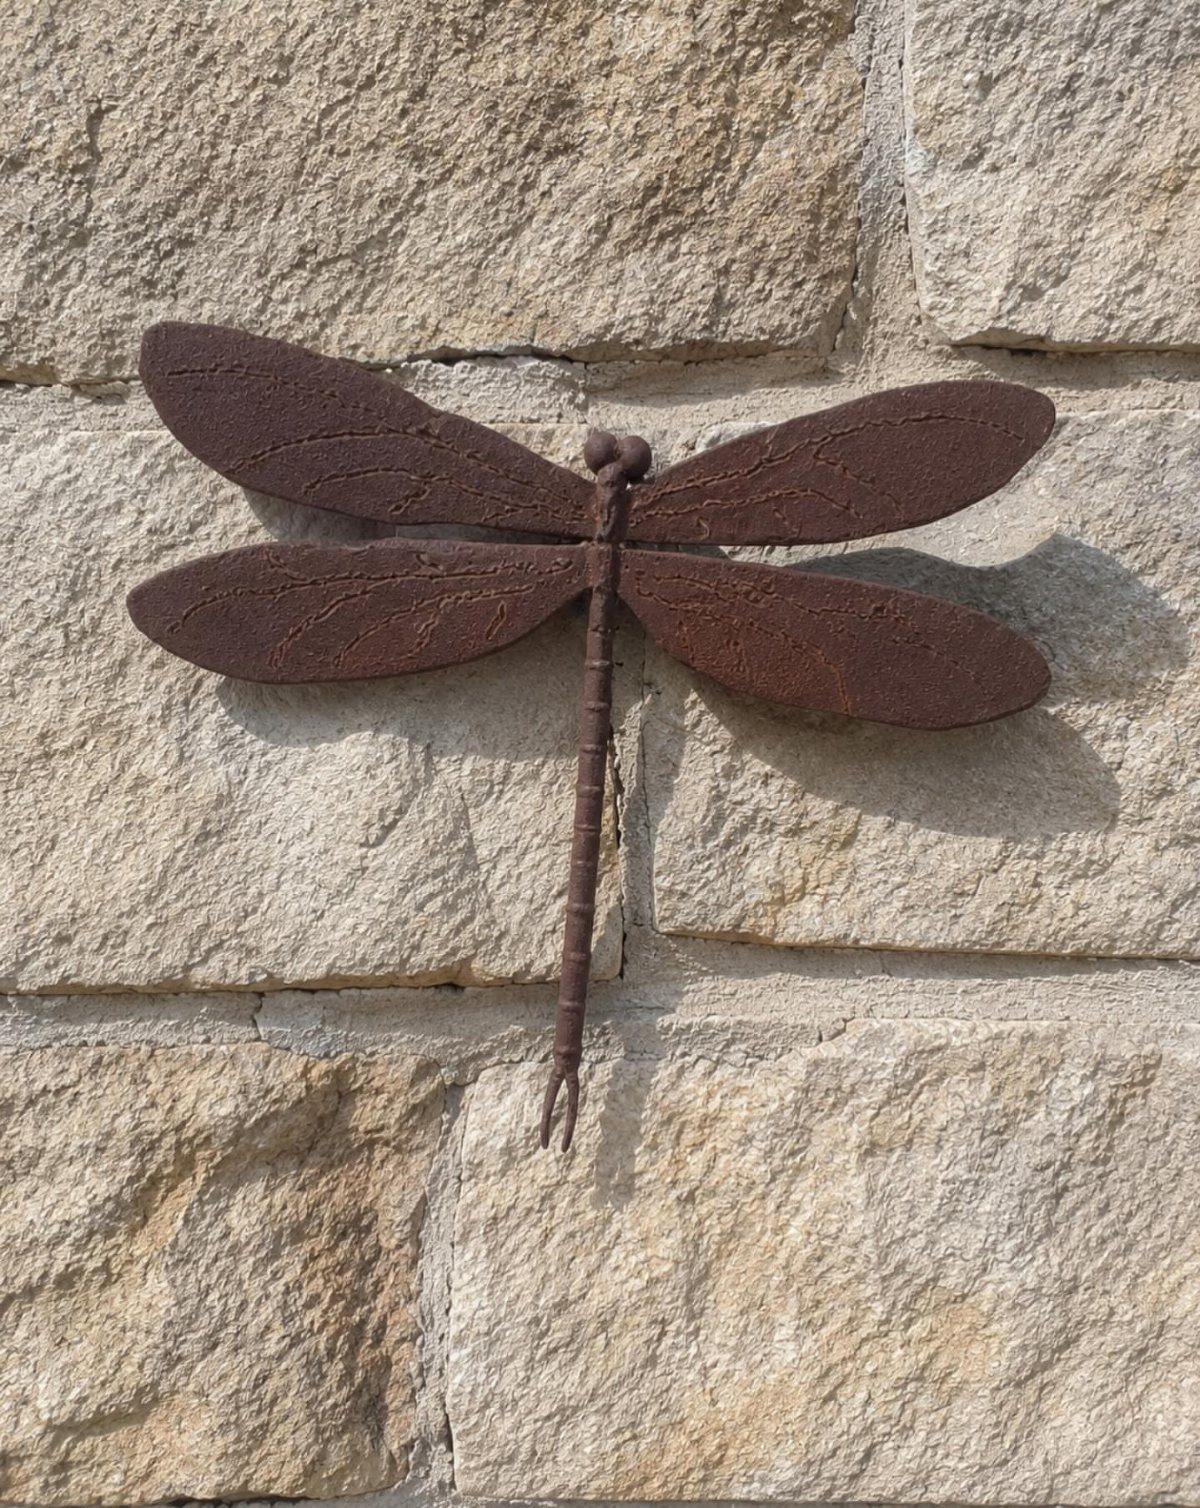
Mounted flat on stone, the sculpture becomes permanent garden art that needs no watering or upkeep.
Choose a wall with plain surroundings so the wing detail doesn’t compete with anything.
One dragonfly is enough for a small wall. Add a second only if you have room to space them well apart.
10. Container Water Garden
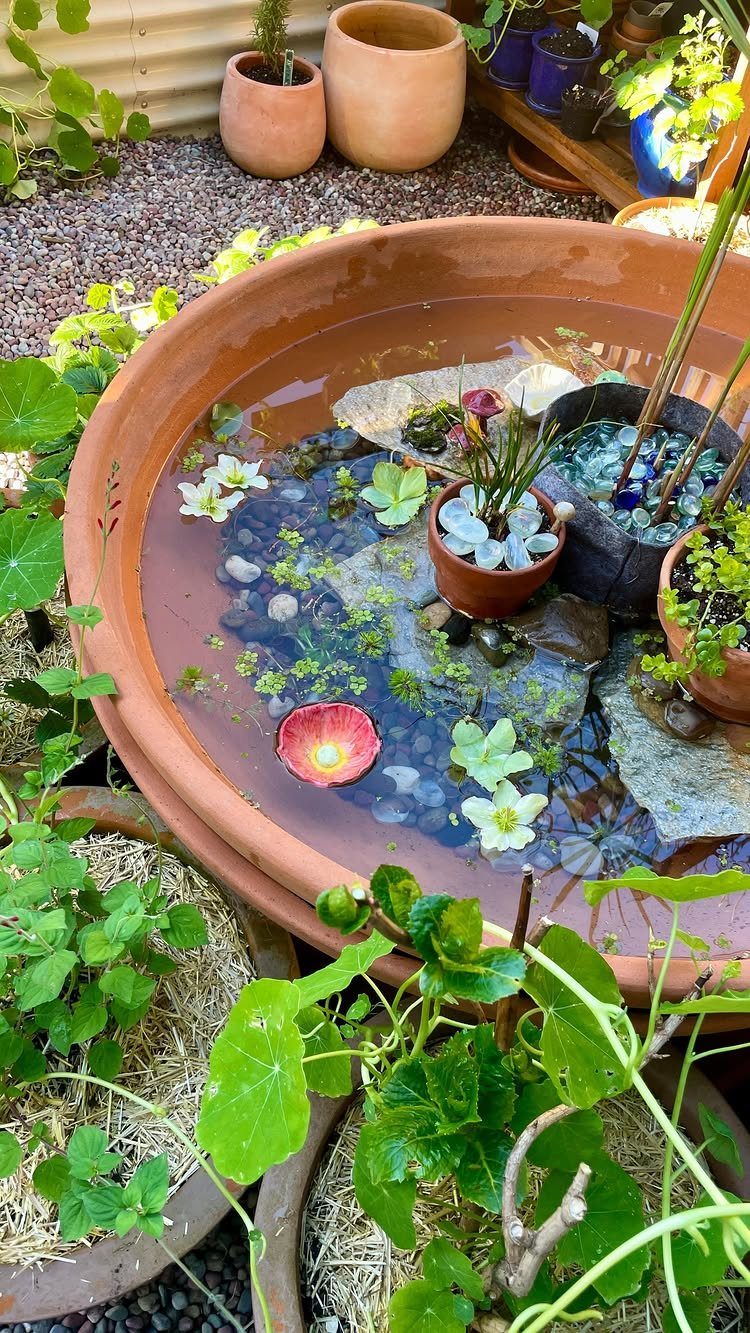
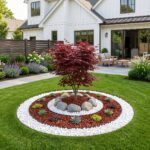
A single large terracotta bowl can hold a full water garden: a few aquatic plants, some stones for height, and small potted plants set around the rim.
It suits a patio because it needs no digging, only a spot and some water.
Stones add structure inside the bowl and give plants something to sit against.
Set the bowl on gravel, as this one is, and cluster other pots behind it so it feels like part of a planting. I like a wide, shallow bowl for how much surface it shows.
11. Pallet Garden Planter
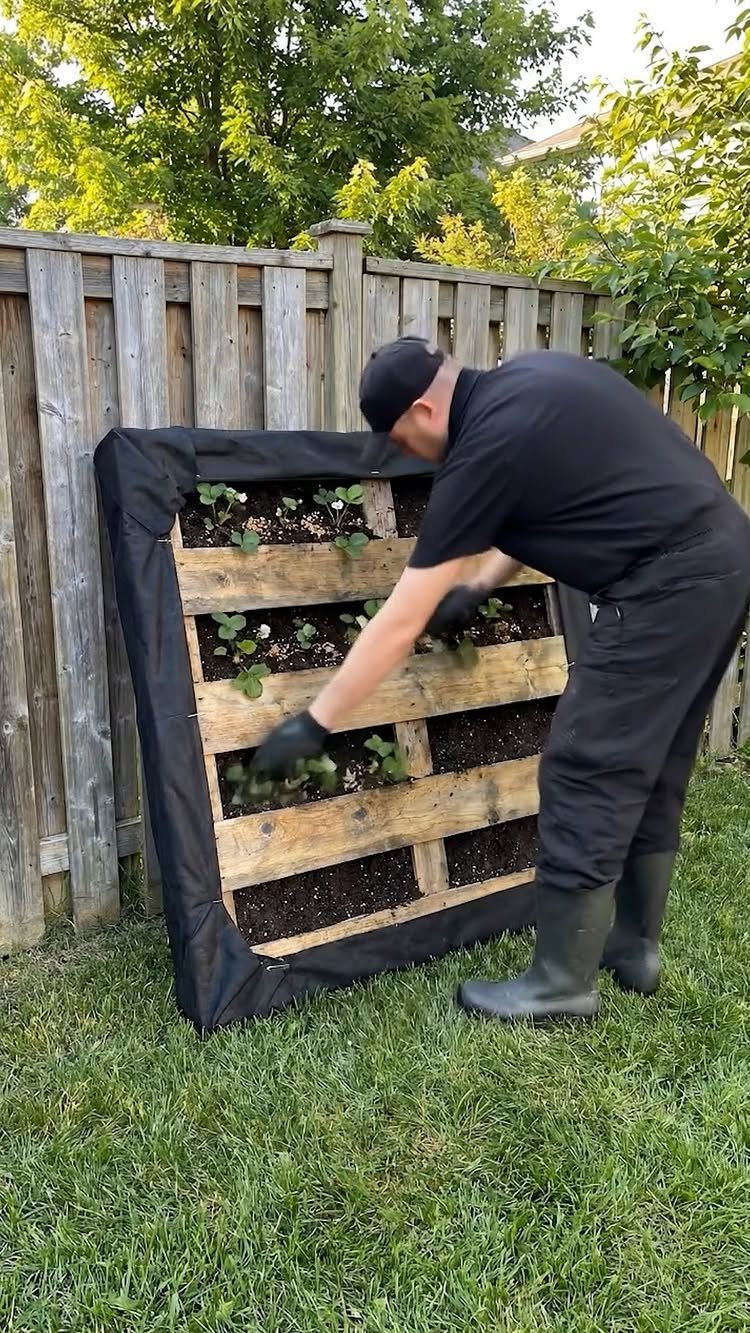
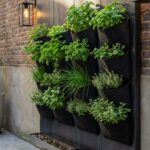
A pallet stood upright gives you a vertical garden, with each gap between slats acting as a planting pocket. Lining the back and sides with black fabric holds the soil in, and the small green plants fill in the rows.
Lean it against a fence, as this one is, so it stays steady and the wood backs the display.
A reclaimed pallet costs little, and the fabric and plants are the main spend. Plant from the top down so soil doesn’t spill onto finished rows.
12. DIY Tyre Planters
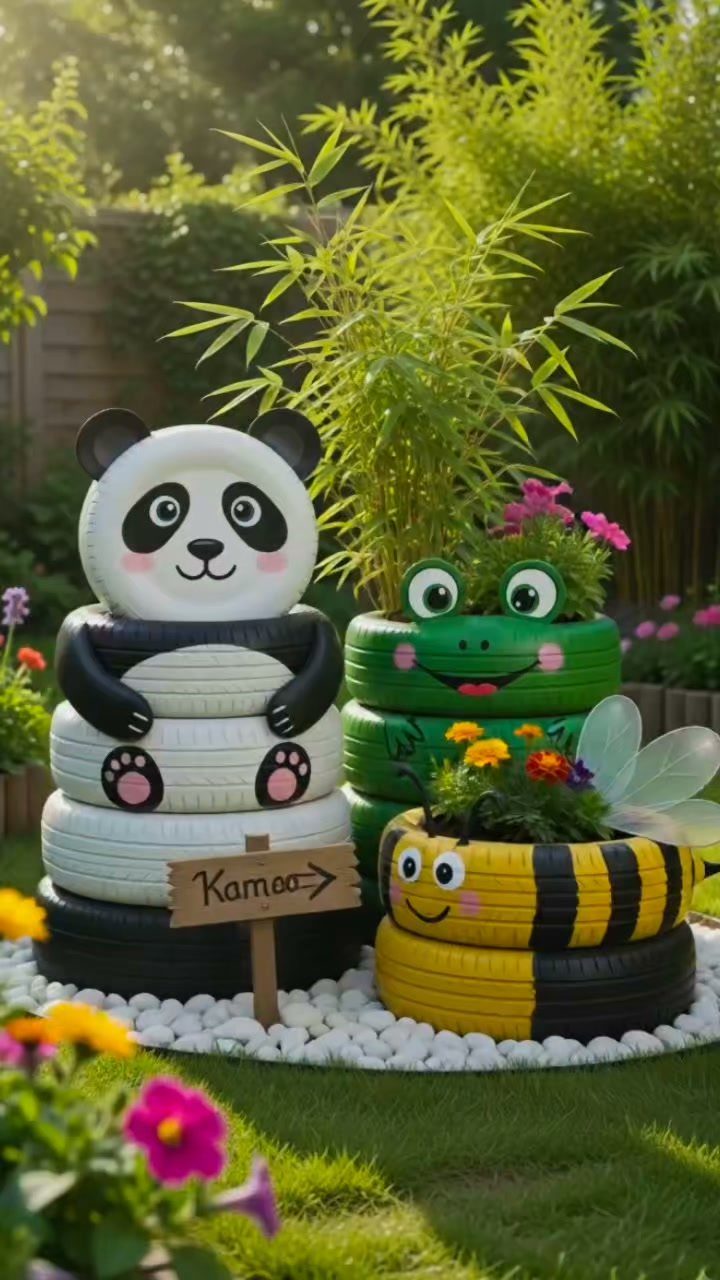
Painted tires turn into animals easily, because a plain round shape suits a panda, a frog or a bee. The ring body already reads as a head or a belly, so paint and a few added features finish the character.
Bold color is what makes a tyre planter look playful rather than junky.
Plant flowers, herbs or a trailing vine in the center hole, and let the foliage double as hair, a crown or a splash of color. Group several characters together, as here, and the set feels like a small zoo.
13. Optical Illusion Mirror
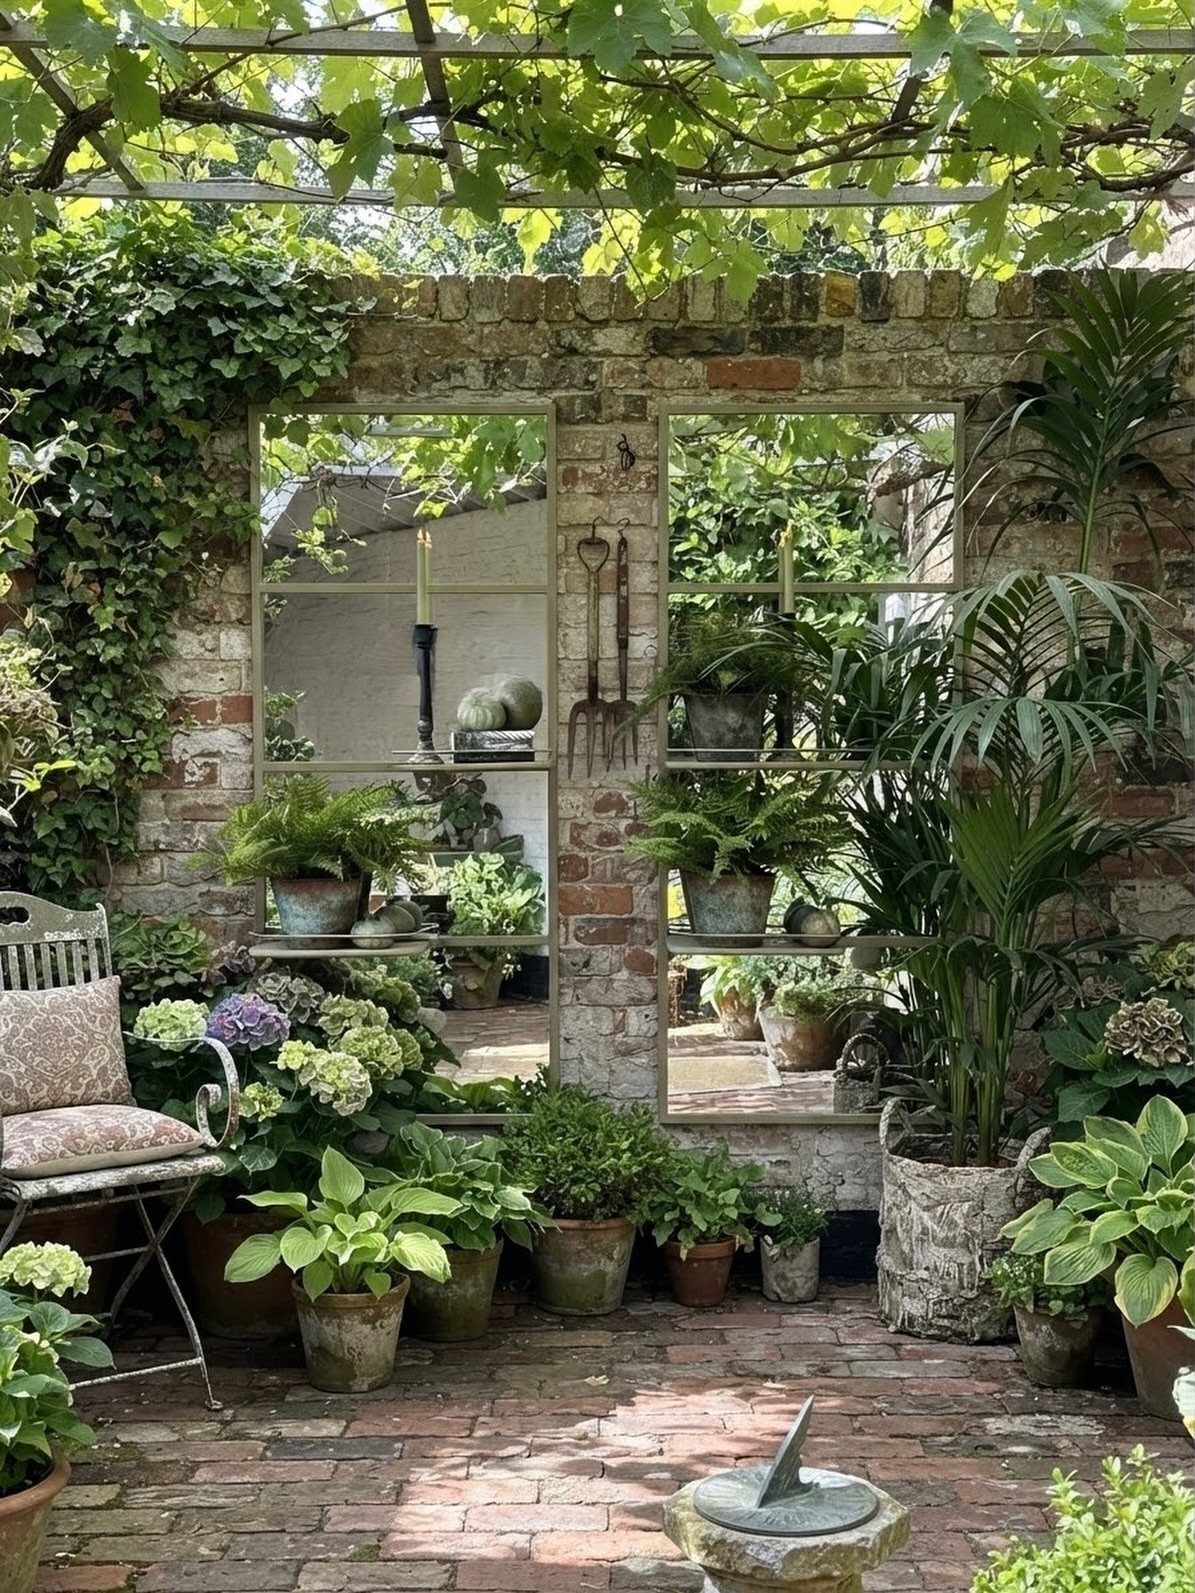
A mirror hung on a brick wall pushes the garden back: each pane catches the plants and pergola in front of it and doubles the greenery.
Outdoor-rated glass or acrylic holds up best in weather. Window-pane mirrors suit this best, since the grid breaks the reflection into small views, like openings onto another yard.
Mount them where they face your best planting, not a bare fence.
Cluster potted greenery below so real leaves and reflected ones blend at the base. 2 panes side by side fill a wall without crowding a small patio.
14. Window Greenhouse
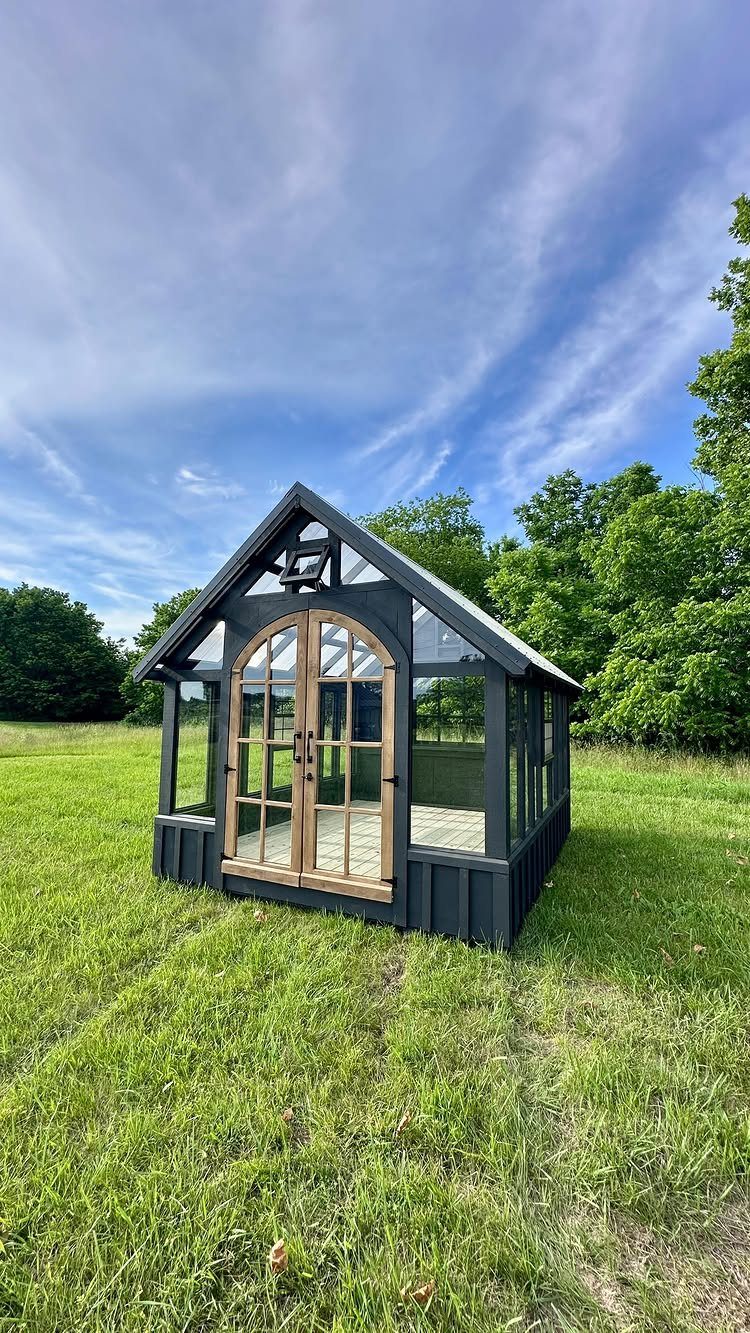
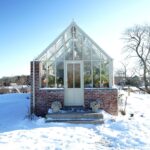
Old house windows become a greenhouse when you set them as walls and add arched doors on the front. Many panes mean many small pieces of glass, so the dark frame outlines each one and gives the structure its look.
Collect windows of matching size first, then plan the footprint around them. Mismatched sizes make the build harder.
A small greenhouse like this sits well in an open lawn, where light reaches it from every side. Salvaged windows are usually the cheapest part.
15. Garden Plant Tags
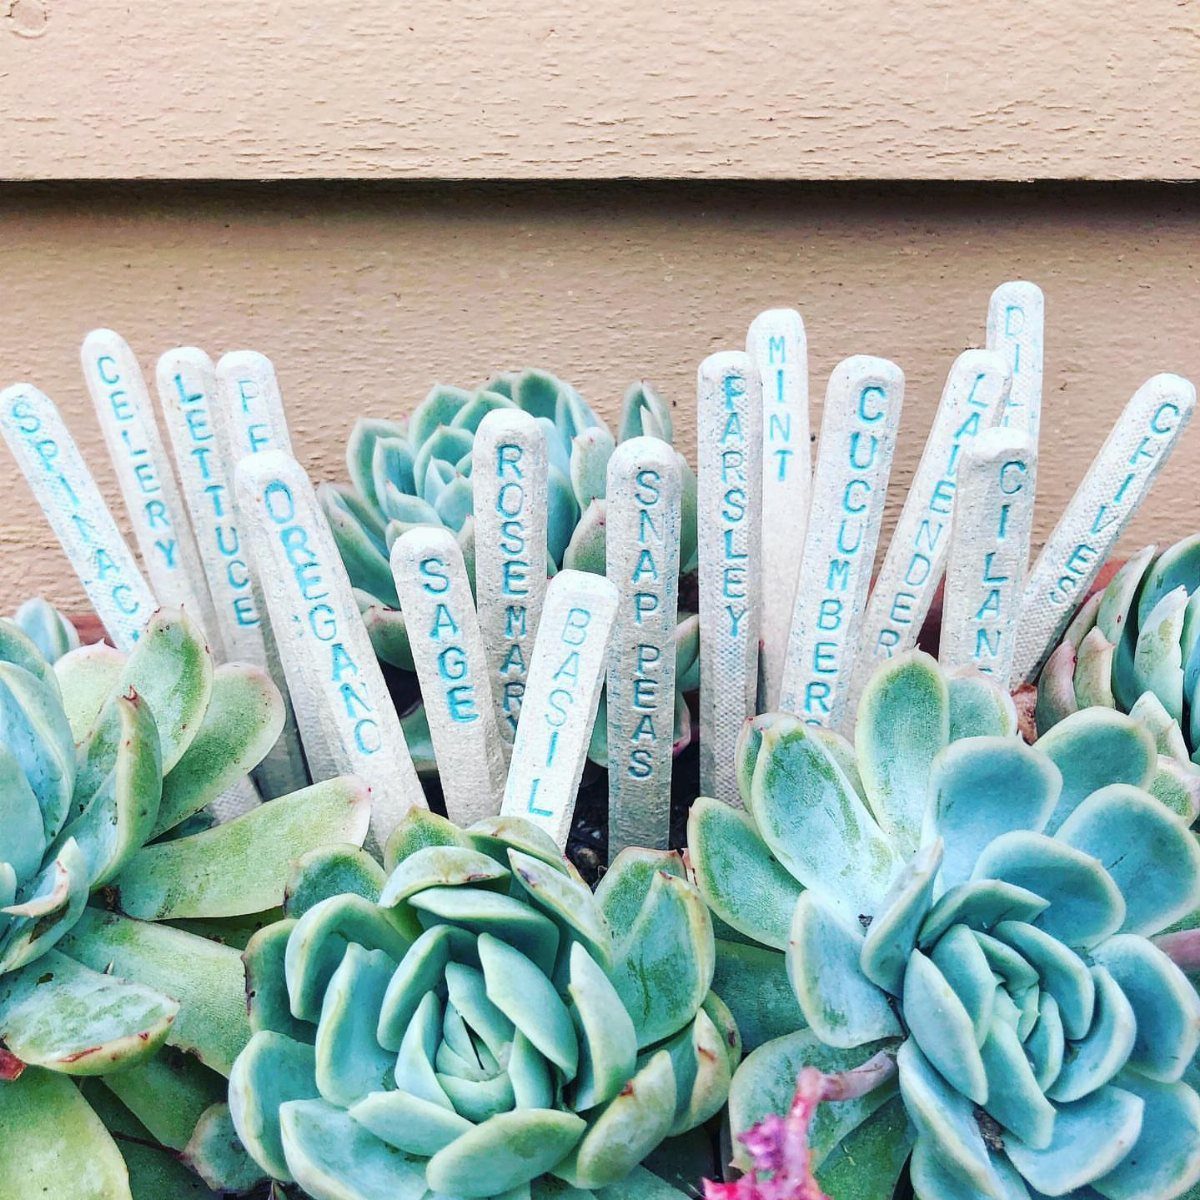
Printing "SAGE" and "BASIL" in one color on one shade of wood keeps the set uniform.
Blue-green succulents make a good backdrop, because the blue text echoes the leaves. Paint the tags white first, then letter them in a single hue.
I would push each marker in close to its plant so the name reads at a glance. Wooden craft sticks keep the cost very low.
16. Rusty Tool Animals
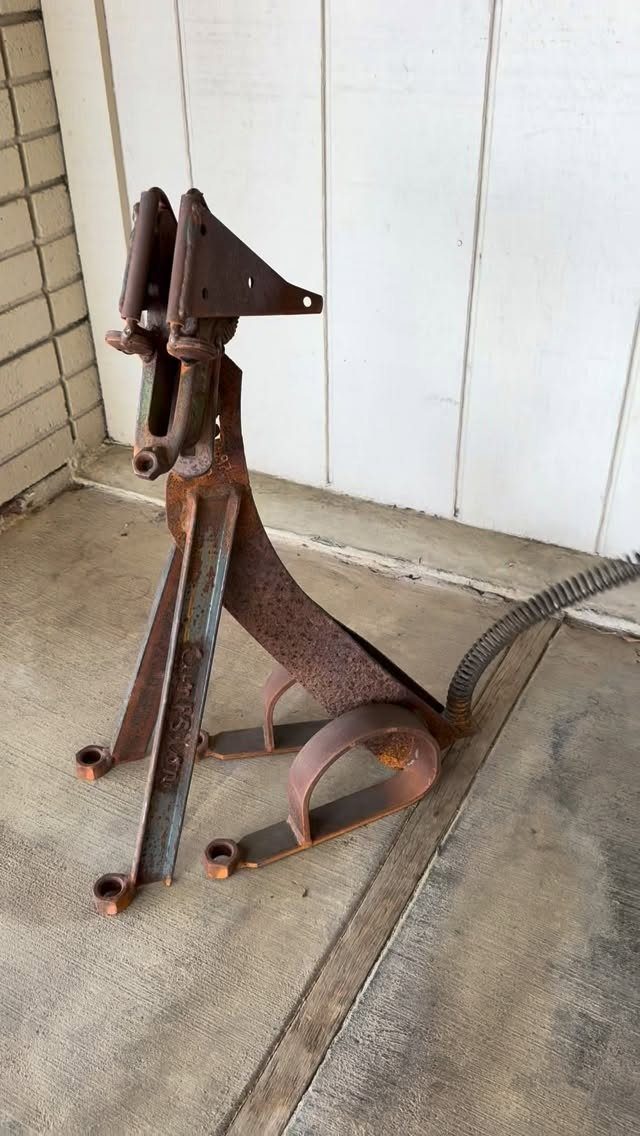
The rust is the color, so no paint is needed.
Sort your pile by shape before you build. Long pieces suit legs, and curved ones work as ears.
Set the finished animal on a porch or concrete patio, where its brown tones read clearly next to a white wall. Hardware stores and yard sales are cheap sources.
17. Watering Can Fairy Lights
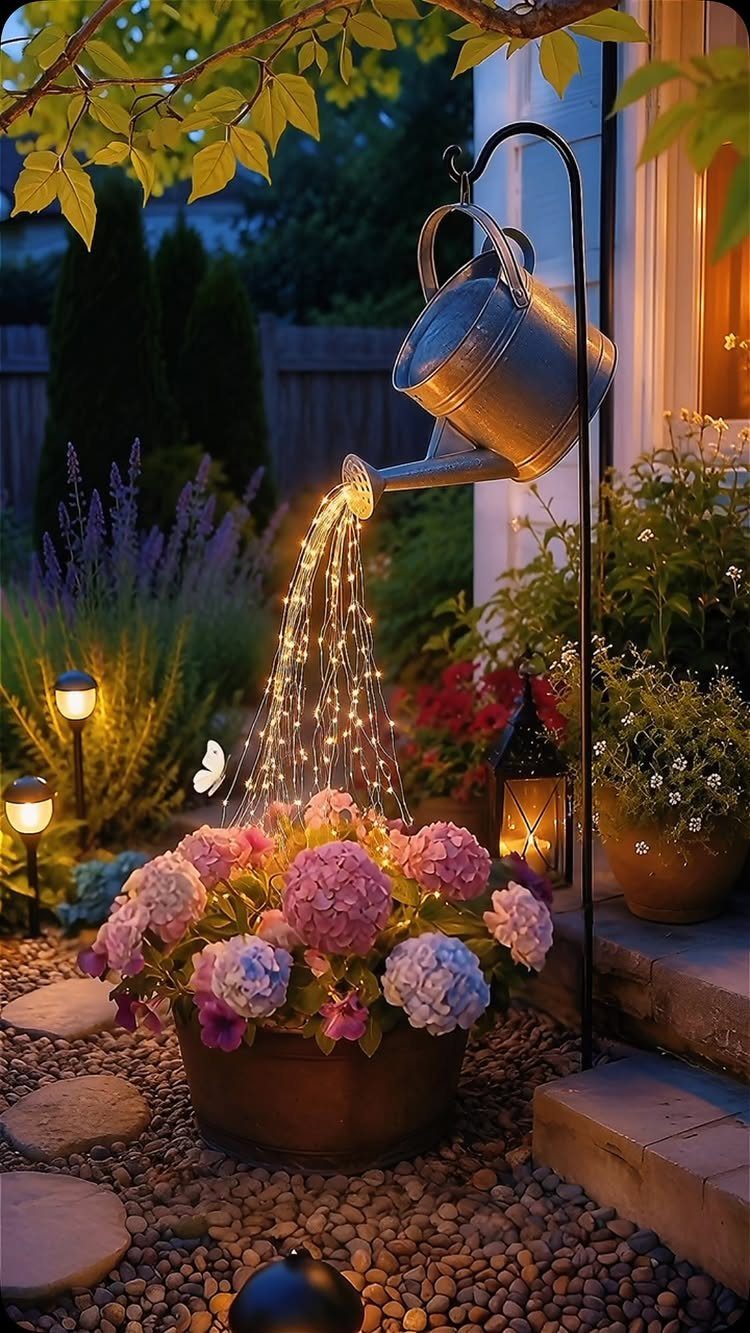
Fairy lights spilling from a watering can look like water, and that is the whole trick of this piece.
Hang a silver can from a stand at a tilt, thread the string through it, and let the strand fall from the spout over the flowers.
Use warm white lights for the most convincing pour.
Place the plug or battery pack inside the can so the cord stays out of sight. A secondhand can keeps the cost low.
18. Decorative Wooden Birdhouse
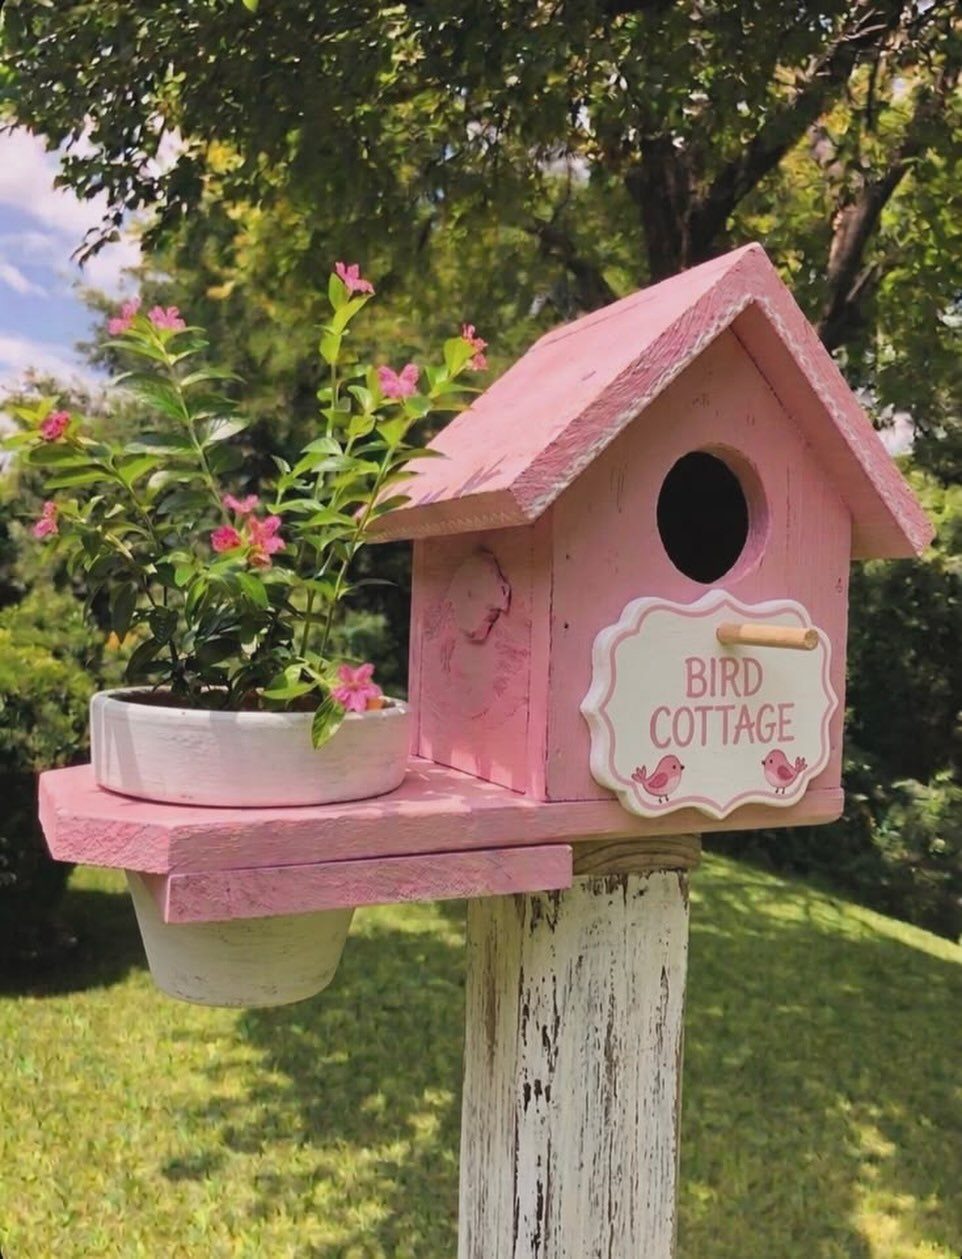
A birdhouse with its own porch planter turns a post into a tiny cottage. Painting it pink and adding a "BIRD COTTAGE" sign sets the charm, and a small box of flowers on the front finishes it.
Mount it on a white post so the color pops against grass and trees.
I like matching the planter flowers to the house paint, which makes the whole thing look planned. Keep the sign short so the lettering stays easy to read from across the yard.
19. Garden Wishing Well Planter
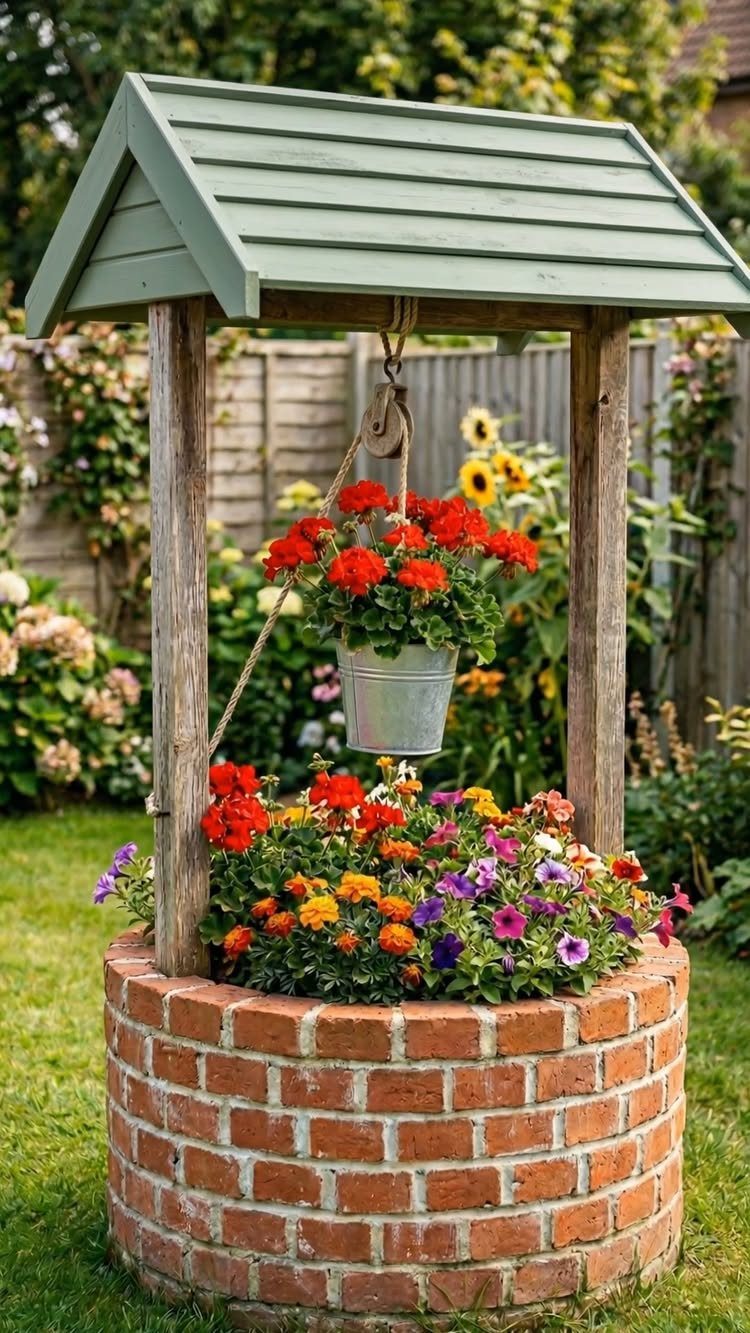
A roofed brick well gives a flower bed a focal point with height, and the hanging bucket adds a second layer of planting right at eye level.
The red geraniums in the bucket pop sharply next to the green roof and the mixed blooms below.
I would keep the bucket’s color to one flower, as this one does, and let the well itself carry the variety.
A wishing well suits a lawn edge or a fence line, where it reads as a small feature rather than clutter. Fill the base with flowers that spill over the brick.
20. Wheelbarrow Flower Planter
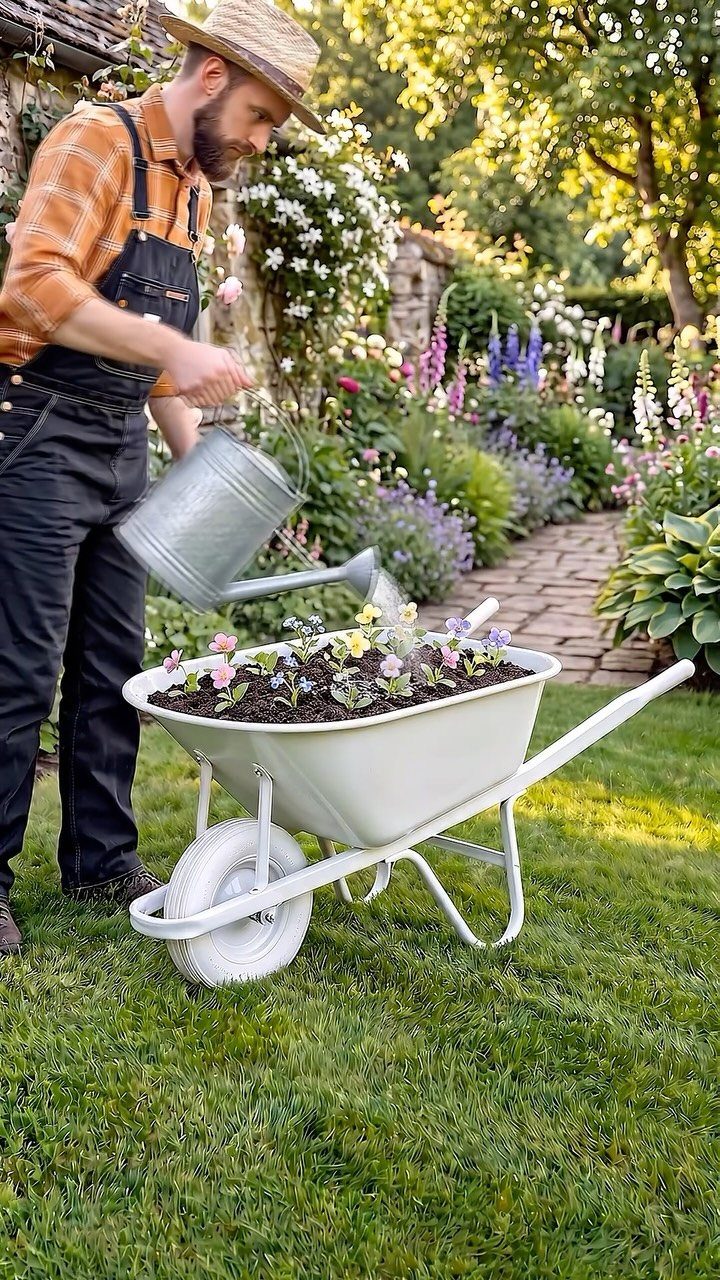
Old wheelbarrows make good planters because the deep tray already looks like a garden bed on wheels. A white one lets bright flowers carry all the color, and a mix of shades packed in tightly gives that overflowing look.
Set it right in a garden bed, where it blends with the surrounding plants. Pick flowers that stay full and bloom for a long stretch, then water often, since a tray this size holds less soil than the ground.
21. Pressed Flower Sun Catchers
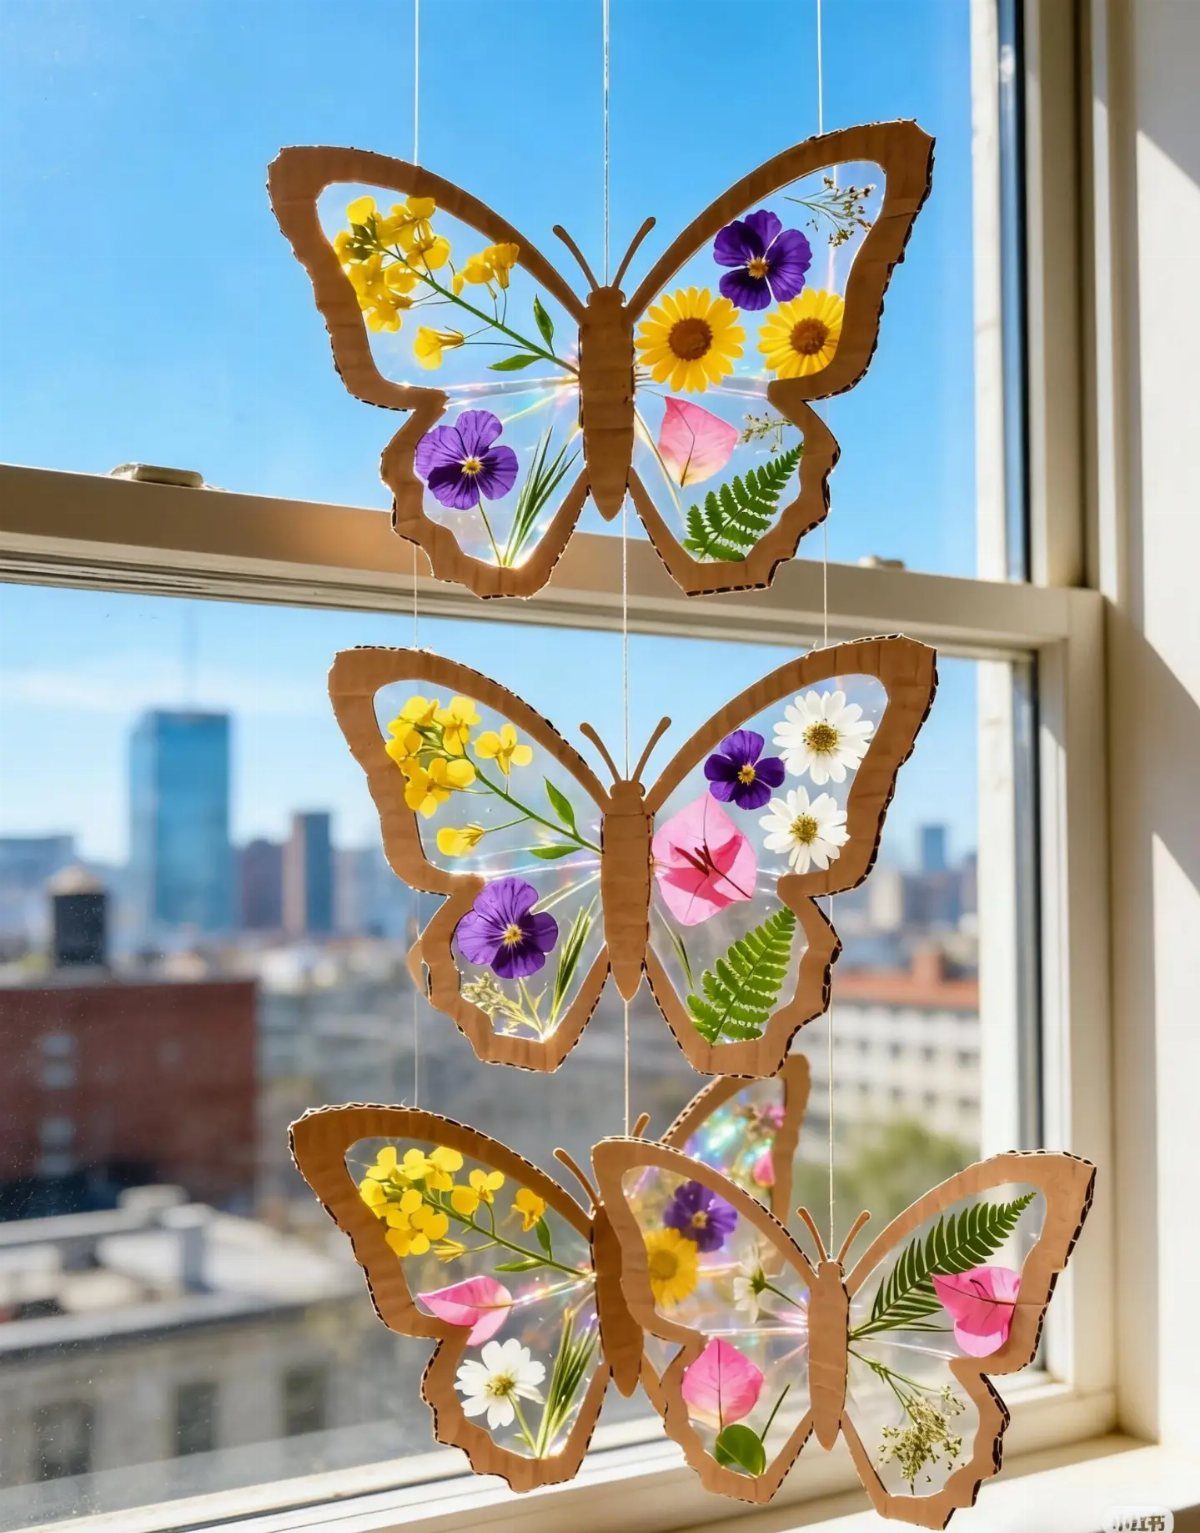
Butterfly frames hold pressed flowers and leaves flat between clear layers, so light passes through the petals like stained glass. A window with open sky behind it is the right spot, since the color shows best against daylight.
Hang several at different string lengths, as these do, so they don’t line up like laundry.
I would choose small, thin flowers and leaves in contrasting colors, because bulky blooms press unevenly and hide the shape. Pressing costs almost nothing if you use blooms from your own yard.
22. Coconut Husk Birdhouse
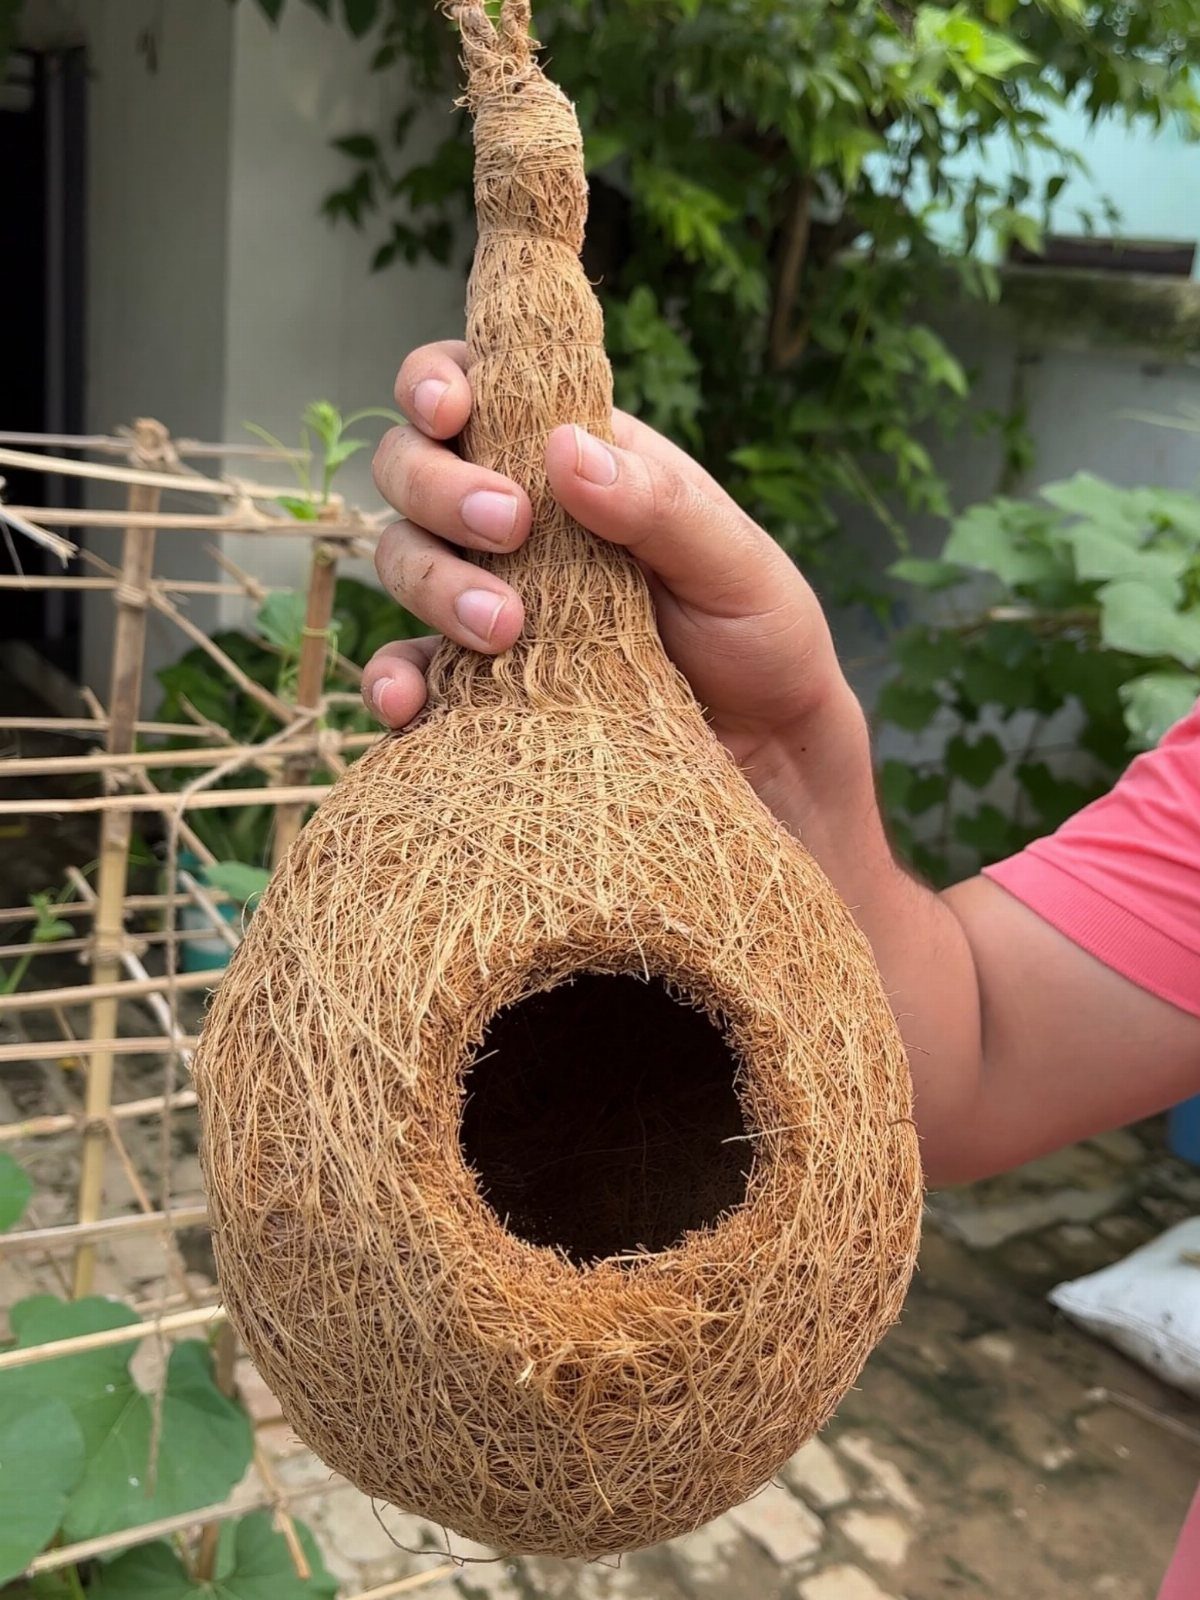
A hollowed coconut husk makes a birdhouse with almost no construction: the round opening is the entrance and the brown shell is the walls.
Its natural color disappears into foliage, so hang it among leaves or against a trellis rather than on a bare wall.
Keep the hole smooth and the inside clean and empty.
A husk is small enough to hold in one hand, so it suits a tiny yard or a balcony. I like this one for how little it costs and how quickly it comes together.
23. Succulent Head Planter
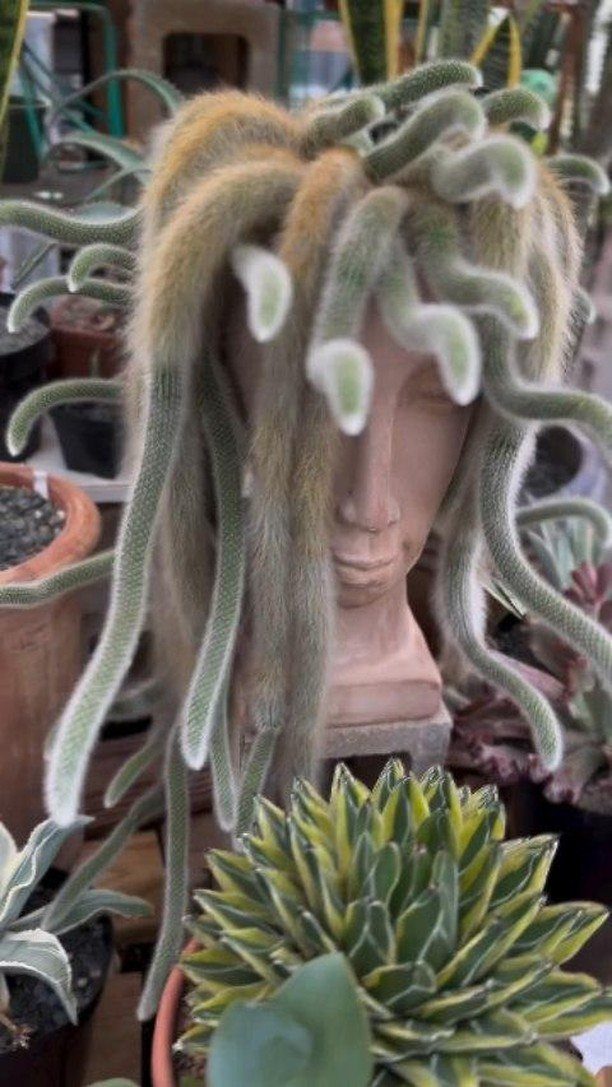
A terracotta bust turns trailing succulents into hair, and the long green strands make the face look alive. Plant the top so the stems hang down past the shoulders; a longer fall reads more like hair than a short tuft.
I would set the head among other potted plants, as this one is, so it feels like part of a collection rather than a lone novelty.
Terracotta’s warm color pairs well with green, and a succulent needs little care, which suits a casual weekend project.
24. Wooden Garden Hose Holder
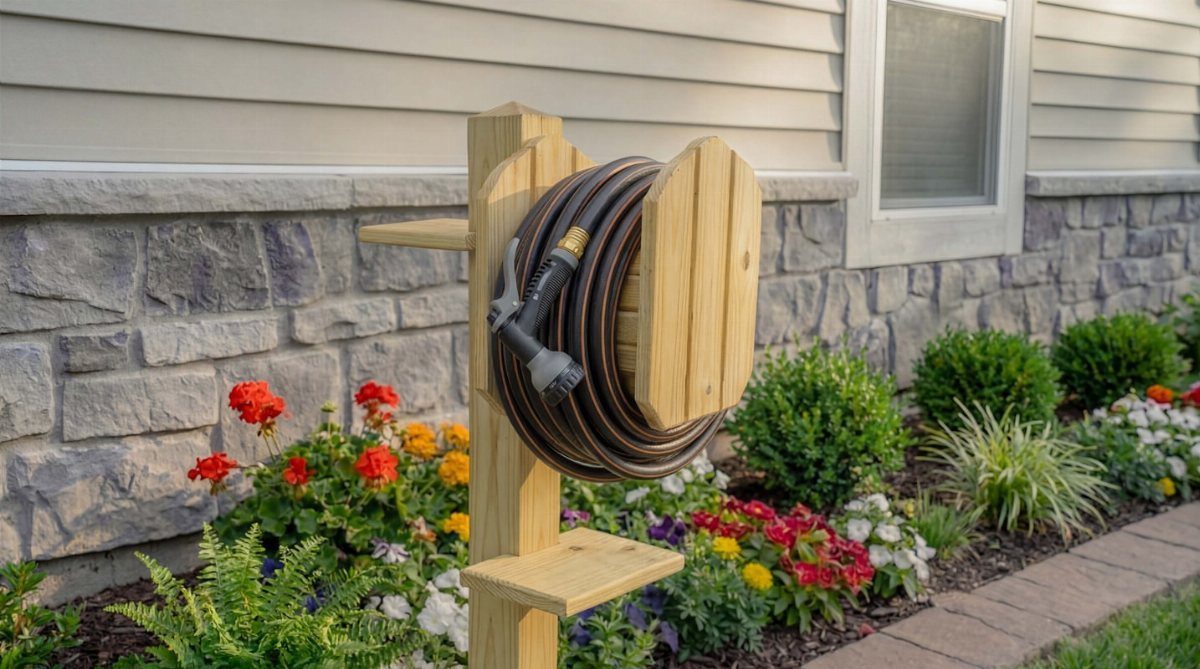
A freestanding wooden post and rack keeps a coiled hose off the lawn and out from underfoot.
Placing it in a flower bed beside the house, as this one is, puts it right where the spigot is, so you coil and hang the hose in seconds.
Wood fits a garden better than a plastic reel, and a plain brown finish blends with mulch and stems.
Set it close to the faucet so the hose reaches without stretching. Stain or seal the wood if it will sit in rain.
Choosing Materials and Supplies
Upcycling means reusing something old, unused or broken, and castoffs are often free or cheap.
Curb piles, garage sales and the back of your own shed can supply most of what a project needs, so look there first and pay full price only for what’s missing.
Metal pieces need outdoor paint, since indoor formulas peel and rust through once rain hits them. Buy it by that label, not by color alone.
Old step ladders are a good find. They fold small, so they suit a tiny patio, and they work as plant stands or a side table.
Pick up garden-art tools and outdoor glue before you start cutting and joining, so a project doesn’t stall halfway.
Mismatched finds work for most rustic pieces, like planters, signs and trellises, though a window greenhouse is the exception, since matching sizes make that build far easier.
Budget and Project Range
Store-bought outdoor decor is expensive, and handmade pieces cost far less. A landscaper’s fee is out of reach for plenty of households, and a yard can look finished without one.
Match the project to your skill and your weekend. Easy ones suit kids and first-timers, so start there if you want a quick win.
If you like a challenge, pick something with cutting, joining or several steps. I would do one easy project first to learn how your paint and glue behave outdoors.
Spend your money on the part you see and touch most, and take the rest from free or secondhand sources.
Using Decor in Outdoor Spaces
Decor works in many spots: yards, gardens, porches, patios, fences, walls, sheds and small corners. Look at where your eye lands first when you step outside, and start there.
Mix decorative pieces with functional ones. A fence or shed wall is blank space that can carry art, while a porch or patio can hold items that also do a job.
In a small space, choose a few pieces and give each room. One strong feature on a wall beats five small things crowded on a step.
Walk the area at different times of day before you place anything, so you see how light and shade will treat it.