Before you pick a layout, check how many hours of direct sun your spot gets, because basil, rosemary and most other herbs sulk below 6.
A sunny sill, porch rail or balcony can hold a row of jars or a pair of hanging baskets, but a shadier apartment window is better served by a countertop hydroponic unit that brings its own LED grow lights.
The ideas run from tin cans and teacups that cost almost nothing to a wooden raised bed on legs, and from a single jar of water rooting cuttings to a herb spiral. Pick the site first, then the container.
1. Tiered Herb Planter
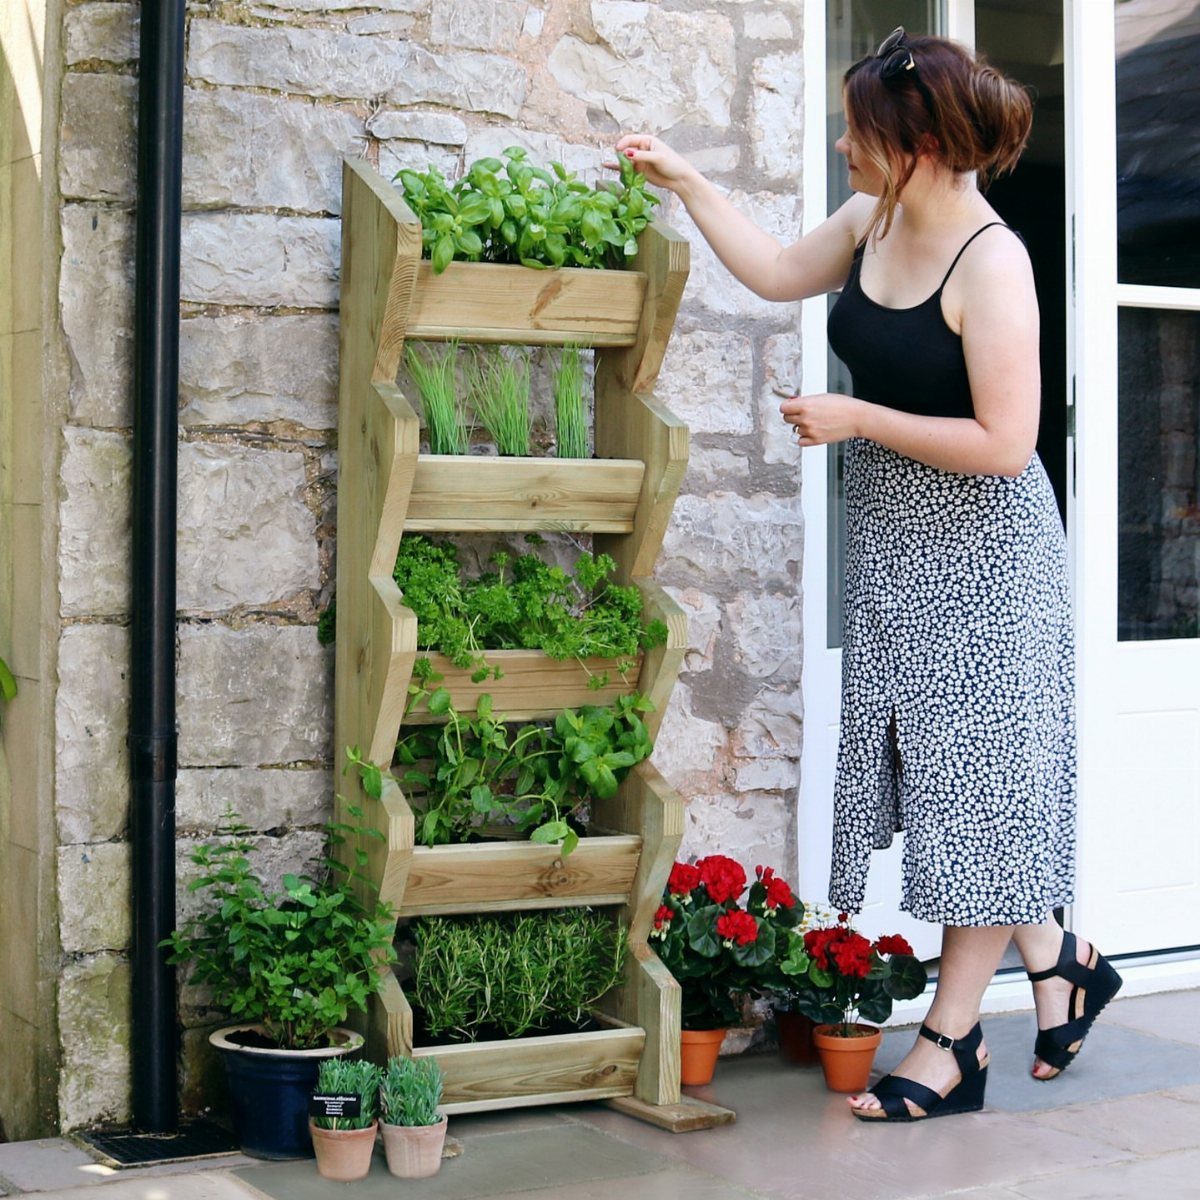
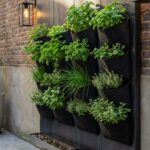
Stacking levels adds planting space for very little money, and it costs you no floor at all. A tiered wooden planter puts several herbs on one small footprint, and the red flowers mixed in add color beside the greens.
Put the thirstiest herbs on the lowest tier, where water runs down to them.
Keep the top tier for herbs that like it drier. A wall behind the stack gives the whole thing a steady back to lean on, which matters once the soil is wet and heavy.
2. Basket Herb Display
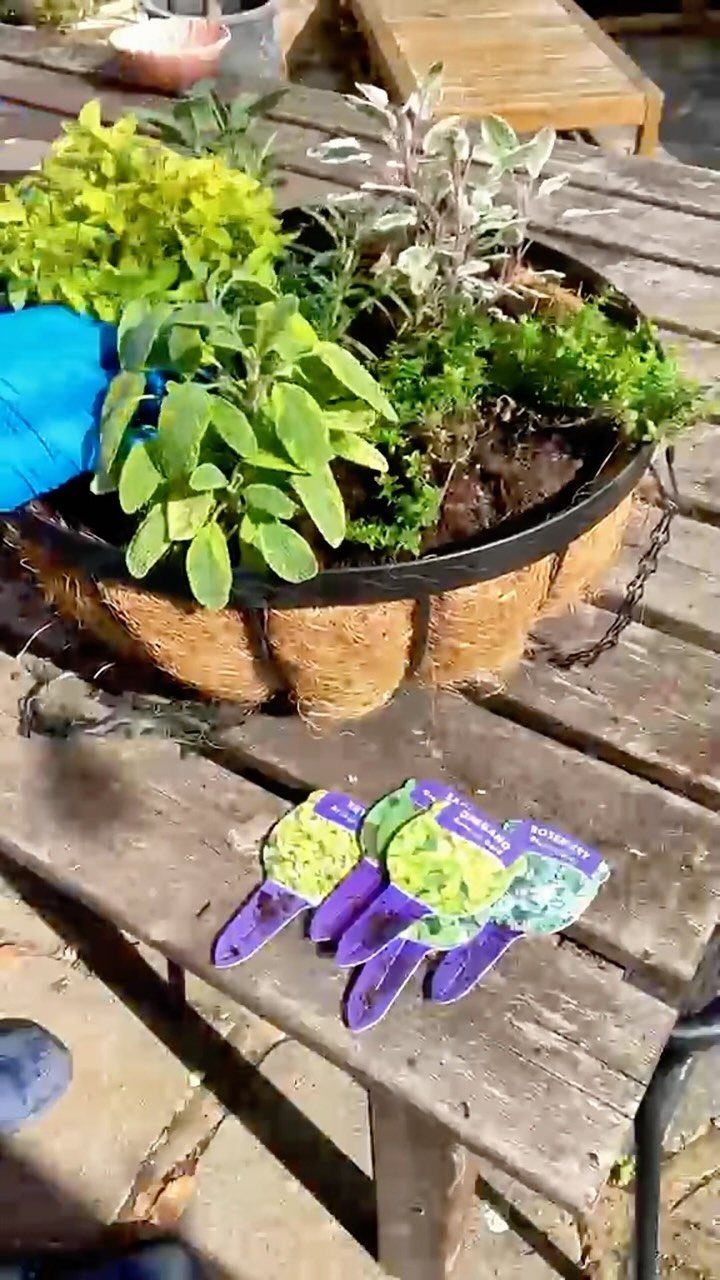
A plain plastic pot looks fine for growing and awkward on a table. Slip it inside a woven basket and the problem goes away, with the basket doing the decorating.
Plant in the plastic pot first, then set it in the basket, so you can lift it out to water and drain.
Herbs like oregano and rosemary suit this, since each gets its own pot. A wooden box works the same way if you prefer straight edges.
3. Kitchen Wall Planters
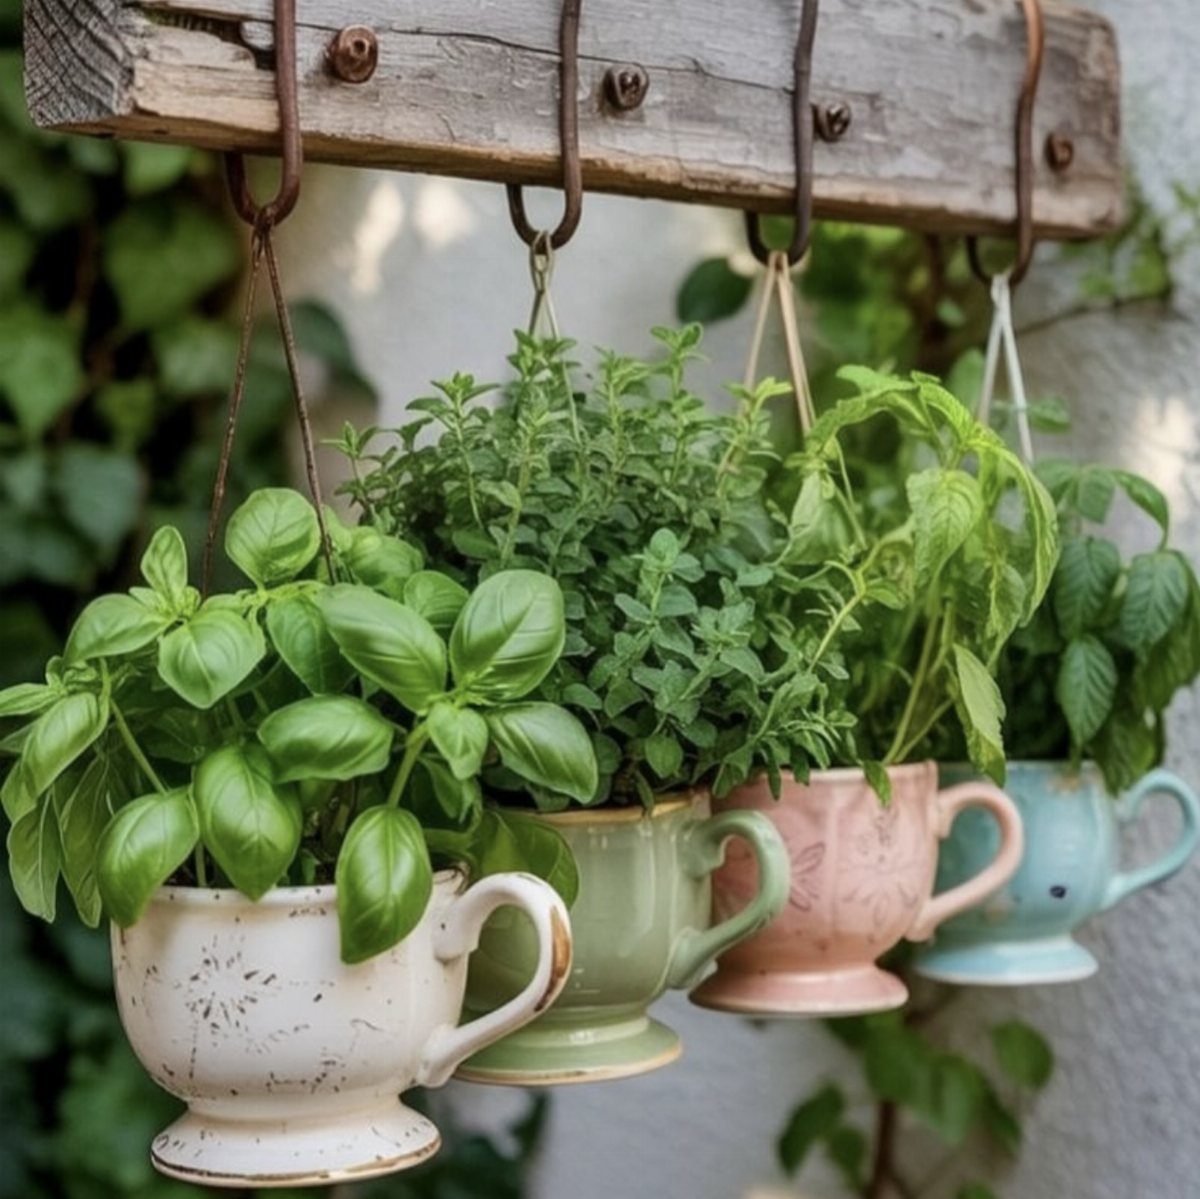
Teacups hung from a beam turn a blank kitchen corner into planting space, and they cost almost nothing if you collect mismatched ones.
Each cup holds one herb, so four cups give you four cuttings within arm’s reach of the stove.
My caution: teacups usually lack drainage holes.
Add a layer of gravel at the bottom, and water in small splashes rather than pours. Anchor the beam into studs, because wet soil adds weight.
4. Hydroponic Herb Garden
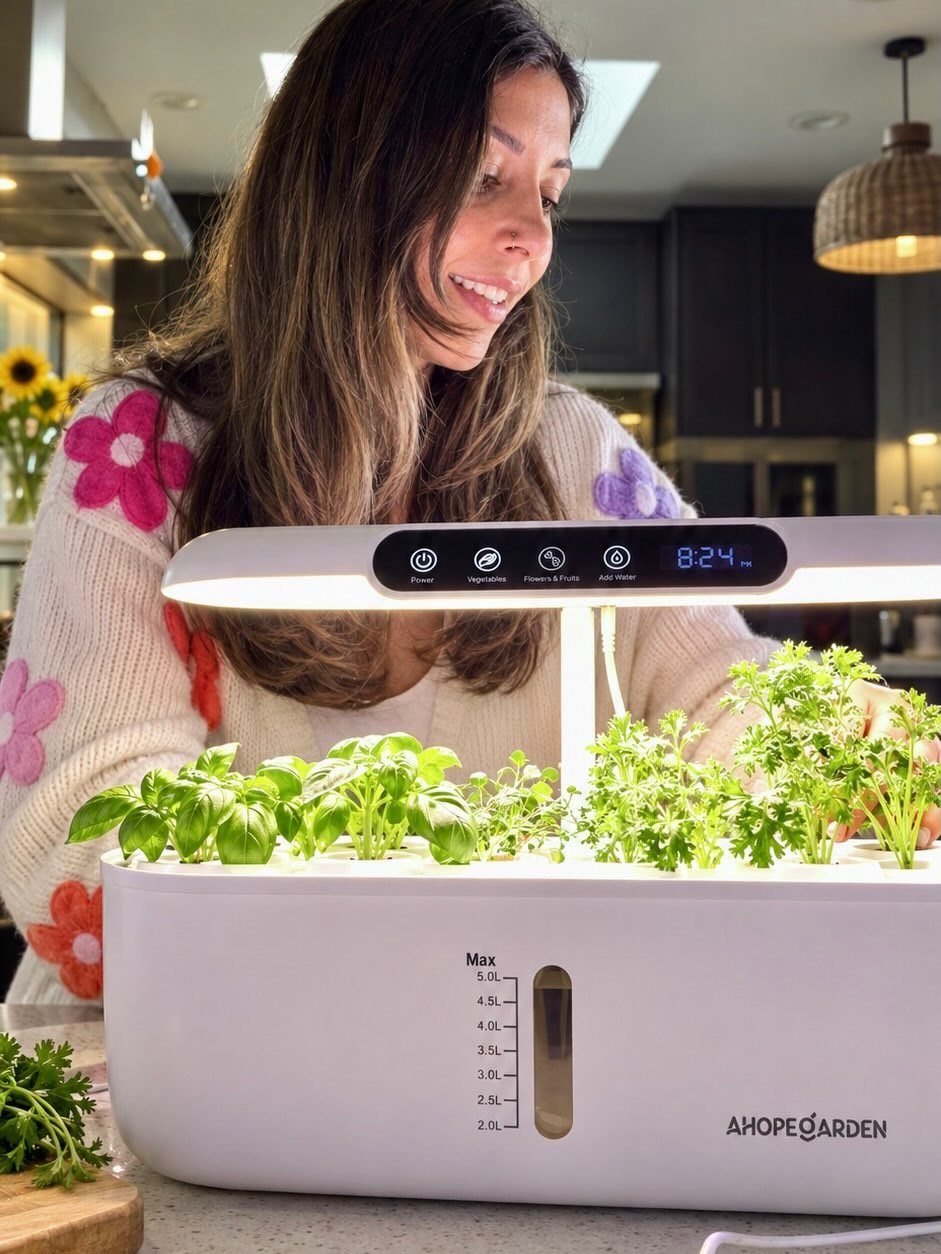
Soil-free growing suits anyone who dislikes dirt on the counter, and a hydroponic unit keeps everything in one tidy, self-contained shell.
Look for a hydroponic unit with built-in LED lights, a timer and water level markings, since daily care then shrinks to topping off the tank.
I like it for kitchens with no sunny window. You pay more up front than for a pot and potting mix, which is the real trade-off.
5. Windowsill Herb Garden
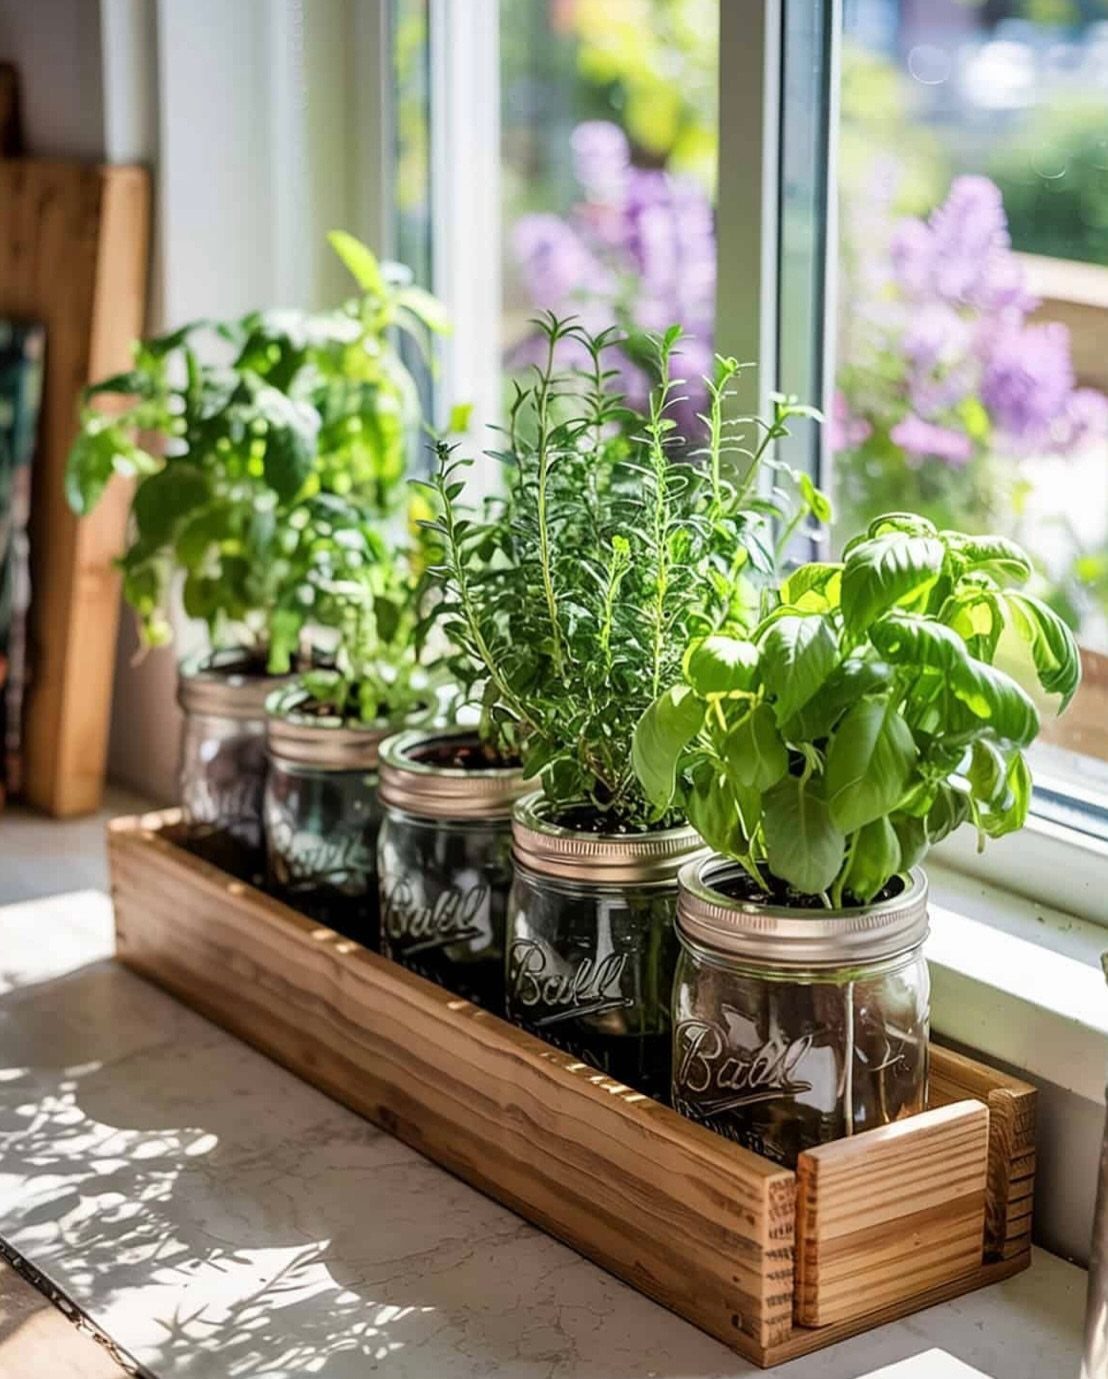
Mason jars in a wooden tray make a windowsill garden you can carry. Slide the whole tray to the sink for watering, then slide it back into the sun.
Pick the sunniest sill you have, since herbs sulk in dim light.
Jars have no drainage holes, so put pebbles in the bottom and go easy on water. 5 jars fit the sill neatly, and the tray catches any drips before they reach the wood.
6. Hanging Herb Baskets
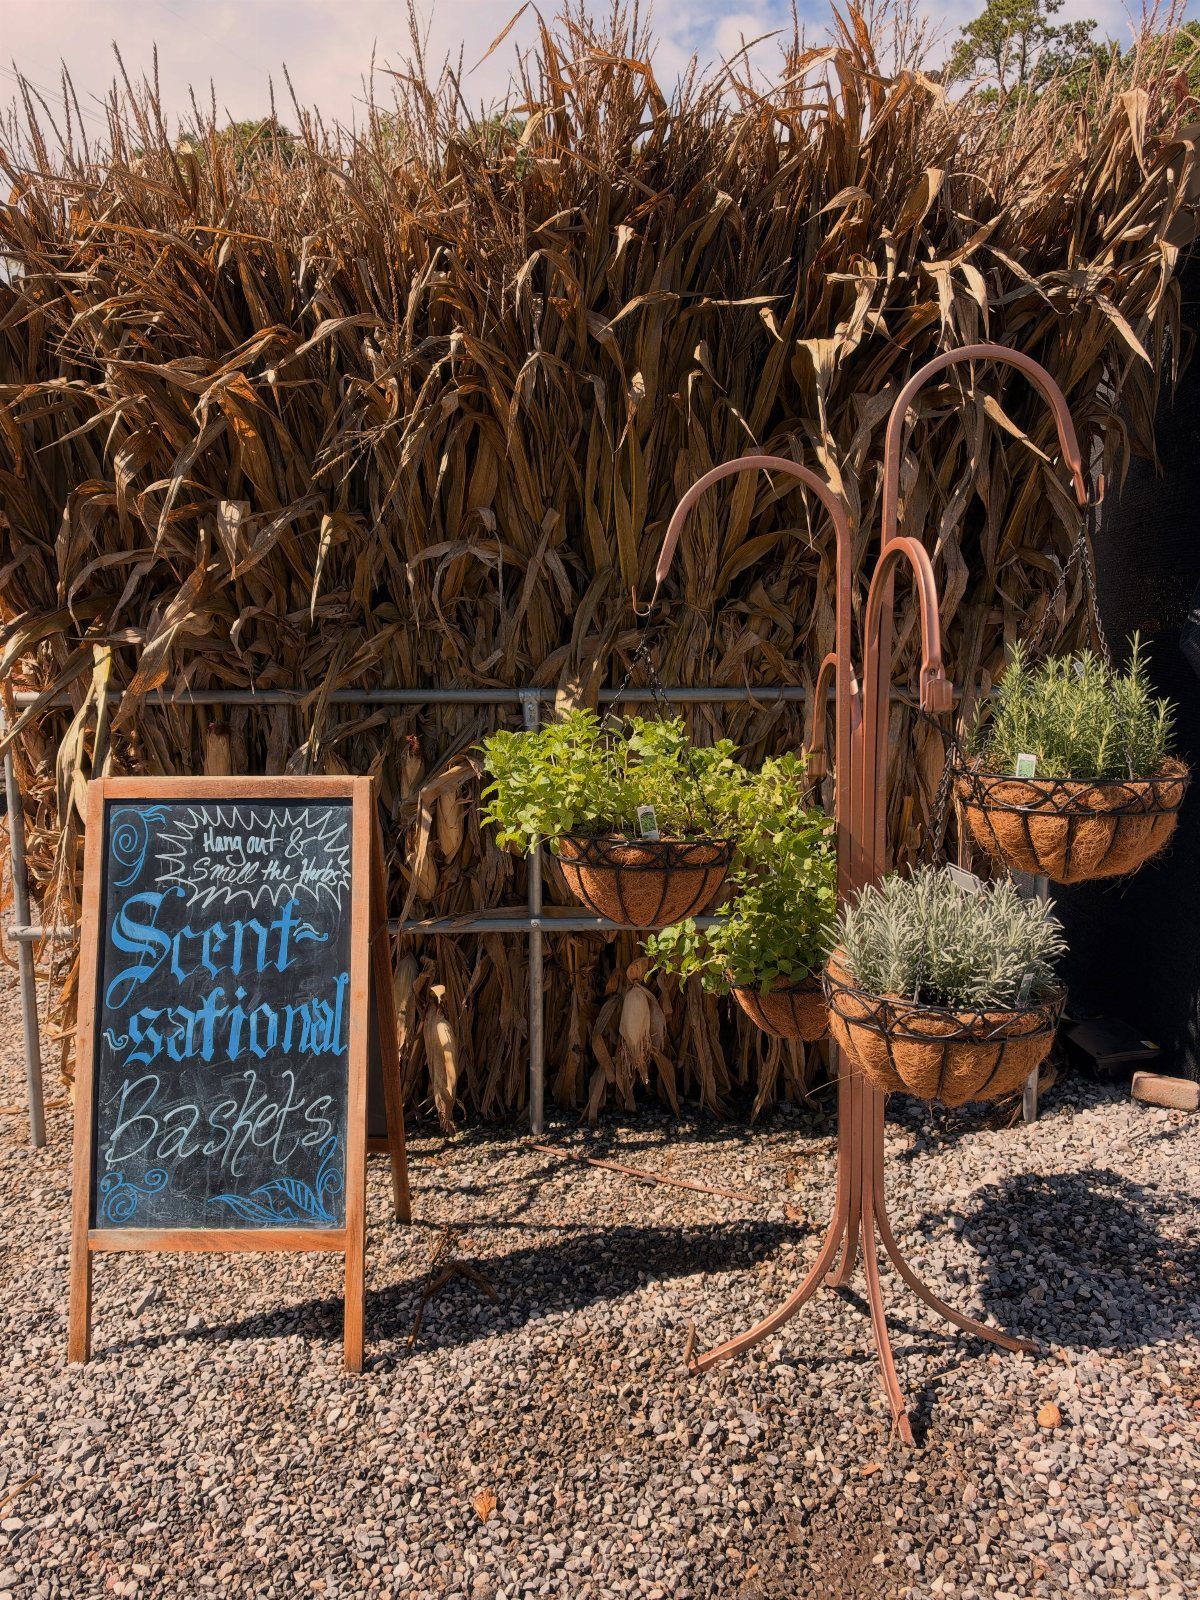
Hanging baskets lift herbs off the ground and give the garden height. A freestanding metal stand holds 3 baskets at once, which means no drilling and no permanent hooks, handy for renters.
Place the stand where you will brush past it, so the scent reaches you.
Hanging baskets dry out faster than pots on the ground, so check the soil often. Set the stand on level ground so it doesn’t tip when the baskets are watered and heavy.
7. Basil
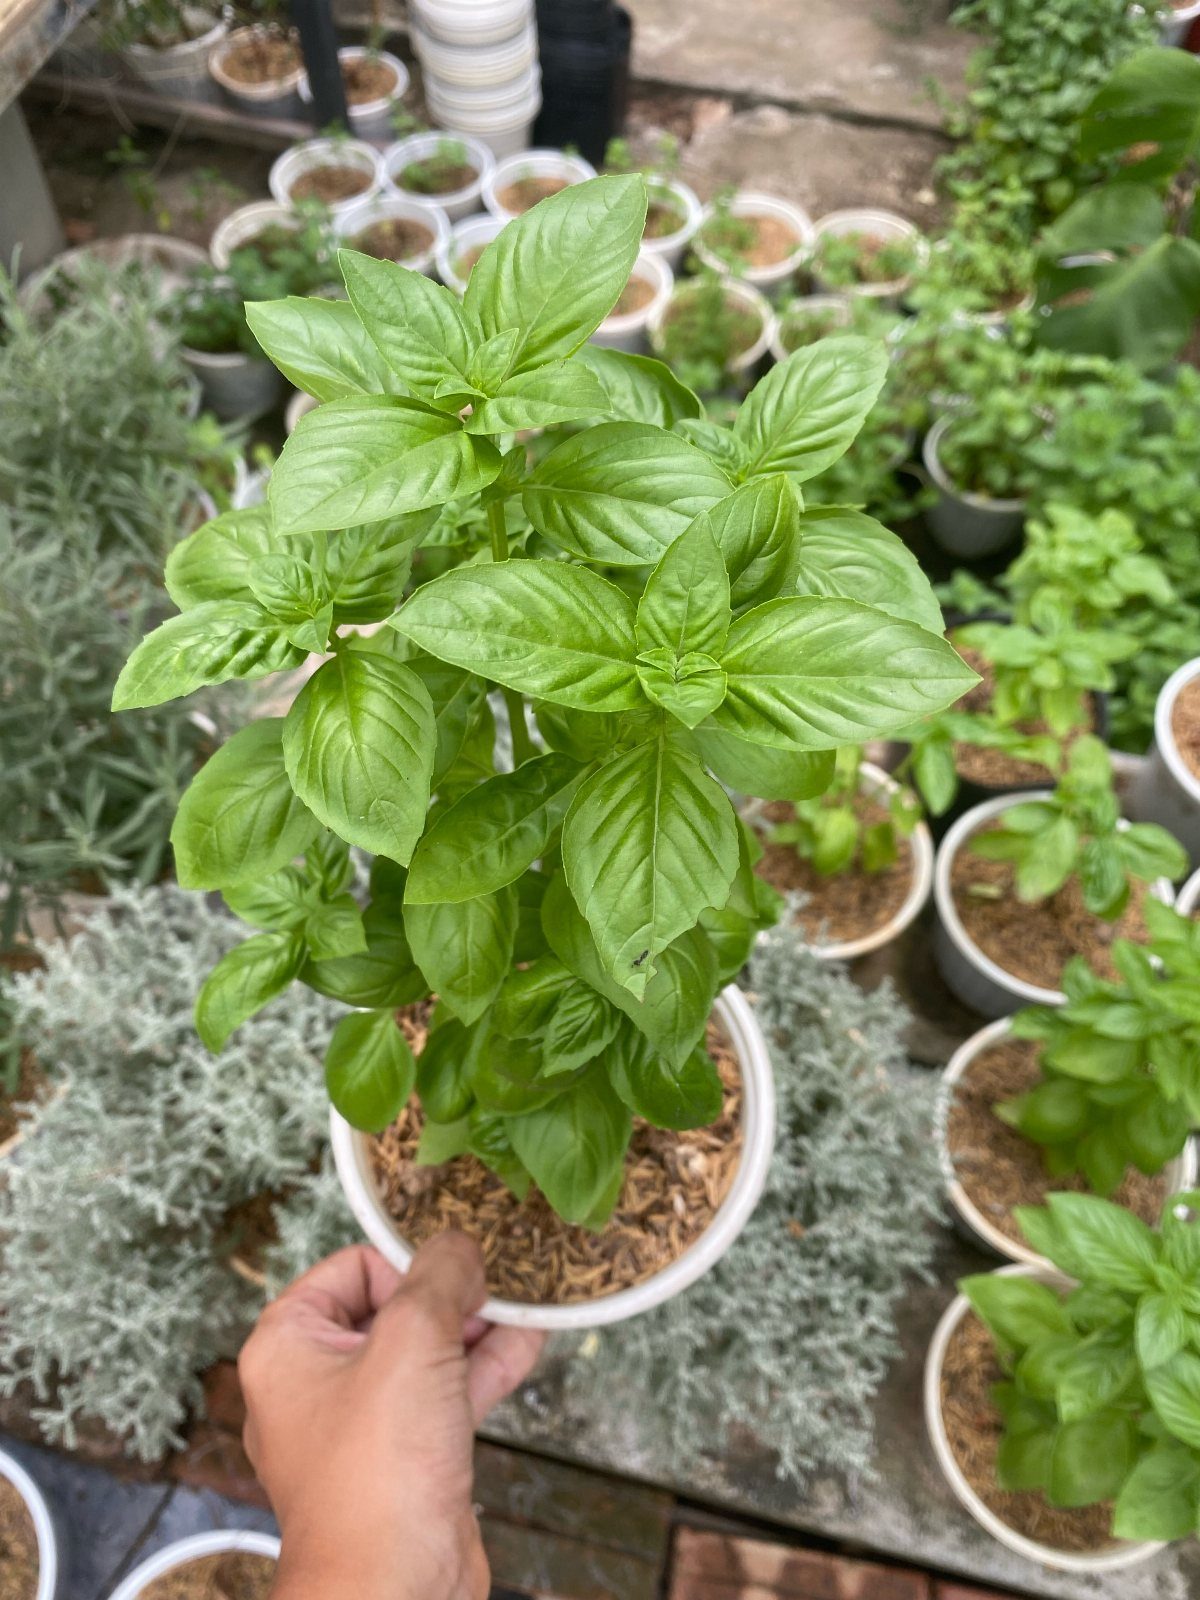
Basil wants the sunniest spot you have, and it pays you back for every harvest. Pinch stems just above a pair of leaves and the plant branches into more growth instead of climbing thin and bare.
Treat it as an annual, a plant that lives one season, and cut it often rather than waiting for a big haul. A white pot like this one keeps basil easy to move beside the other herbs.
8. Kitchen Herb Garden
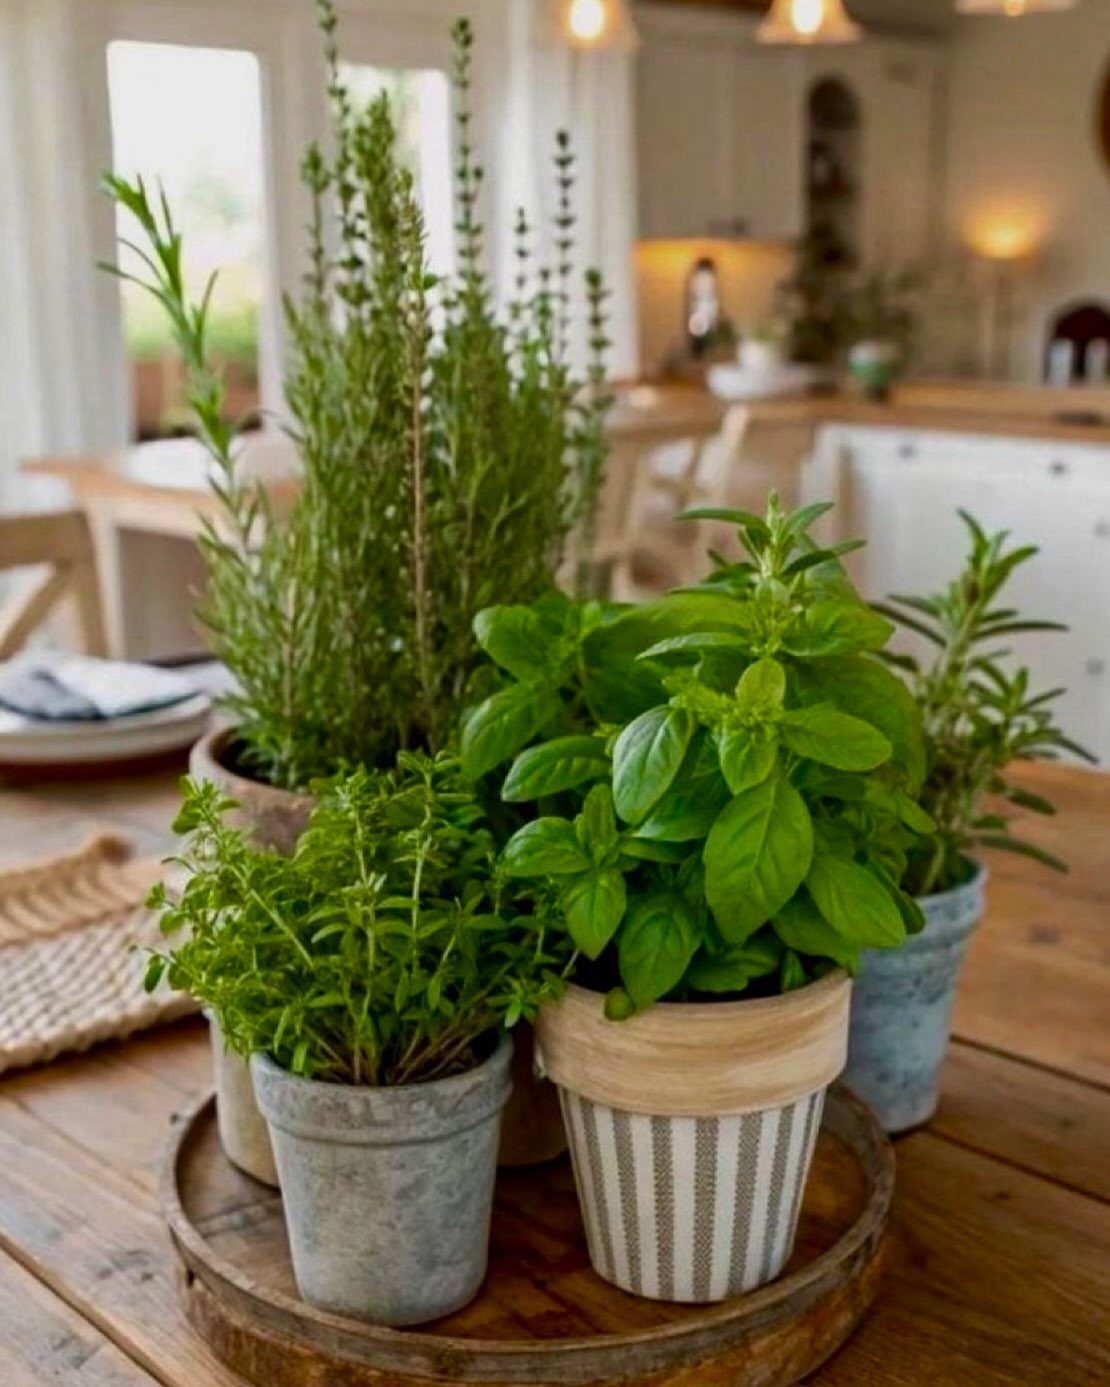
A wooden tray on the kitchen table turns a handful of potted herbs into one display you can pick up and move. Keep the pots in the tray so drips land on wood you can wipe, not on the table.
I like this for cooks who want to snip a leaf mid-recipe without walking anywhere. Choose herbs you actually cook with, and set the tray where light reaches it.
9. Backyard Corner Herb Garden
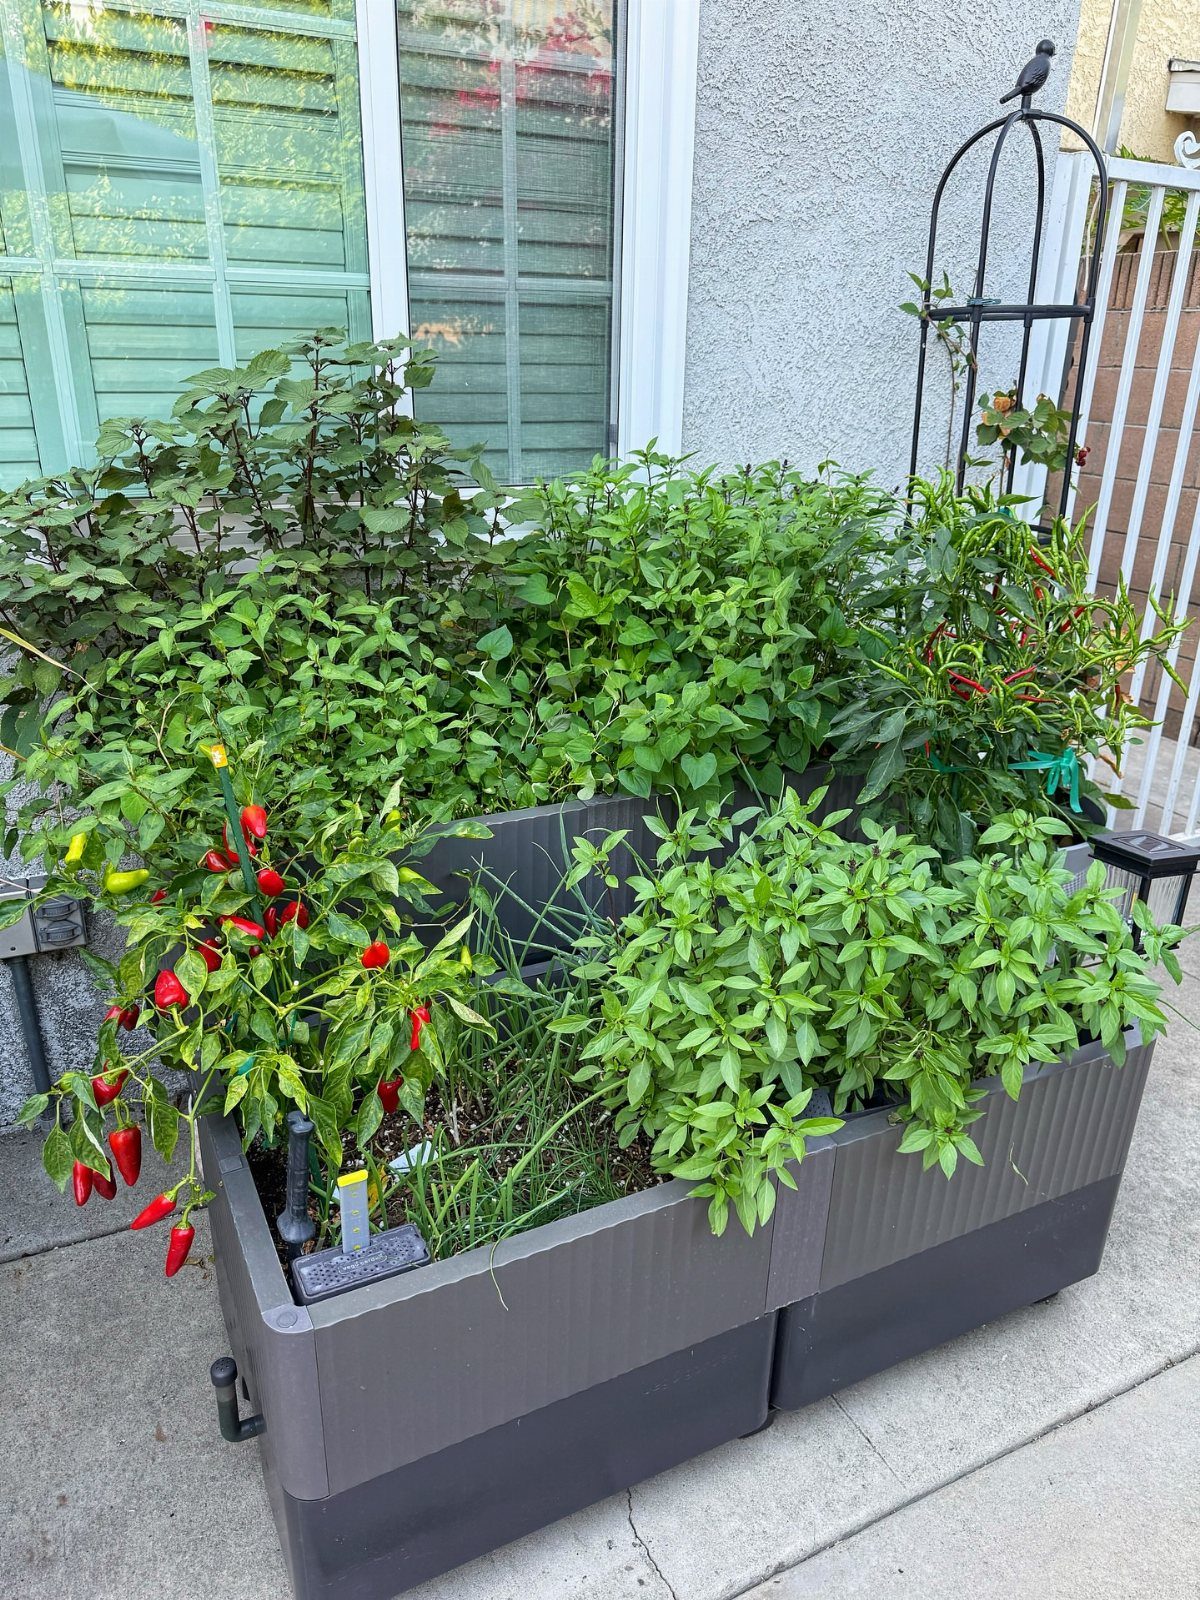
A backyard corner out of the foot traffic gives herbs a calm place to settle. Long rectangular planters tucked up to a fence, a house side or a garage, so they use space that would otherwise go to nothing.
Keep them where you will not bump them while carrying groceries or hauling a chair.
Plastic planters cost less than ceramic and are lighter to shift. Leave room to reach every herb, and a pepper plant can share the box if you want some color.
10. Lemon Balm
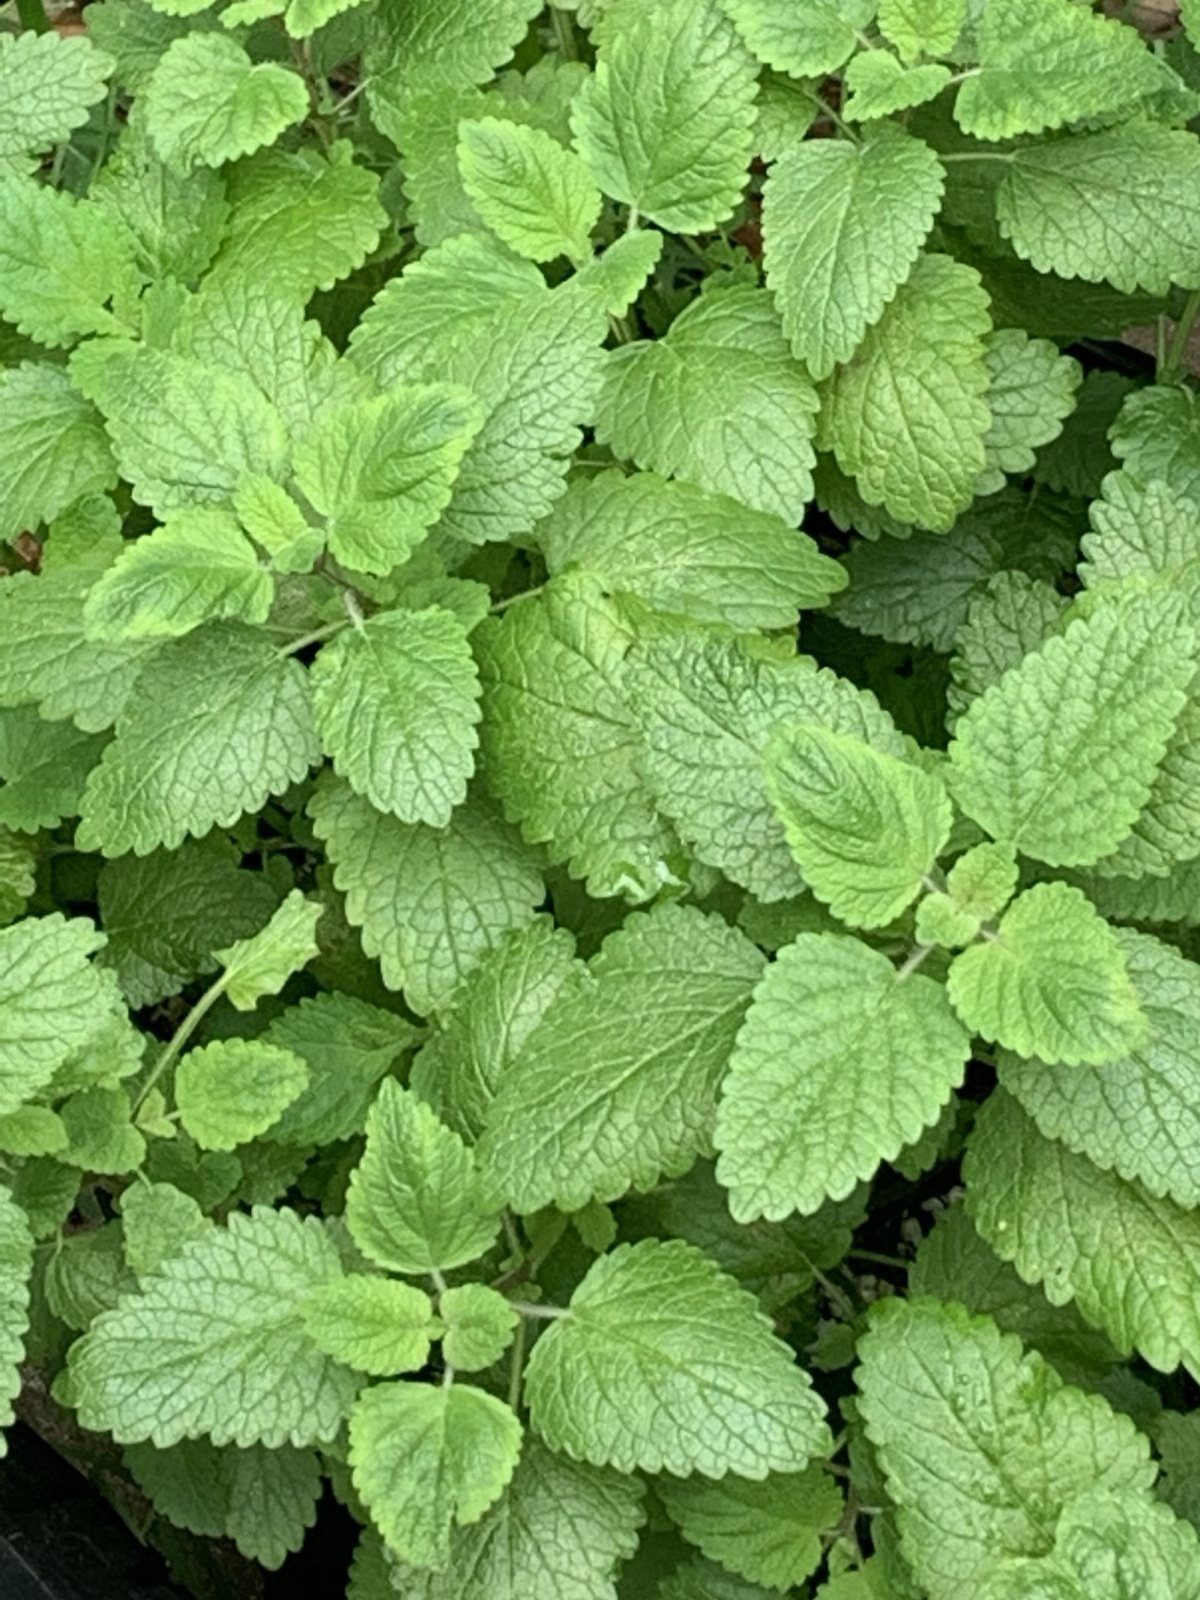
Lemon balm is a perennial, so it comes back instead of needing replanting. Its serrated, textured leaves are good fresh and make a simple tea.
I would give it its own pot, since it grows densely and crowds neighbors.
Pick leaves often to keep it full. Steep a few in hot water for a mild, lemony cup.
11. Individual Herb Pots
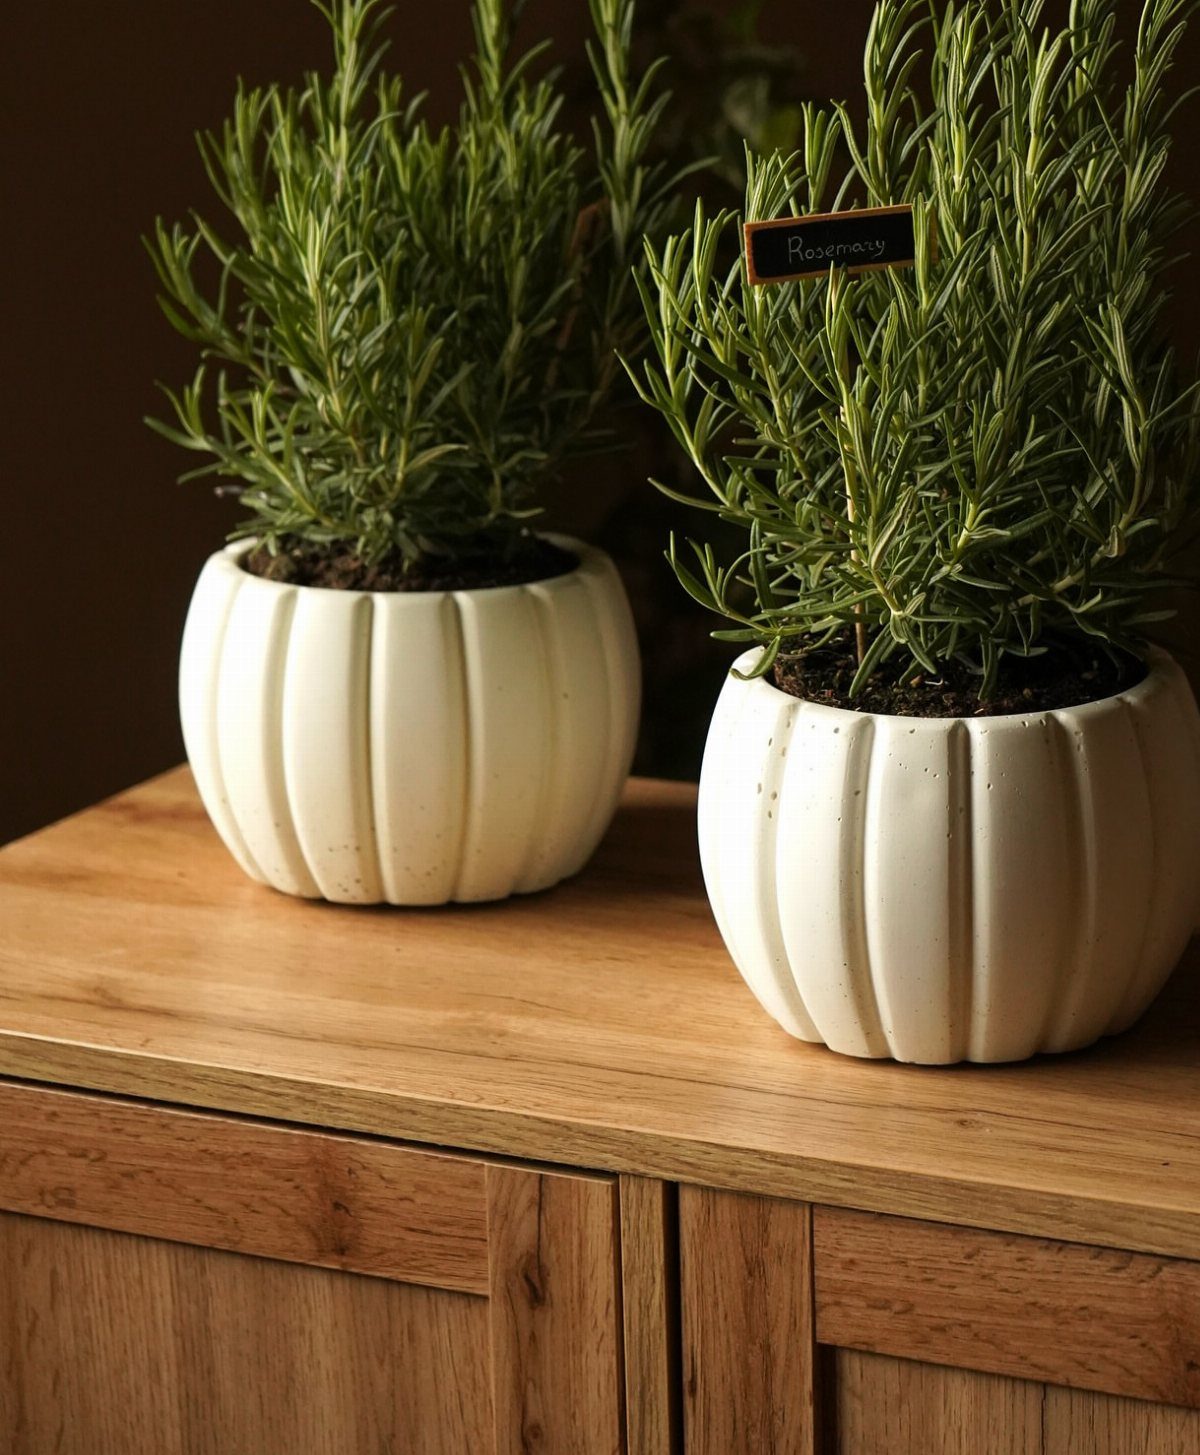
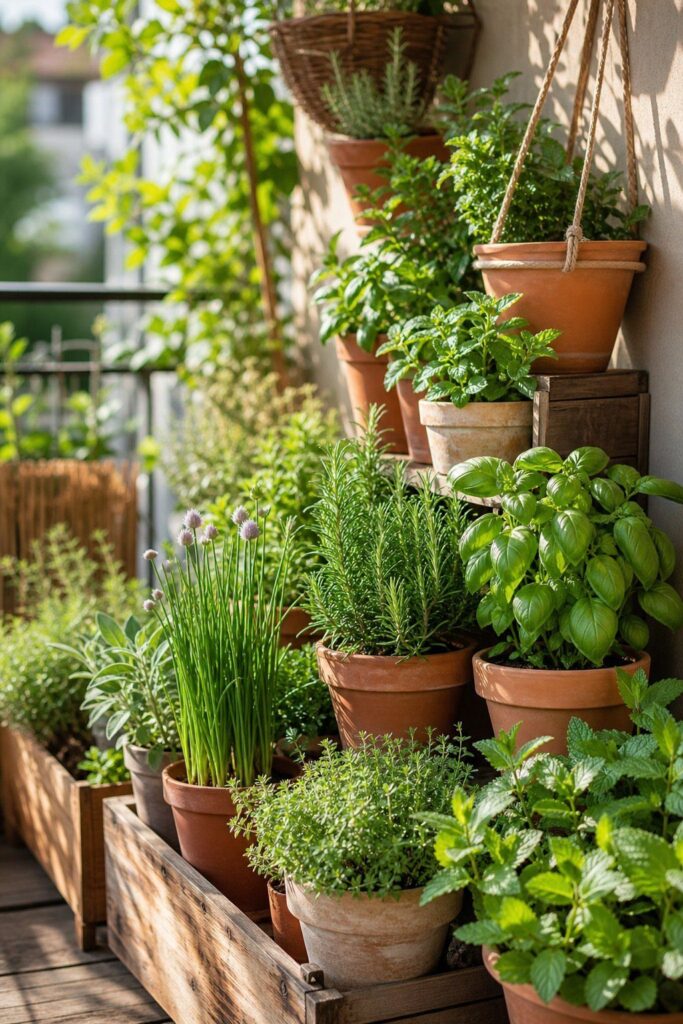
One herb per pot lets you give each plant what it needs, and a group of pots still looks like a single arrangement.
Matching pots in one color and shape read as a set even when the plants inside differ, so I pick a single style and let the herbs supply the variety.
Add a small label, as the rosemary has here, so nobody mistakes one plant for another.
If one herb struggles, you swap that pot alone and leave the rest. I prefer this to a shared planter for beginners.
12. Thyme
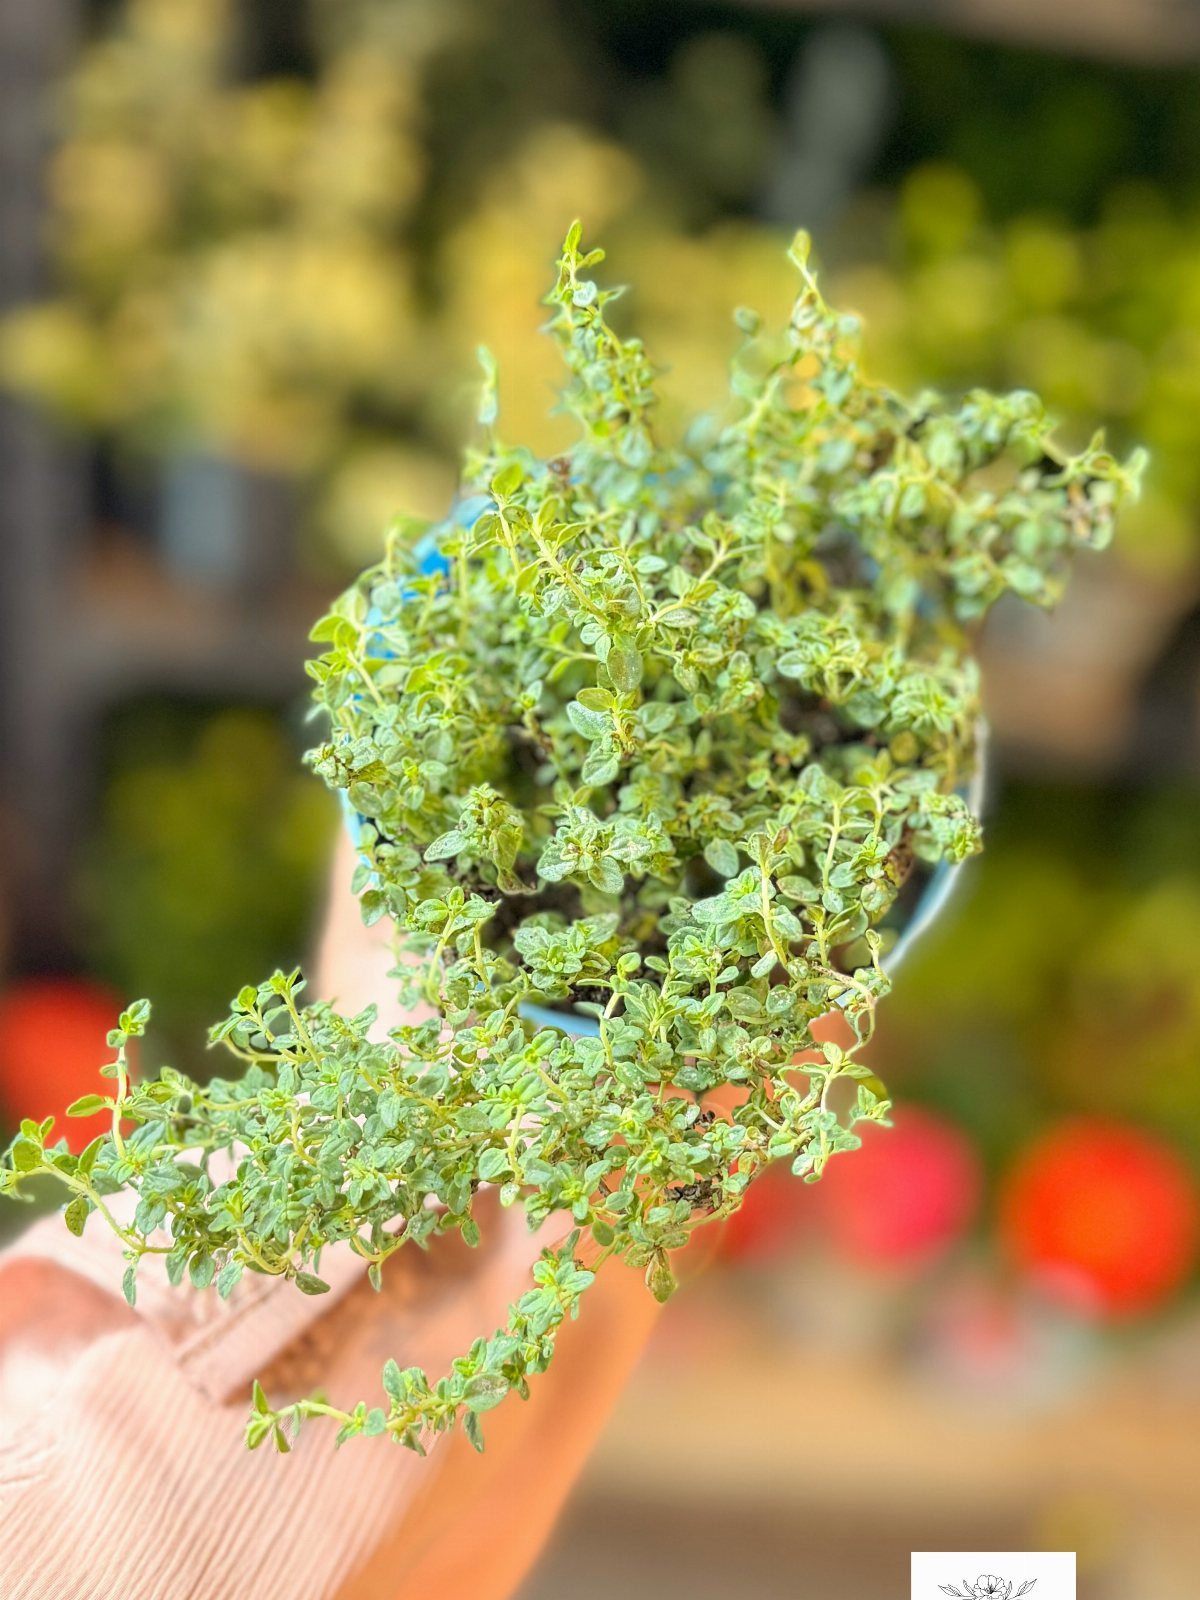
Thyme stays compact, so a small blue pot holds it without fuss. It asks little of you, which makes it a good first herb for a beginner.
The same habit suits hanging baskets, where its small leaves can spill over the edge. Choose a pot that fits the plant now rather than a huge one, and keep it where you can reach it while cooking.
13. Herb Spiral
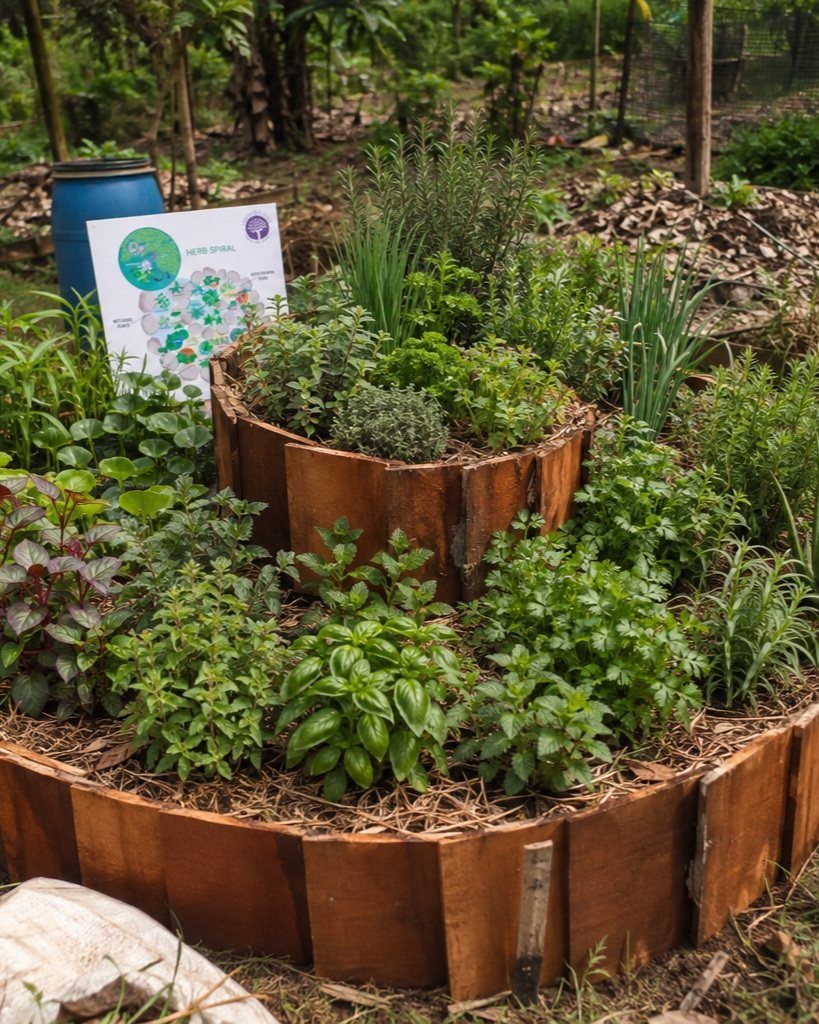
A spiral bed packs a slope of planting conditions into one small footprint. Herbs that want dry, sharp drainage go up top, and the ones that like moisture go at the bottom, where water settles.
I like that a single bed can hold herbs with different needs without separate pots.
A small sign and diagram, like the one here, helps anyone new remember which herb sits where. Raising the spiral in wood keeps the shape crisp.
14. Herb Garden Shelf
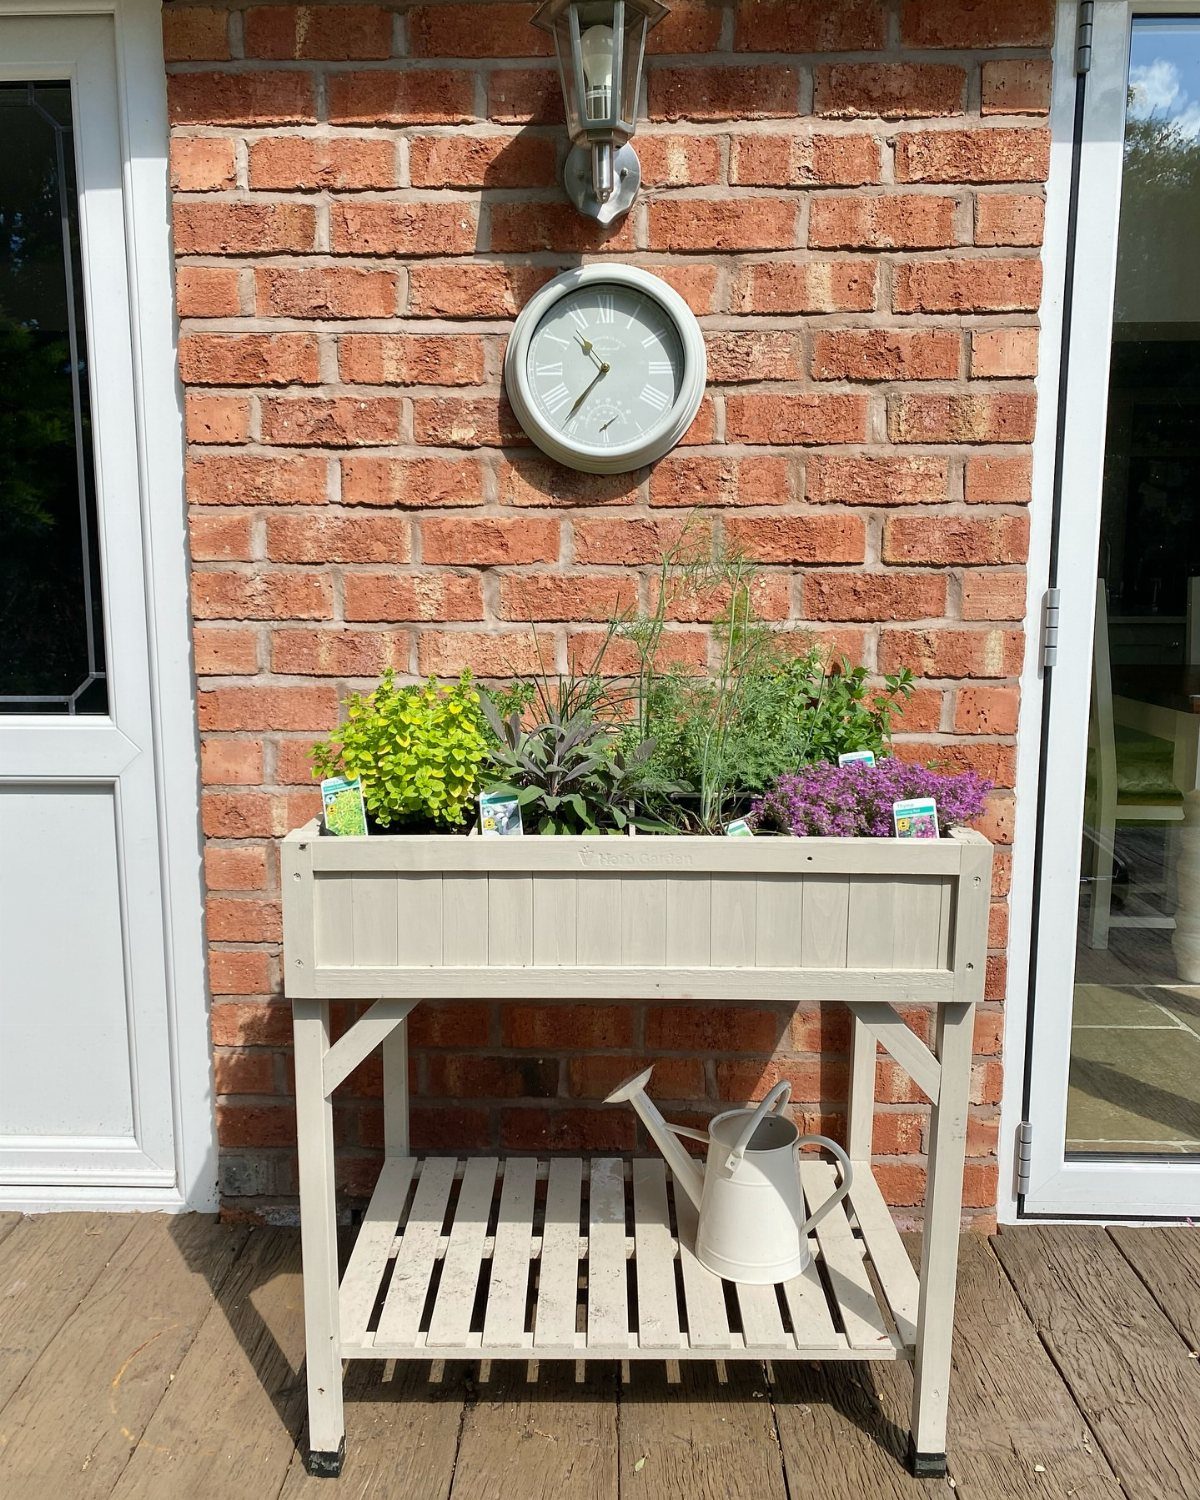
Short on yard, a potting shelf moves the garden up off the ground. A planter box along the top holds the herbs, and the lower shelf keeps a watering can within reach.
Pick a spot with sun, since herbs on a shelf can’t be dragged around easily once the box is full.
White paint, as here, reads clean against brick. Check that the shelf sits level and sturdy before you load it with wet soil.
15. Painted Can Planters
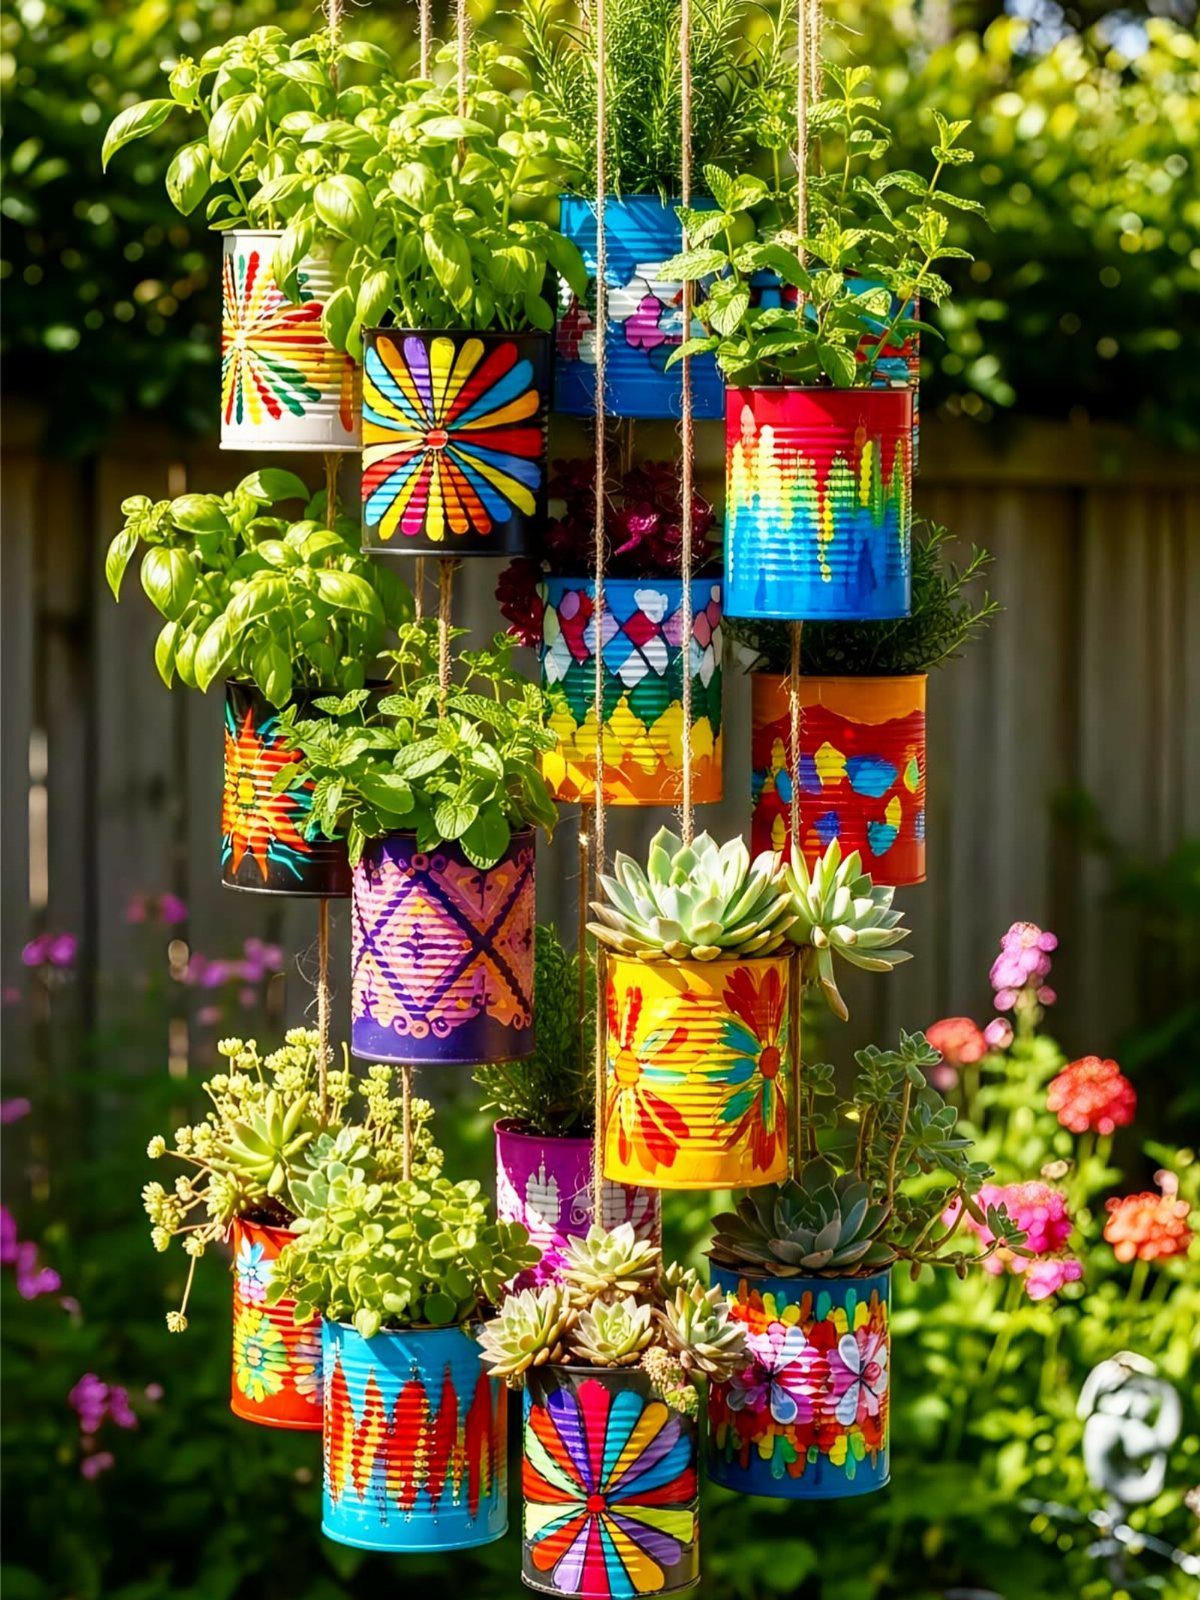
Old tin cans make herb pots that cost next to nothing, and paint turns them into a bright row. Hang them by string from a fence and the cans take no ground space.
Poke drainage holes in the bottom before planting, because a sealed can holds water and rots roots.
Mixing herbs with a few succulents, as here, keeps the display varied. Seal the paint if the cans will sit outdoors.
16. Garden Path Herb Trough
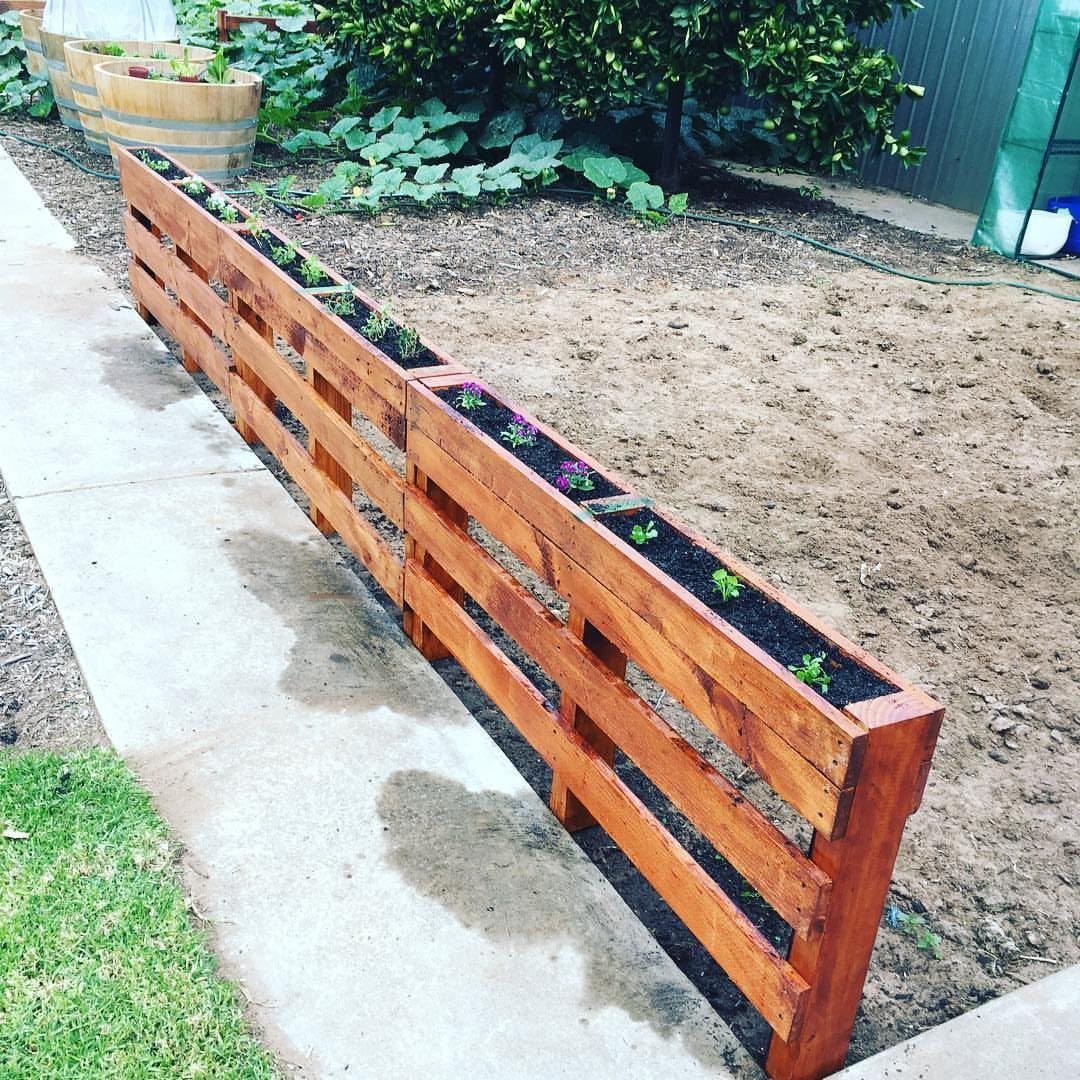
Along a walkway, a long, narrow wooden trough puts herbs right where you pass, so you can brush a leaf on the way by. Its slim shape fits beside a concrete path without eating the yard.
Keep the trough narrow enough to reach across from one side. Plant small herbs in a row with a little space between them, so each one has room to fill in.
17. Dill
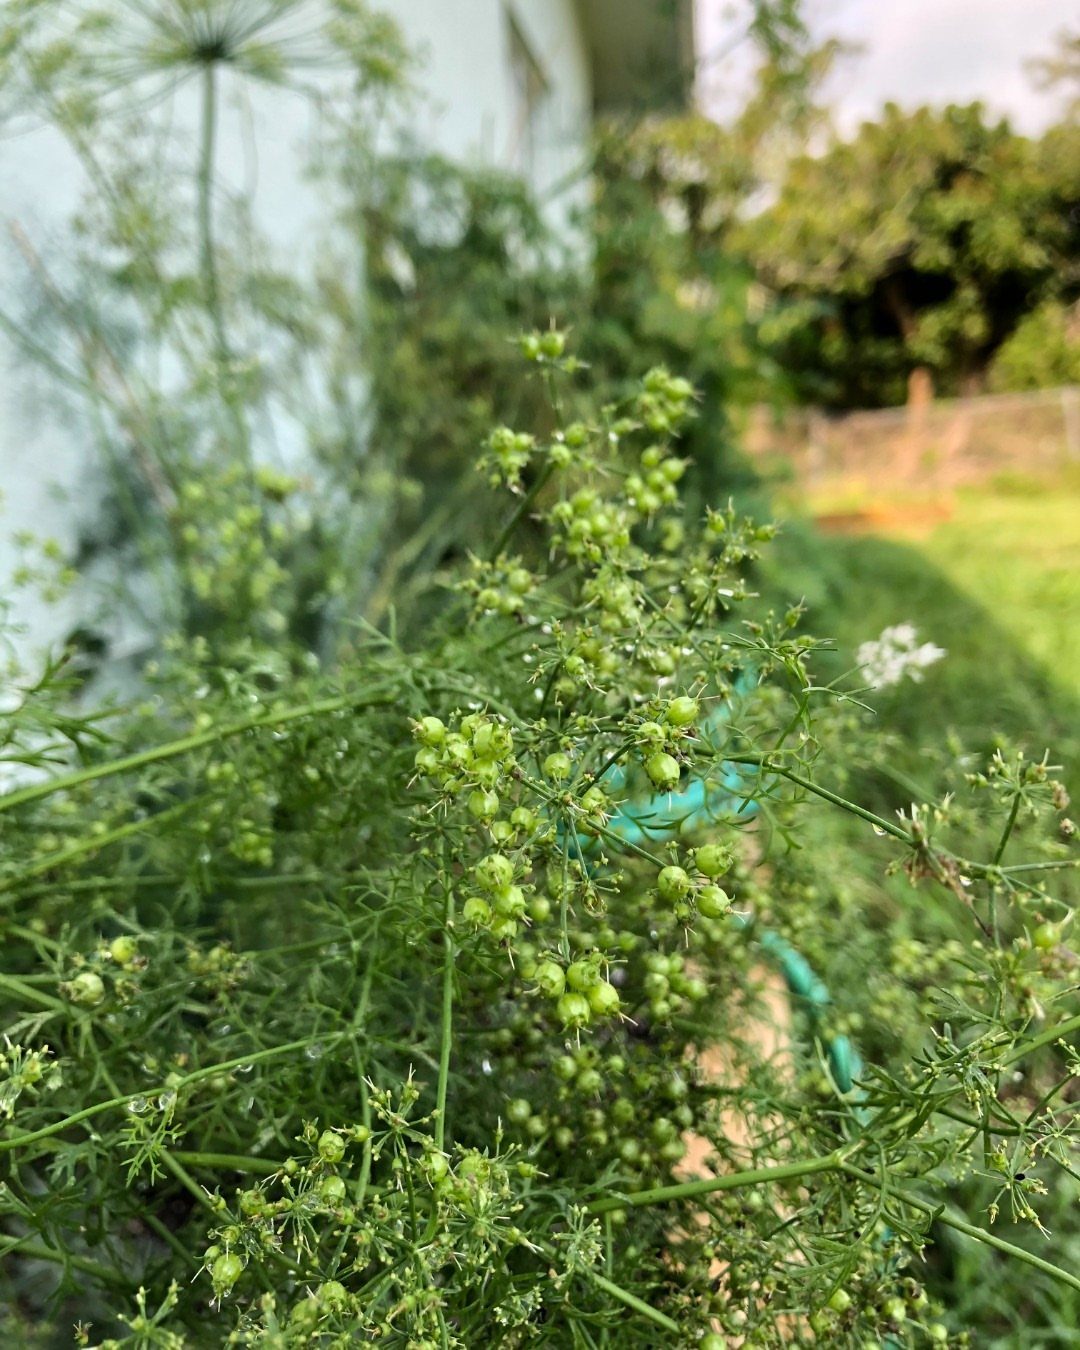
Dill grows tall and feathery, and its green seed heads look good against a plain wall. Both the fronds and the seeds are usable in the kitchen.
I would give it a spot where it can stand upright, since the stems reach high and a wall behind them helps.
Snip fronds as you need them. Let a few seed heads form if you want the seeds.
18. Elevated Wooden Herb Bed
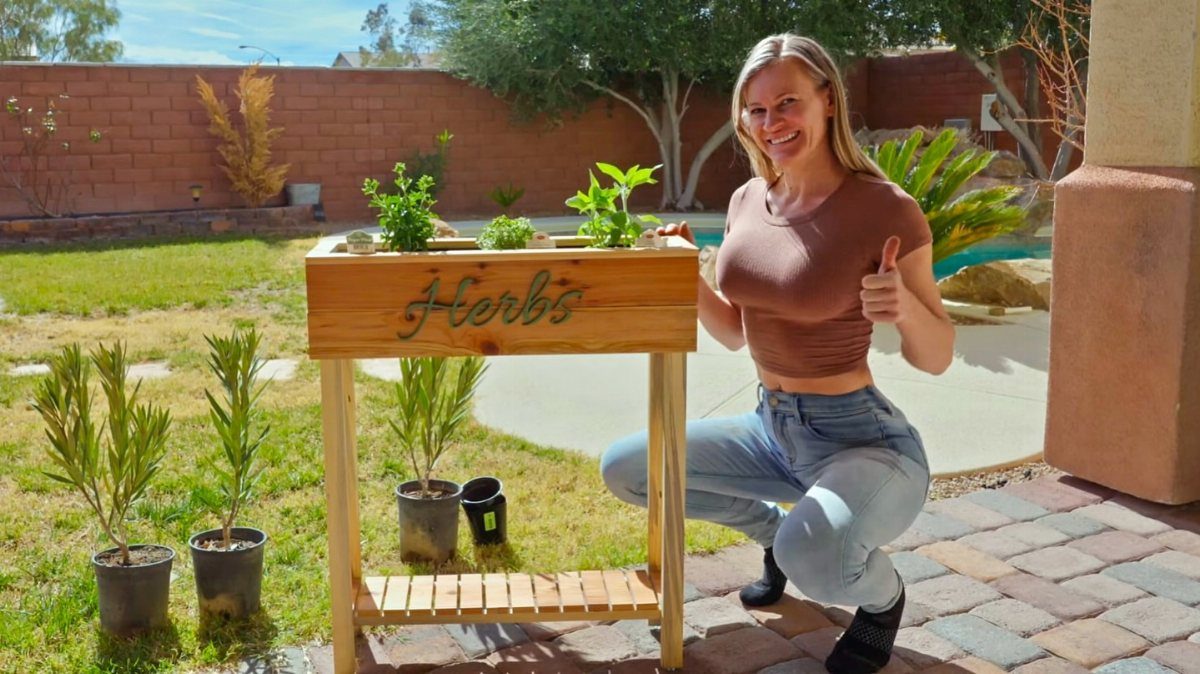
Legs lift a compact wooden box to waist height, so planting and picking need no kneeling. For a small backyard, one raised box labeled "Herbs" is a tidy start.
A box on legs holds less soil than a ground bed, so it dries out faster; water it often. Place it in full sun, and make sure the legs stand level before you fill it.
19. Fabric Grow Bag Garden
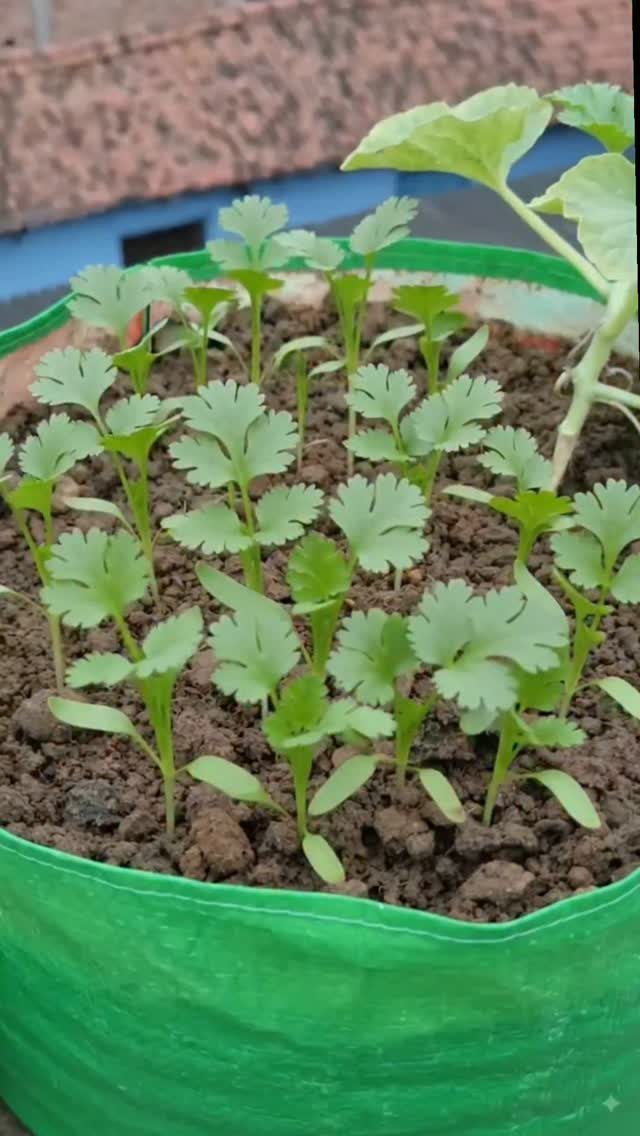
Fabric grow bags hold herb seedlings in soil and weigh little, so a bright green one like this is easy to carry to a better spot.
Slide it into the sun, then back out of the way when you need the space.
Fill it with potting mix and set seedlings with room between them.
Fabric is soft and holds its shape only once filled, so I pick a flat spot to stand it on. Water slowly and check the soil by touch.
20. Chives
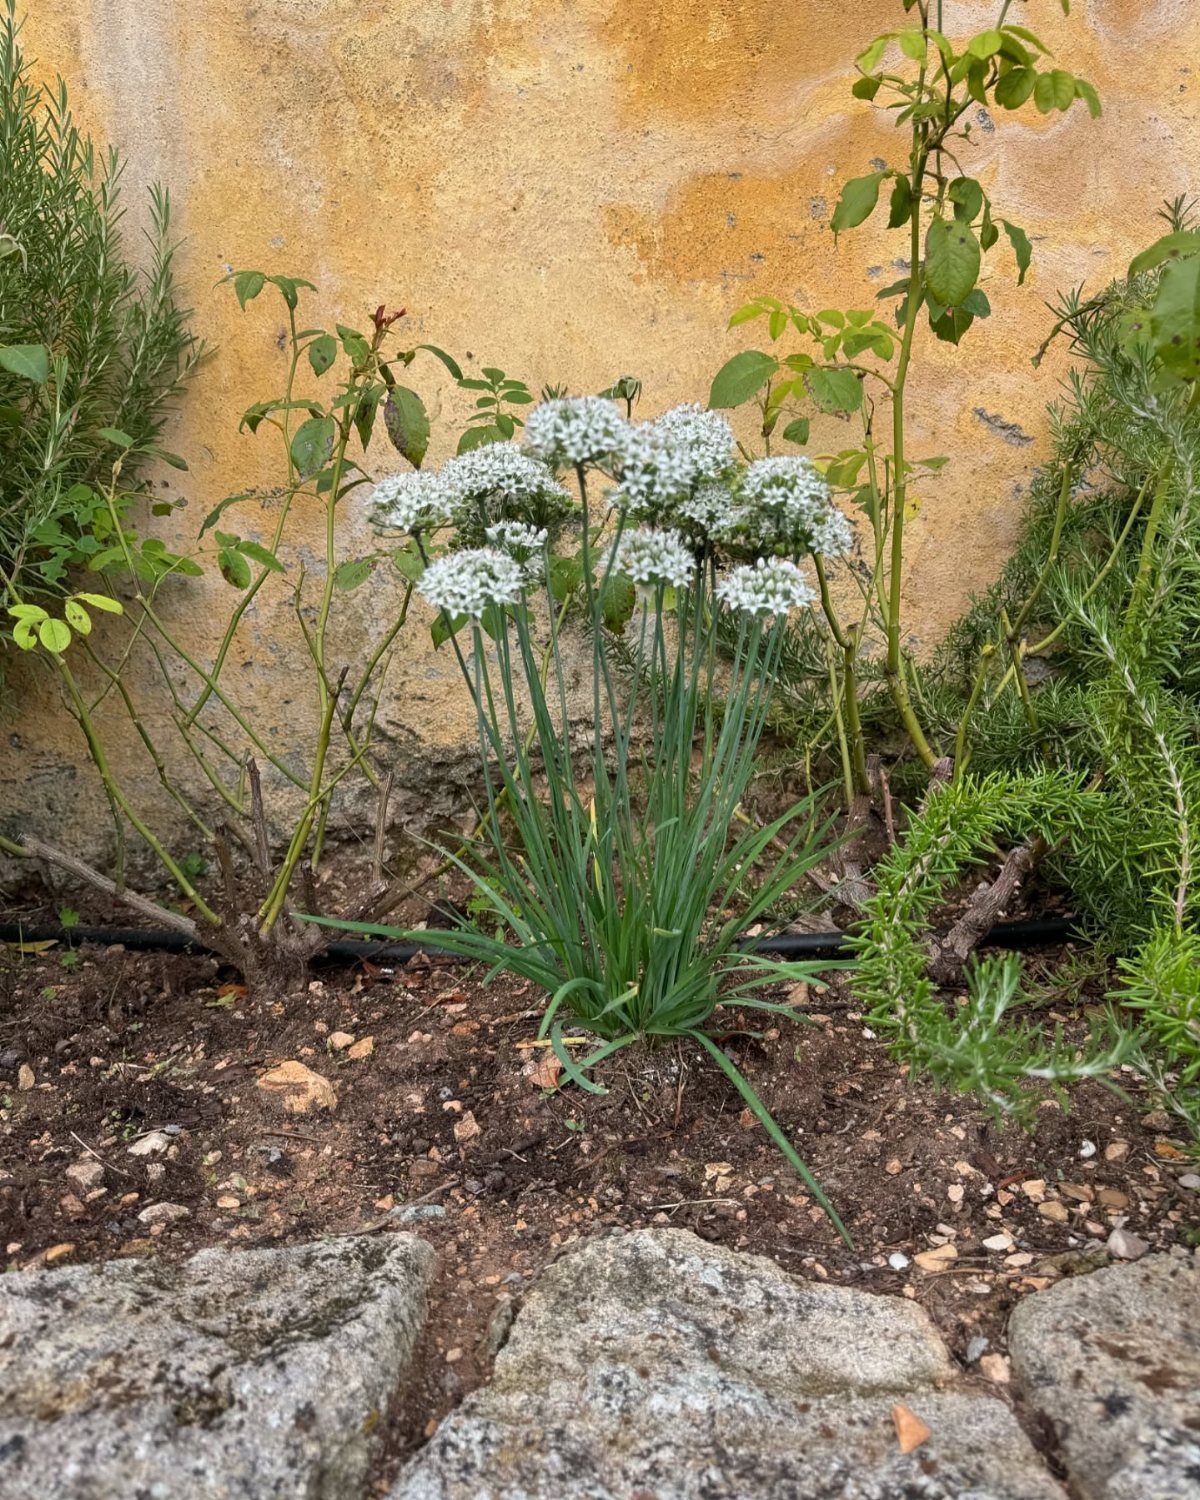
Chives bloom with purple pom-pom flowers, and a patch in a garden border makes a pretty edge as well as a harvest. Their slim green leaves stand in a clump you can snip whenever a recipe needs them.
I would plant them where a border meets stone or a wall, so they have a defined spot and neighbors don’t crowd in.
Snip chives an inch or so above the soil, and the clump keeps sending up fresh shoots. Leave a few blossoms on for looks, because the purple pom-pom flowers are a big reason people grow chives at all.
21. Water Propagation Jars
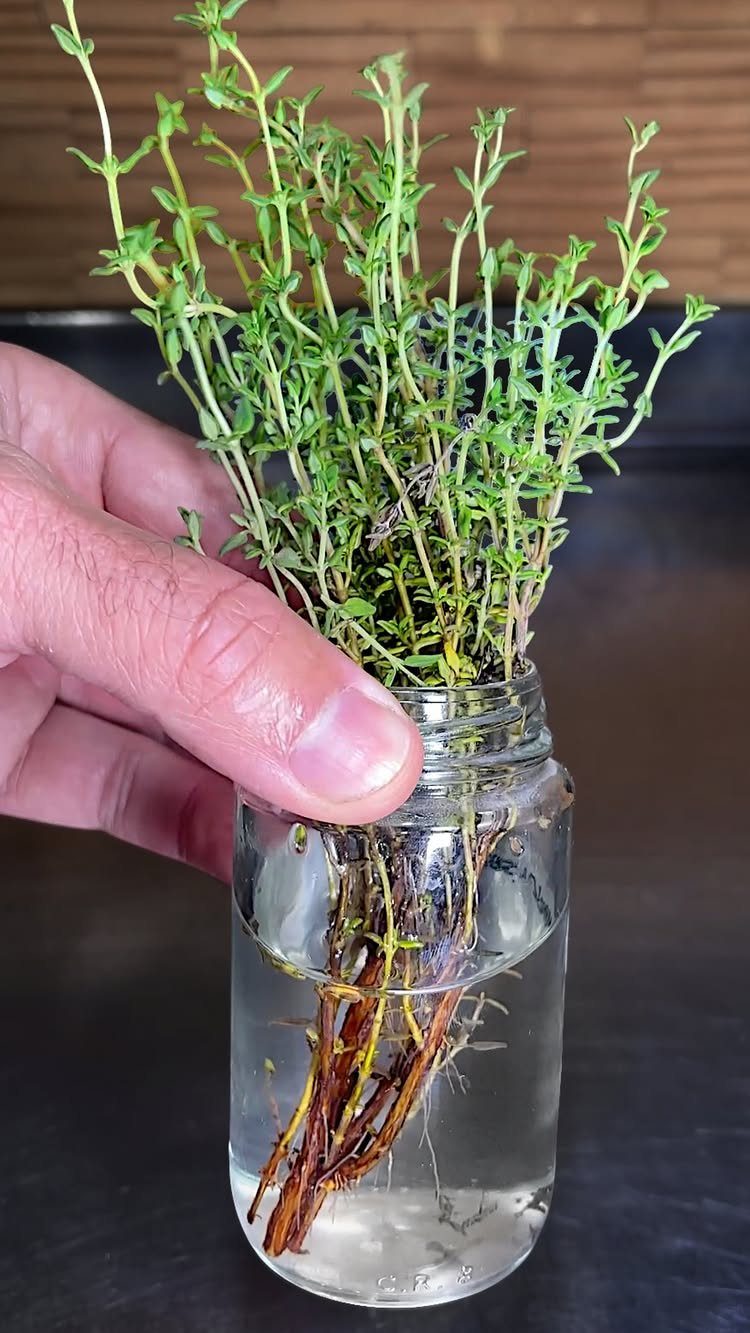
A small clear jar of water is enough to root herb cuttings, and clear glass lets you watch the roots form. It costs next to nothing if you already have a jar.
Snip a sprig with a few leaves, strip any leaves that would sit below the waterline, and stand the stem in the jar.
Keep it in light and change the water when it looks cloudy. Once roots show, move the cutting into soil.
Sunlight and Site Selection
Before settling on a spot, track how long the sun actually lands there, since most culinary herbs want 6 or more of full sun.
Most herbs want at least 6 hours a day, so watch the space from morning to late afternoon and note where light actually lands.
A bright windowsill, porch or balcony can all work. If you only get about 4 hours, stick with herbs that tolerate partial shade rather than forcing sun lovers to cope.
A basic LED grow light on a timer can cover the gap in a dim apartment window.
Pick a spot close to the kitchen door or counter, because a herb you have to hike to is a herb you forget to snip.
A herb garden you pass daily gets watered and harvested; one at the far end of the patio gets forgotten.
Watering and Drainage
Start with a container that has drainage holes and a well-draining potting mix. Most herbs are Mediterranean by origin, so they don’t want much water, and soggy roots do more harm than a missed day.
Push a finger into the soil up to the first knuckle; if it feels dry, it’s time to water.
Basil is the one I watch most. Water in the morning or early afternoon, and empty the saucer after 15–20 minutes so the roots never stand in a puddle.
Mint is the exception to the pot-sharing rule.
After germination, water the compost when dry – about once a week. When the herbs have grown 10cm tall, you can ‘pot them on’.
Harvesting and Pruning
Cut early and cut often. Regular snipping pushes herbs to grow bushy, and it keeps them from turning leggy or running to seed too fast.
On most herbs, sharp scissors and a cut of the top 2–3 inches of growth keep the plant bushy. Parsley works differently, so snip the outer stalks at the base and leave the center to keep growing.
Hot, intense sun pushes basil, parsley and cilantro to bolt, and once they flower and set seed the leaves turn bitter and stop coming.
Keep harvesting basil to hold off the flowers. Near the end of the season, let a few plants bloom, since bees love the flowers.
A light monthly feeding with all-purpose liquid fertilizer keeps cut herbs growing. A quarter turn of each pot every 3–4 days keeps the plants from leaning toward the window.
Frequently Asked Questions
What herbs can I plant together indoors?
Group herbs that want the same light and water. Thyme, rosemary and oregano like dry, sharp drainage, so they share well.
Basil is thirstier, and mint spreads, so give mint its own pot. Individual pots set in one tray look like a single garden and let you swap out a struggling plant alone.
Which herbs are perennials?
Rosemary, mint, chives, oregano, thyme, sage and lemon balm all come back year after year.
Basil is the common exception, since it lives one season and needs replanting. Lemon balm spreads fast and crowds its neighbors, so it gets its own container in my plan.
What herbs thrive in full sun?
Basil, rosemary, oregano, thyme and chives all do best in full sun, and mint takes it too. Watch the spot from morning through late afternoon before you plant; 6 hours of direct light is the minimum most herbs will accept.
Which herbs do well in small pots?
Thyme, rosemary, chives, parsley and basil stay happy in pots 6–8 inches wide. Thyme stays compact and even spills over the edge of a hanging basket.
Mint grows fast and crowds neighbors, so keep it in its own pot. Pick a pot sized to the plant now, not a huge one.
Which herbs are easiest for kids to grow?
Potted perennials bought as plants are the easiest: rosemary, mint, chives and oregano. Cress sprouts within days, which keeps young gardeners interested, and chives are almost as easy from a seed packet.
Basil and parsley from seed make a good longer project, but basil needs warm soil and both can go to flower if the weather heats up.
How do you grow annual herbs from seed?
Sow a few seeds on damp, drained potting mix in a small pot with drainage holes, then cover them with a thin layer of mix. A clear plastic bag over the pot speeds germination; remove it once seeds sprout.
Keep the pot on a windowsill and water when the mix dries. Move seedlings to bigger pots at about 4 inches tall, and plant outside only after the cold has passed, since they are fragile.
How do you plant herbs into pots or the garden?
Space plants about a hand’s width apart, whether in a pot or the ground. Make the planting hole a little wider than the rootball, drop the plant in, and press the soil lightly around its base.
Water well, and label each herb so you know which is which. In a container, use a pot with drainage holes.
What type of container should I choose for herbs?
Choose a pot with drainage holes that fits the plant’s size. Clay breathes well but is heavy and breakable; plastic costs less and is light to move.
Oversized pots hold water the roots cannot use, and waterlogged roots rot faster than a dry spell would hurt them. Fabric grow bags and tin cans with holes poked in the bottom also work.