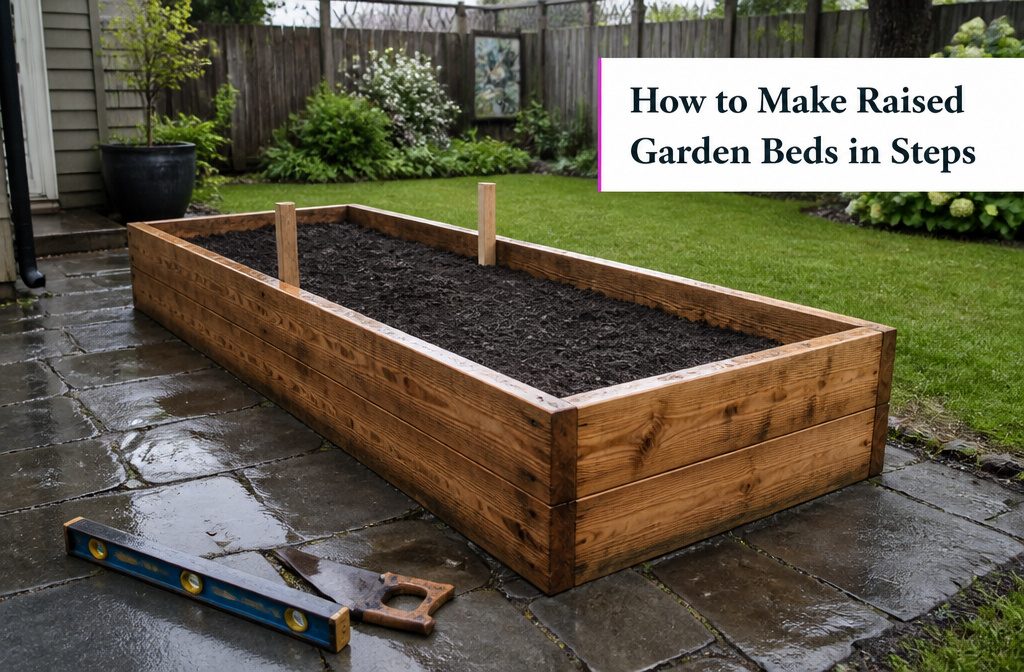
You end up with a 4-by-10-foot bed, 16 inches tall, built from 2×8 boards and 2×4 stakes. It takes a saw, a level, and patience with the first row.
Most people rush that row, but a first board that tilts carries the tilt through the whole frame. Cedar costs the most; pressure-treated lumber is the budget route.
1. Prepare the Site
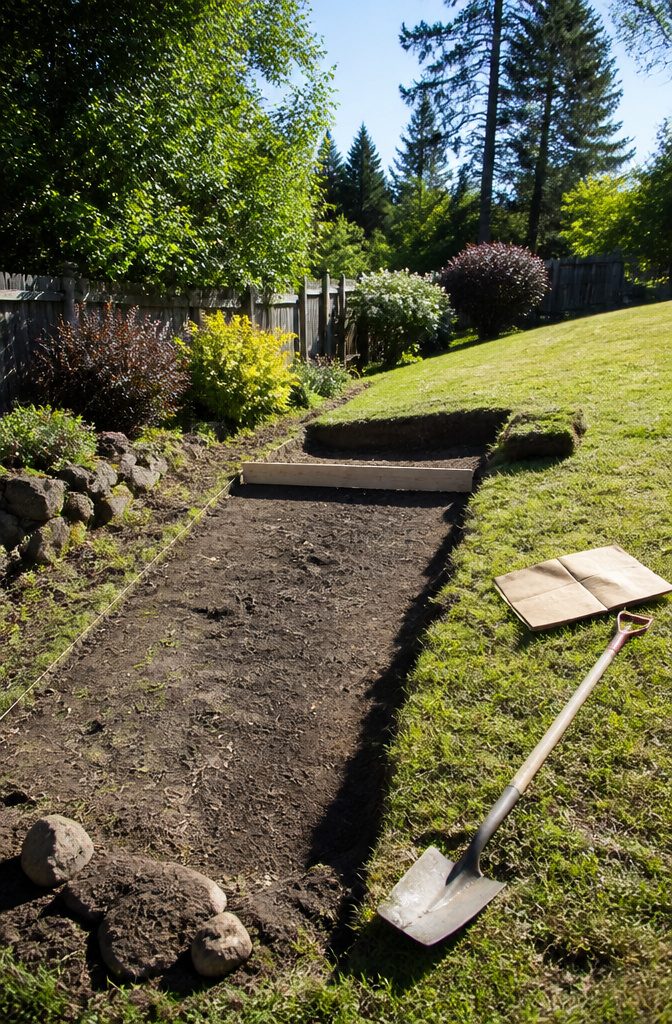
Pick the spot that gets the most sun, because no amount of good soil fixes a shaded bed.
Then strip the top layer of grass and weeds with a digging or trenching shovel, the kind with a sharp cutting edge that pierces turf cleanly.
Pull out rocks and roots, and break up the compacted soil underneath with the shovel or a tiller.
If you’d rather skip the digging, lay cardboard over the grass and weeds. It blocks them from growing up through the bed and breaks down in a season or two.
On a slope, start at the low side and cut a shallow trench for the first board.
Dig deeper on the high side so the board sits level, and check it with a level as you go. That first board sets the position of every other one, so decide on the bed’s full footprint before you commit.
2. Cut the Boards
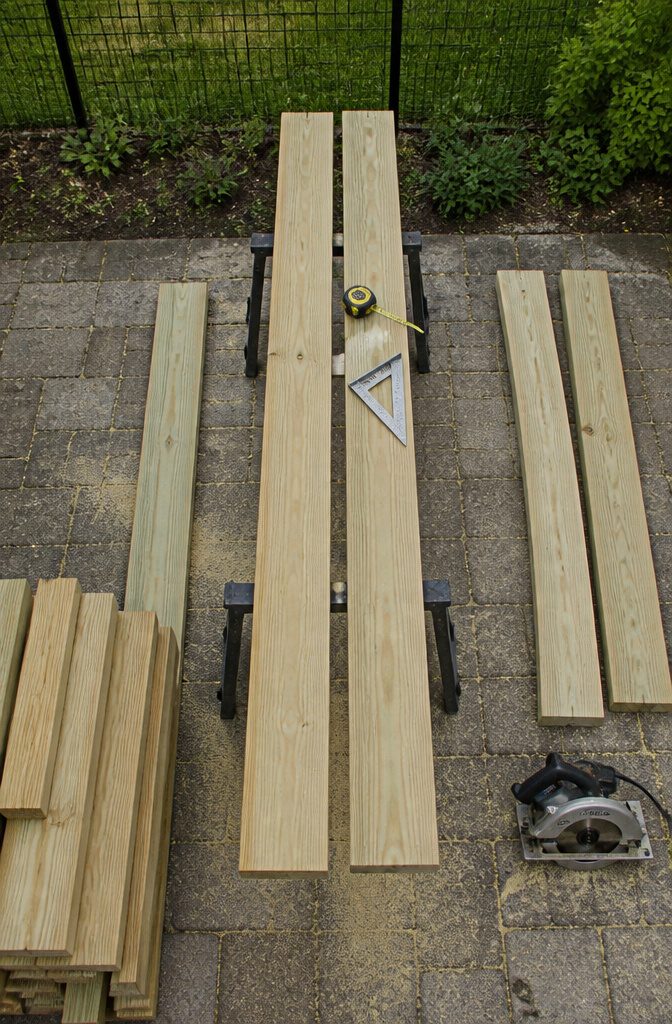
Trim two 10-foot boards to exactly 10 feet, marking the line with a tape and a speed square so the cut runs true.
Then cut an 8-foot board in half for the two 4-foot sides. That gives you the 4-by-10-foot bed at 16 inches tall, with both long sides and both ends.
Support each piece on sawhorses or flat ground while the circular saw works through it. A board that sags mid-cut pinches the blade and leaves a crooked end.
Sort your boards before you cut. Any board with a slight bow goes in with the curve facing inward, because the soil will push the walls outward and straighten it.
If you build the smaller version, it takes just one 8-foot board cut in half.
3. Level the First Row
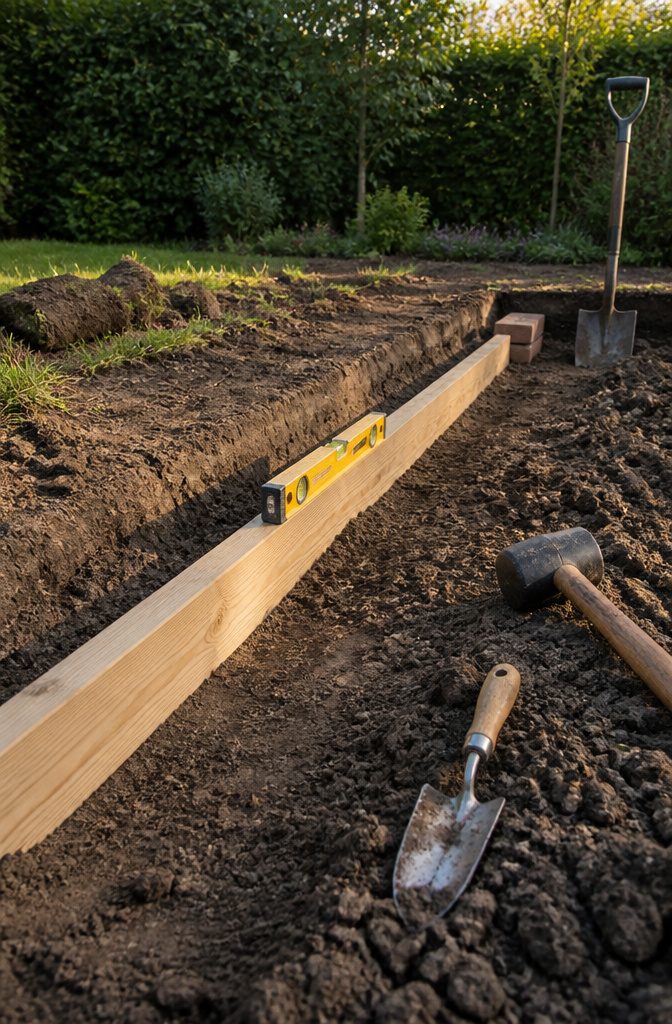
Set the level on top of the first board, then correct from underneath. If one end reads low, dig out soil under the high side or pack soil beneath the low side until the bubble sits centered.
A shovel handles the bulk of it, and a hand trowel reaches under the board without disturbing the ground you’ve already fixed.
A rubber mallet is gentler than a hammer for tapping a board down a hair at a time. Check the level again after each tap, and check it across the width too, not just the length.
Once the board reads level, hold it there with soil packed against both sides.
Clamps work, and so do heavy books or bricks. This step is slow, and it deserves the time: a first course that tilts will carry that tilt through the second row and the whole bed.
4. Fasten the Corners
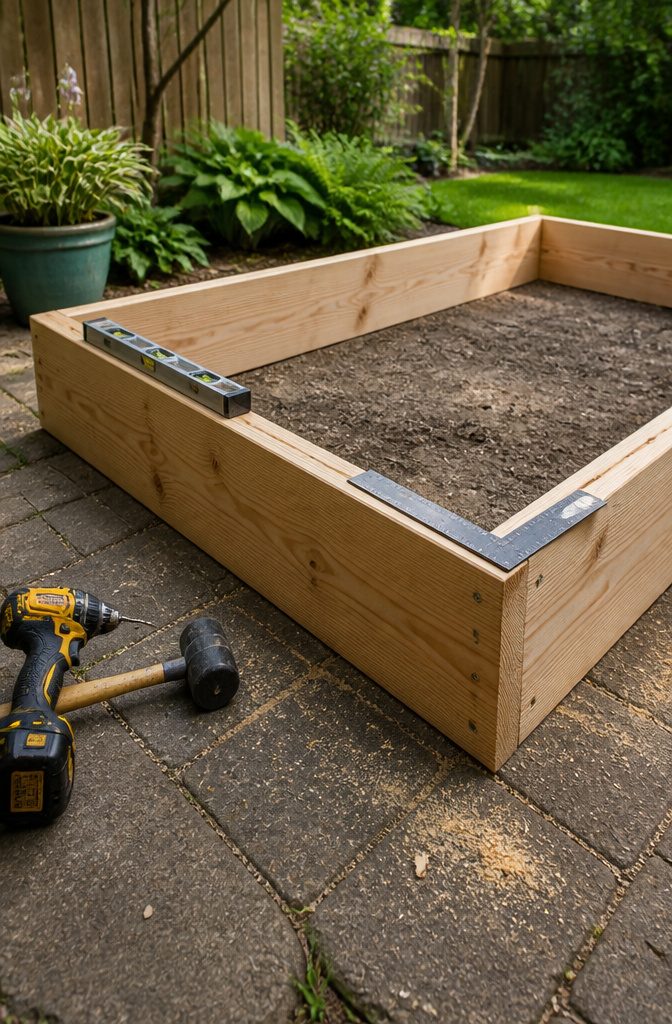
Pre-drill every corner before a screw goes in. Deck screws wedge the grain apart near a board’s end, and a split there weakens the joint for good.
Set one 4-foot end board against the long board, drill the pilot holes, then drive three 3-inch deck screws through the short board into the end of the long one.
Screwing this way matters because soil pushes outward hardest on the long sides, and screws resist shear better than they resist pulling out of aging wood.
Once two corners are in, set the level across the boards, then check each corner with a framing square. If a corner is off, tap the board with a mallet until it lines up.
A slightly bowed board won’t come out perfect, and that’s fine. Fasten the last two corners and run both checks again.
5. Add Corner Stakes
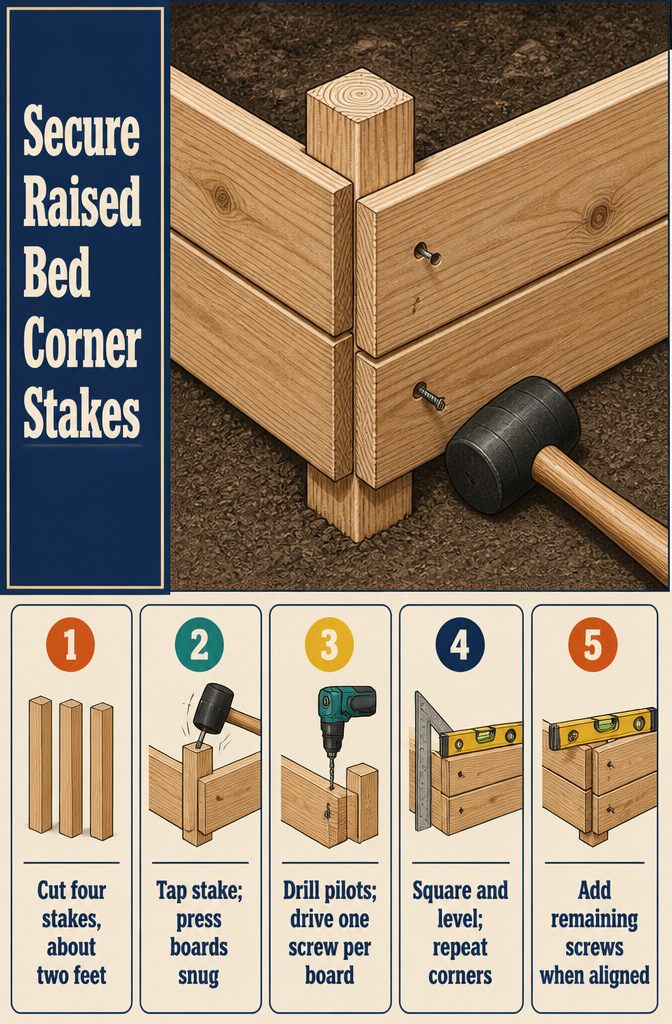
Cut one 2-by-4-by-12-foot board into four stakes of about 2 feet each.
That length lets each stake go a few inches into the ground and still stand a little above the two rows of 2x8s, which run about 16 inches. You’ll trim the tops flush later.
Tap a stake into one corner with a rubber mallet, then push the boards snug against it. Drill pilot holes before driving 2.5-inch screws through the long board into the stake; they keep the wood from splitting near the end.
Check the frame with a framing square and a level after that first corner.
Drive only one screw per board at first, then repeat at the other three corners. Once everything reads square and level, add the remaining screws.
6. Add the Second Row
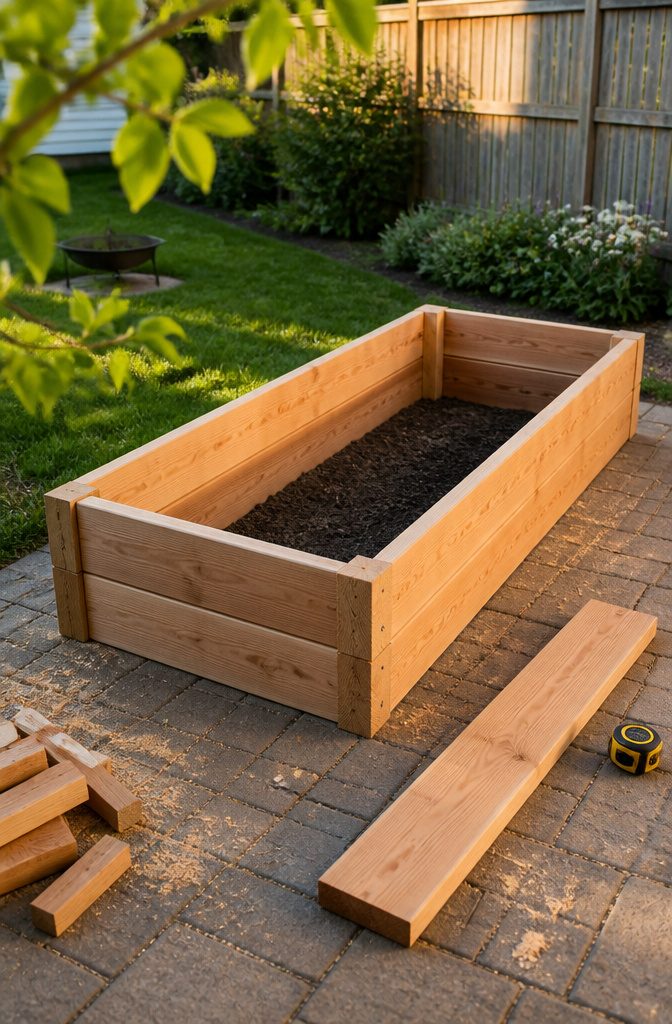
Measure and cut the second course one board at a time. Two 10-foot boards and two 4-foot boards look identical on paper, but a corner that runs an inch long or short will keep the whole frame from sitting square.
Hold each board against the first row, mark it, cut it, and set it in place before you touch the next one.
A board that is a hair too long will not slide inside the legs, and the fix is a replacement board, not forcing it. Swapping one piece is easier than taking apart a finished frame.
Line up each corner of the 2x8s and fasten them. Then screw the row to each corner stake, the 2x4s, so the stakes carry the weight of the soil.
7. Add Side Stakes
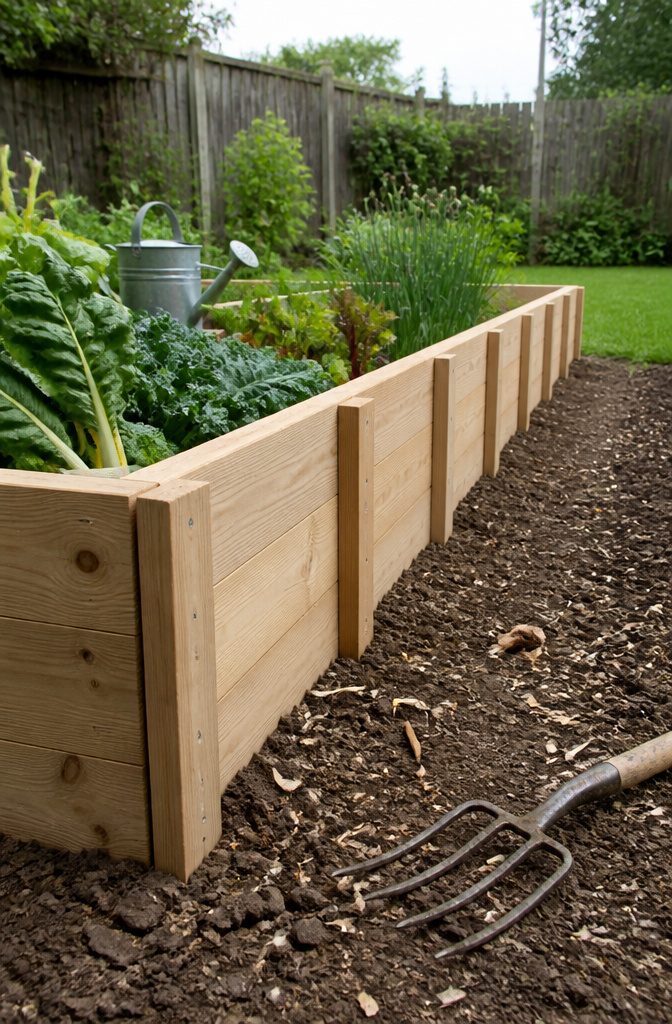
Long boards bow outward once they hold a few cubic feet of wet soil, and corner stakes alone can’t stop it. Cut about four more 2-by-4 stakes, 2 feet long, and space them part way along each long side.
Hammer each stake into the ground flush against the outside of the 2-by-8, then drive 2.5-inch screws through the stake and into the board.
Check that the board stays level as you go, because a stake pounded in crooked will tug the whole row with it.
These stakes also give the 2-by-4 lip something solid to rest on later, so keep their tops even with the board. If you plan to trim them, wait for the trimming step.
8. Trim the Stakes
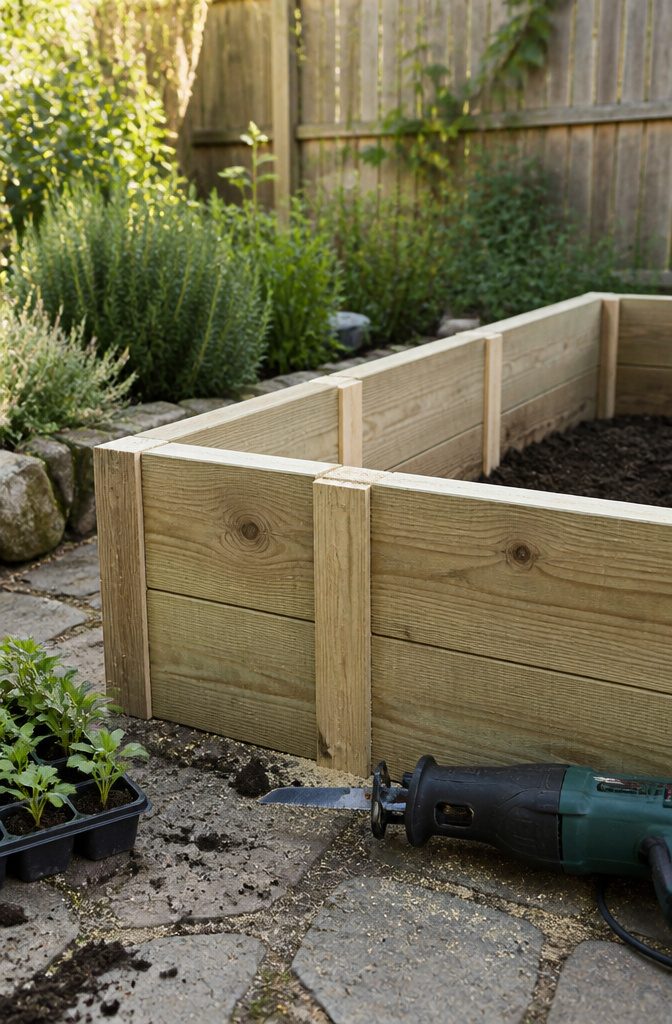
Cut the stake tops flush with the top edge of the 2×8 boards, so the lip you add next has a flat surface to sit on.
A stake left standing even a quarter inch proud will rock the lip board and leave a gap along the seam.
A reciprocating saw is the tool to reach for.
Rest the blade against the board face and let it ride along the top edge as you cut. A hand saw works too and costs nothing, but it takes longer and the blade tends to wander across the grain.
A circular saw also does the job, though the guard can make it awkward to get the base plate flat on a narrow board.
Cut flush, then run your palm across the top row to catch any splinter or high spot before the lip goes on.
9. Add the Lip
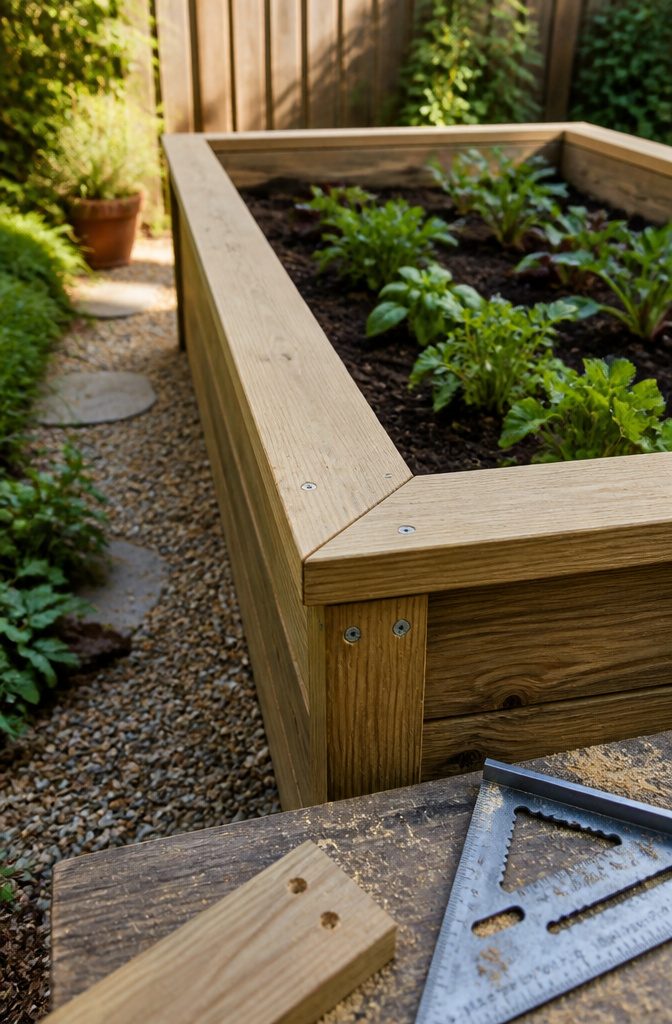
Measure the top of each finished side rather than trusting the length of the boards underneath.
Once the stakes are on, the real outside dimension can run a little off from what you cut earlier, and the lip has to match what is actually there.
Mark a 45-degree angle at each end of a 2-by-4 with a speed square, then cut along the lines with a circular saw.
Both ends slant the same direction in a way that makes a point on the outside edge, so check that before you cut the next three. Drill pilot holes first, since a 2-by-4 end near a miter splits easily.
Then drive 3-inch screws down through the lip into the side and the top of each stake. Fasten each miter joint with one more 3-inch screw.
10. Build More Beds
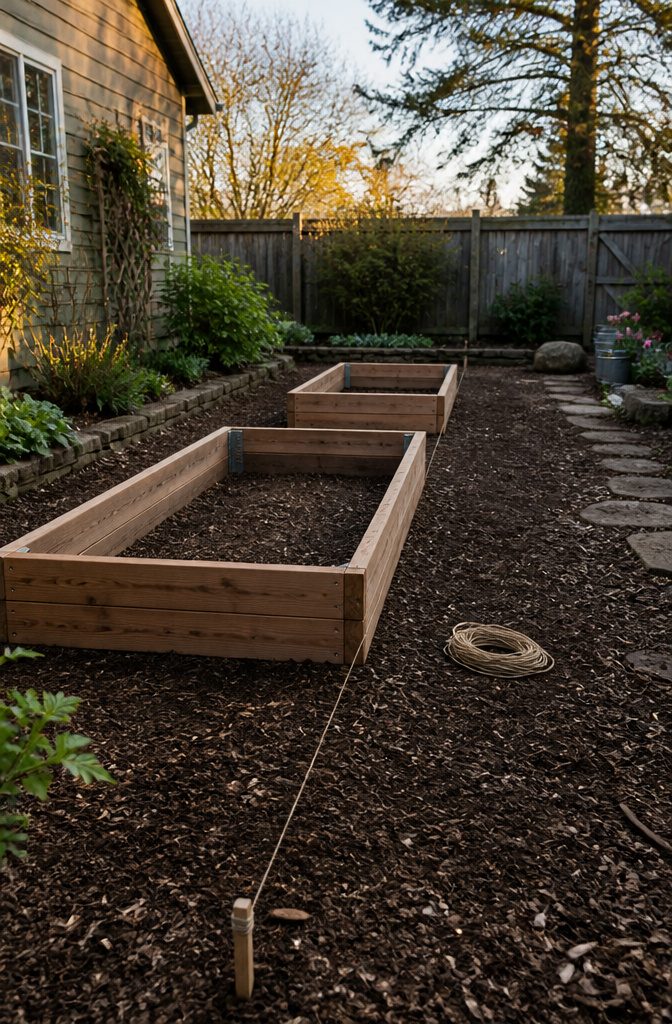
Tap a stake lightly into the ground at the outer edge of your finished bed, then run string or twine from it to a second stake where the next bed will sit.
The line gives you something to sight along, so every new bed lines up with the first one instead of drifting a few inches off by the third.
Pull the string snug, since a sagging line curves your row. Use the same line to check the gap between beds: measure from the string to each bed’s edge, and the paths come out even without guesswork.
Move the stakes as you add each bed, and pull them once the frames are set.
Choose Your Wood
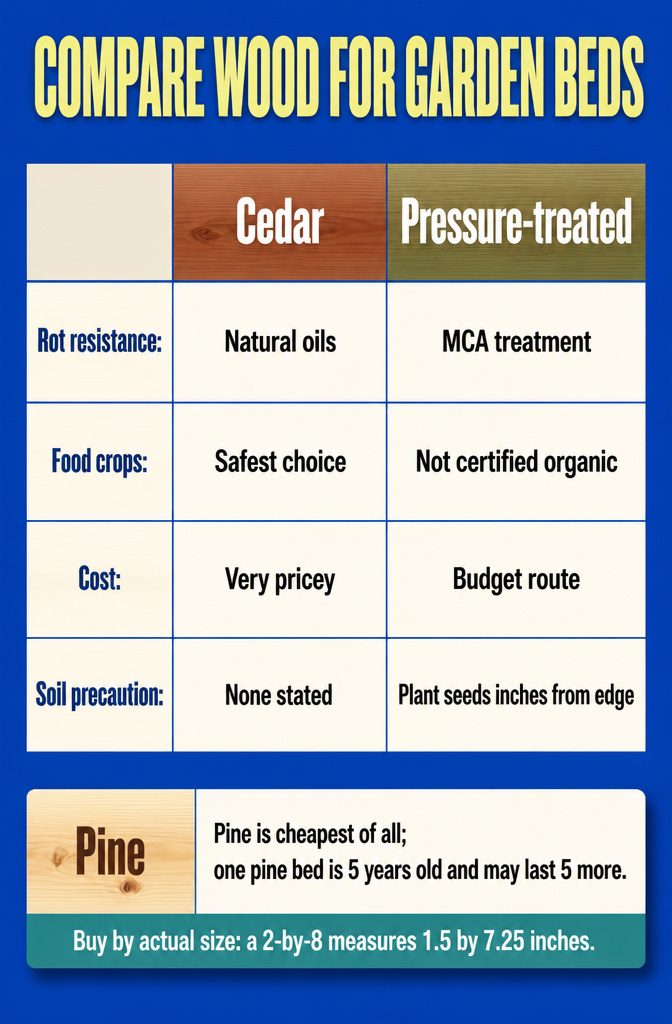
Cedar wins if you can afford it. Western red cedar has natural oils that resist rot without chemicals, and it’s the safest choice for food crops, though a 2-by-8 in it is very pricey.
Eastern red cedar and white oak are the other chemical-free picks, and a local sawyer may sell either from salvaged logs.
Pressure-treated, ground-contact lumber is the budget route. Its main chemical today is MCA (Micronized Copper Azole), a long way from the arsenic-era wood the EPA banned.
Copper reportedly migrates only a couple of millimeters into soil, so plant seeds a few inches from the edge. Still, treated wood isn’t certified organic, and several growers steer away from it for edibles.
Pine is cheapest of all; one pine bed is 5 years old and may last 5 more.
Buy by actual size: a 2-by-8 measures 1.5 by 7.25 inches.
Size and Location
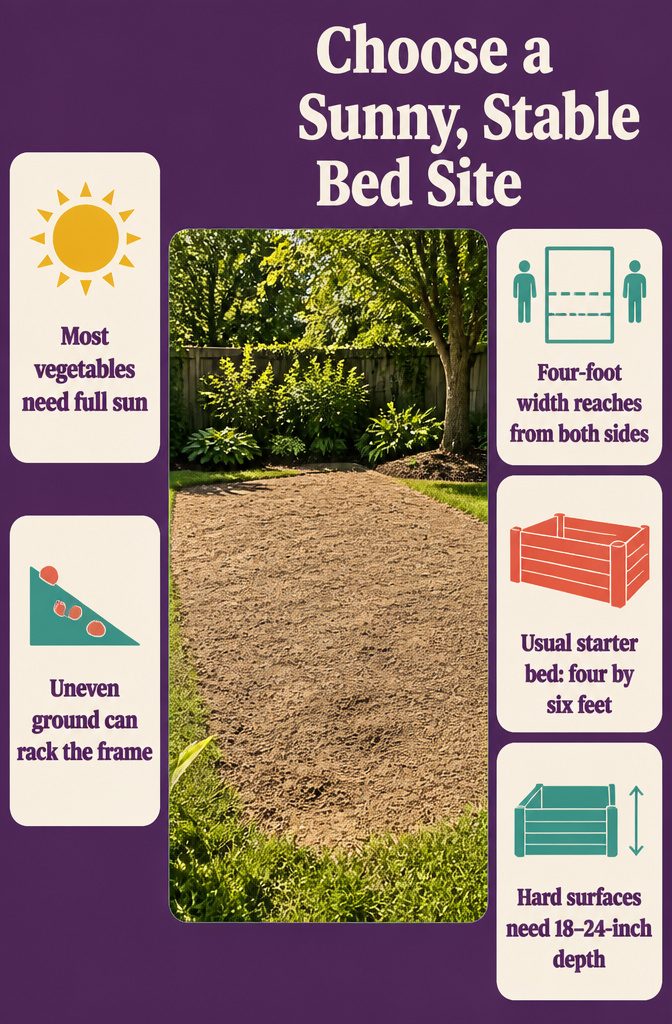
Pick the spot that gets the most sun before you pick anything else, because no bed size or soil mix fixes a shady yard.
Most vegetables want a full, bright day, so watch the area before you cut a single board.
Then check the ground. A bed built on a slope or a lumpy patch will rack and tilt, and that is hard to correct once the second row goes on.
For width, I’d hold to 4 feet, which lets you reach the middle from either side without stepping in. A 4 by 6 foot bed that’s 1 foot deep is the usual starting size, and starting small beats feeling swamped.
Depth depends on what’s underneath.
On grass or dirt, 12 inches works. On concrete or another hard surface, go 18–24 inches so roots have room.
Fill With Soil
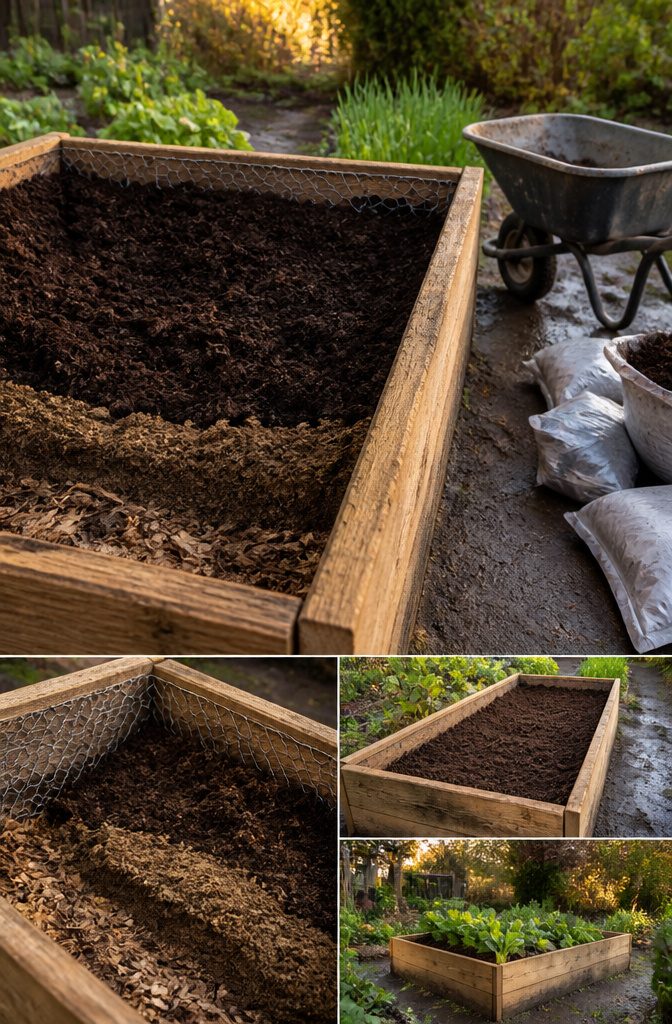
Two fills work, and I’d pick the first for most vegetable beds: 60% topsoil, 30% compost and 10% potting soil. The other mixes equal parts topsoil, coarse sand and compost, which drains faster but gives you less organic matter to start.
Layering is the third route. Put 4–8 inches of coarse material on the bottom, 3–5 inches in the middle, and at least 6 inches of planting mix on top.
Multiply length by width by depth to get your volume, and expect settling. A 4-by-8-foot bed 12 inches deep can swallow more than 20 large bags, so price it before you load the cart.
For a liner, chicken wire stapled up the sides keeps burrowing pests out and drains freely. Landscape fabric holds soil in place, though some gardeners avoid it over plastics.
Frequently Asked Questions
What type of wood is best for a raised garden bed?
Cedar is the best choice if you can afford it.
Western red cedar has natural oils that resist rot without chemicals, which makes it the safest pick for food crops. Eastern red cedar and white oak are other chemical-free options, and pressure-treated ground-contact lumber is the budget route.
What do you put in the bottom of a raised garden bed?
Put 4–8 inches of coarse material on the bottom, then 3–5 inches of material in the middle, and finish with at least 6 inches of planting mix on top.
If you want to keep burrowing pests out, staple chicken wire up the sides as a liner. Landscape fabric holds soil in place, though some gardeners avoid it.
Is it cheaper to build your own raised garden bed?
Building your own is generally the cheaper route, especially with budget lumber.
Pine costs the least, though it won’t last as long as cedar. Cedar costs a lot more, and filling the bed with soil adds up too: a 4-by-8-foot bed 12 inches deep can swallow more than 20 large bags.