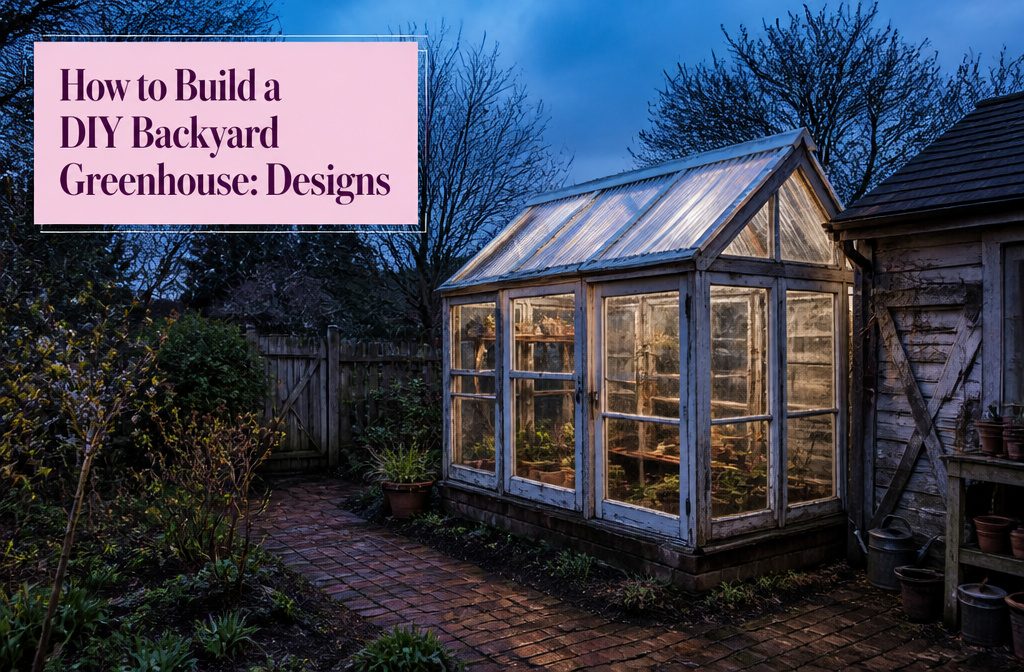
A finished greenhouse costs anywhere from $100–$500 in salvaged windows to just under $1,000 with patio doors, against $2,000+ for a kit, and the skill needed runs from beginner to advanced.
Most people go wrong at the glazing: glass overhead can break in hail, so keep windows on the walls and put polycarbonate on the roof.
1. Small Gable-Roof Greenhouse
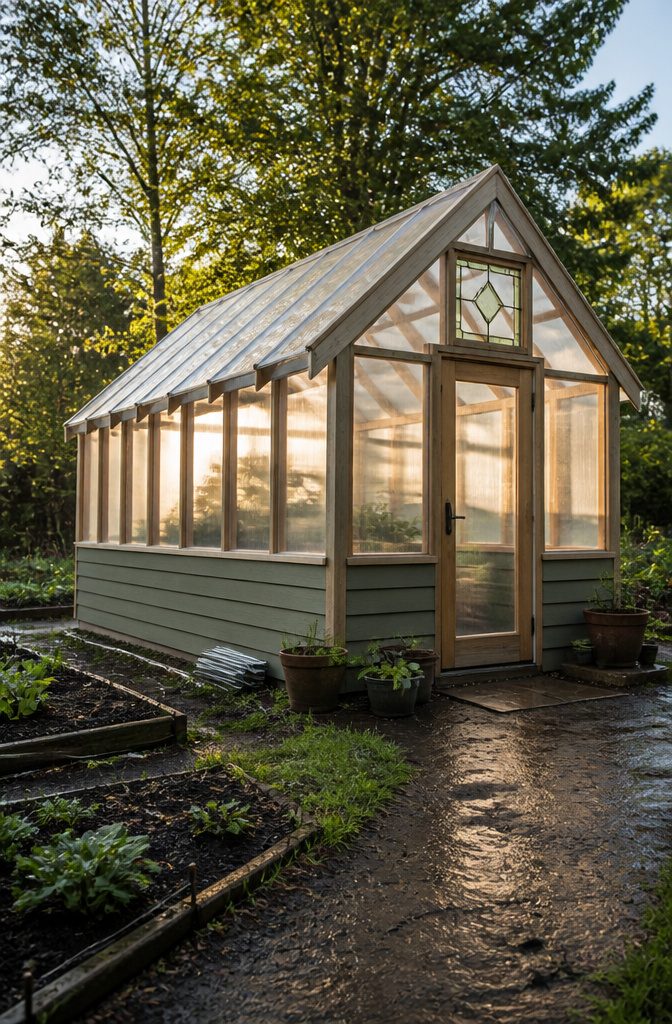
A gable-roof greenhouse is the classic shape, and it is also an advanced plan: the roof framing asks for angled rafter cuts and notched bird’s mouths, so skip it if this is your first build.
The materials are 2x lumber, siding, plastic panels, a door, a ridge cap and wavy strips.
The 8 by 12 foot version uses 8 floor joists and 15 2x4x8 rafters, 7 per side plus one more, set 24 inches on center.
Each side also gets 4 purlins, one at the top, one at the bottom and two between. The peak rises 3 feet.
If you want a decorative window over the door, set it on the ground first and measure to the peak to confirm that height. Collar ties of 2×4 scrap across every other rafter pair keep the roof from spreading.
2. Barn-Style Greenhouse
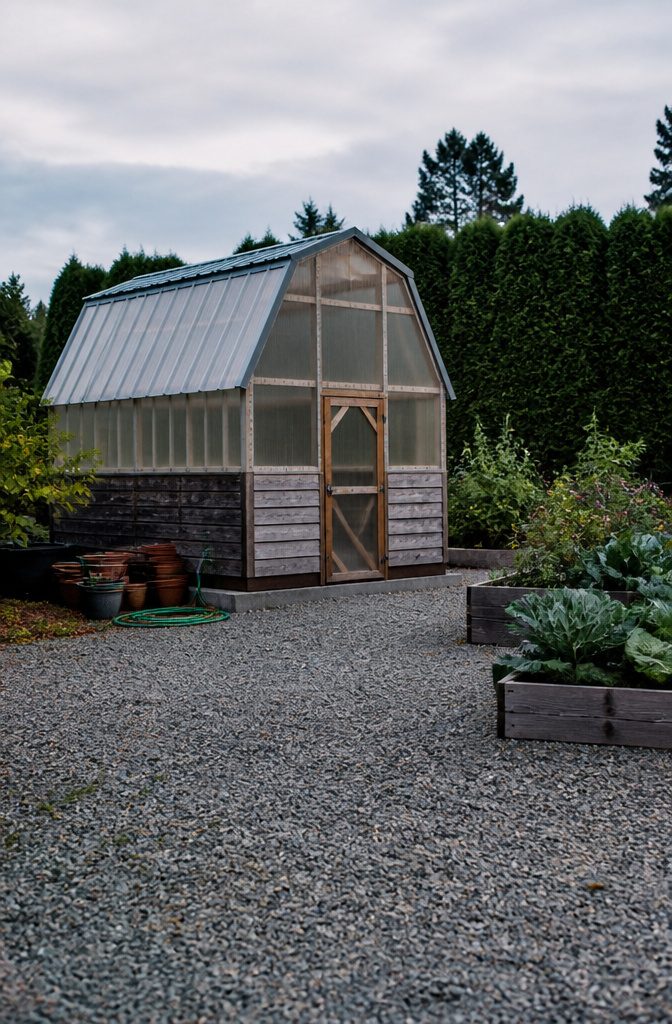
A barn-style greenhouse is a framed building with a barn-like roofline, and it is the plan I’d point a first-time builder toward if they can handle a saw and a drill.
The 2x lumber frame is the sturdy part. Plans like this have been built thousands of times, and one builder reports that theirs still looks new after about fifteen years, which tells you the design holds up outdoors.
Materials are simple: 2x lumber, siding, plastic panels, a door, tin, wavy strips and flashing. Tools are a tape measure, saw, drill, sander and safety glasses.
Expect more framing work than a basic gable or hoop house.
The roofline means extra cuts and more pieces to fit, so the plan is rated intermediate. That time buys a stiffer, longer-lived structure.
3. Large Twinwall Greenhouse
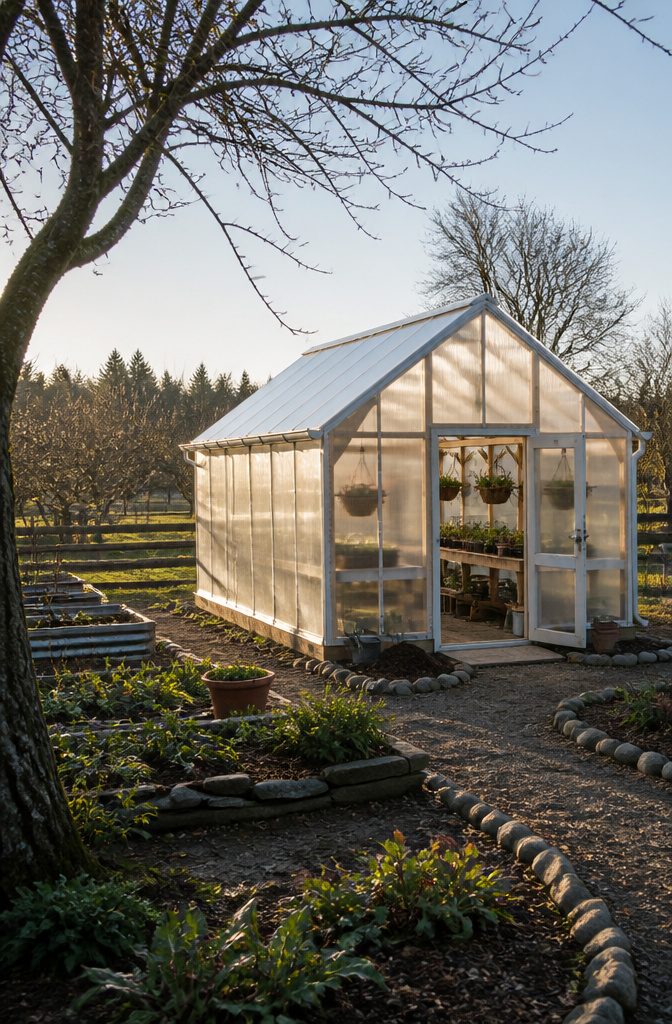
Twinwall polycarbonate is what makes this 12 by 16 foot build worth the lumber. The panels transmit about 95 percent of light and come with a 20-year warranty, so the glazing should outlast the first coat of stain on the frame.
At roughly 10 feet tall, counting the floor if you add one, the room is big enough to stand up in, hang baskets, and fit a bench along each wall.
It is also fully enclosed, so the inside stays dry, which means no rain on seedling trays and no soggy potting mix.
The frame is standard 2x lumber and plywood, cut with a saw and a drill. I’d still call it advanced: the size, the H channels that join the panels, the gutters, and the ridge cap all add steps.
The door is sized for a standard storm door, which saves you from building one from scratch. Choose this one if you want a permanent structure and have a full weekend or two to give it.
4. Lean-To Greenhouse
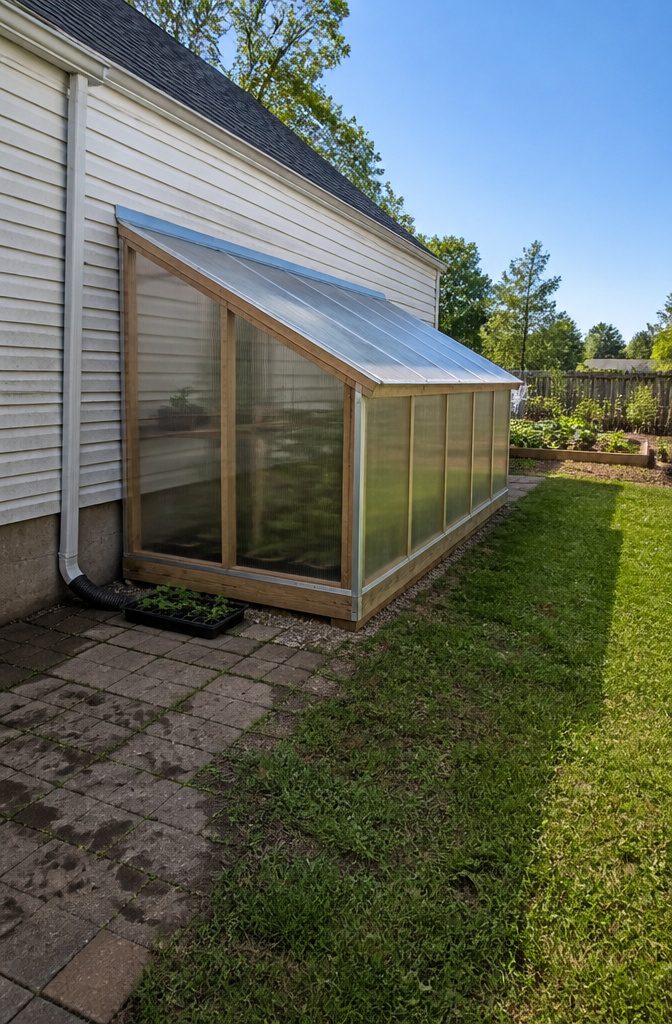
A lean-to uses your house, garage or fence as one wall, so you frame only the front, two short sides and a sloped roof.
That saves lumber and glazing, and the shared wall holds some heat after a sunny day. Pick a wall that faces south or close to it, and skip one with a downspout or a dryer vent in the way.
Frame the new walls to suit your panels. Corrugated plastic sheets 26 inches wide pair well with 2×4 studs spaced 24 inches apart, which leaves room to overlap each sheet before you screw it down.
Build on a leveled base of treated 4×6 lumber pinned down with rebar, and keep it sealed where the roof meets the house. Flash that top seam well, because a leak there rots the siding behind it.
5. Open-Air Garden Enclosure
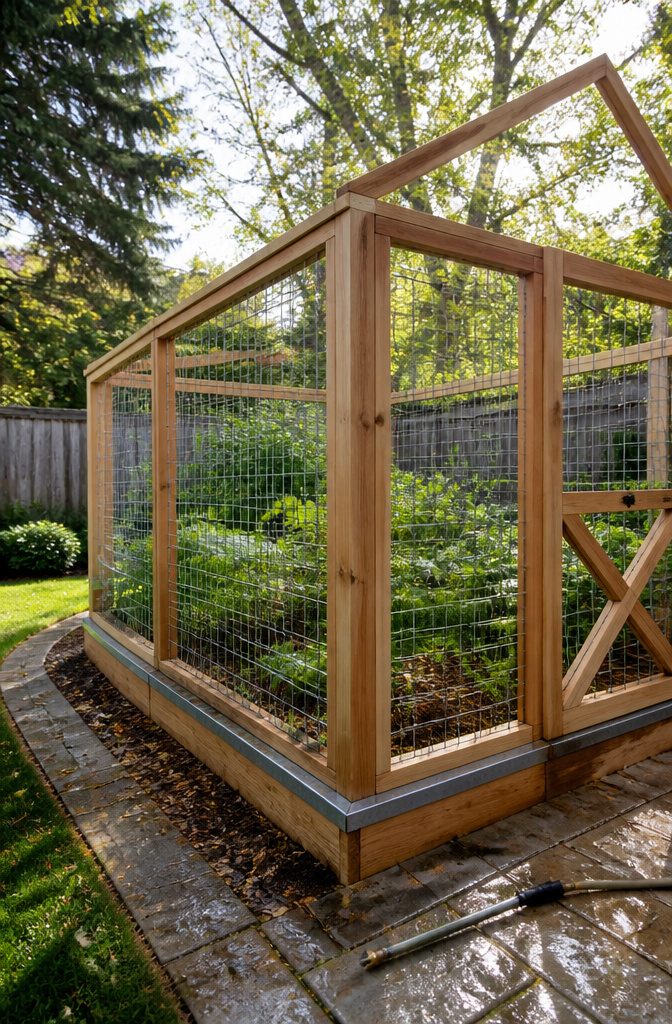
Mesh walls and an open top make this a critter fence for your plants, and nothing more.
It has no roof panels, so it adds no warmth, holds no humidity, and won’t protect seedlings from frost or a hard rain. If you want to extend the season, skip this one and pick a covered design.
What it does well is keep rabbits, deer, and neighborhood cats out of your beds while the plants still get full sun and rain.
The build uses 2×4 framing, wire mesh, cedar pickets, and metal flashing, set on pavers so the wood stays off damp soil. One version borrows a barn-style roofline from a standard greenhouse plan, which gives it height and looks good.
Skill level runs from beginner for a simple mesh-and-hinge box to advanced for the barn-roof version. Cedar is the best wood, but treated Douglas fir works if cedar costs too much.
6. Cottage-Style Greenhouse
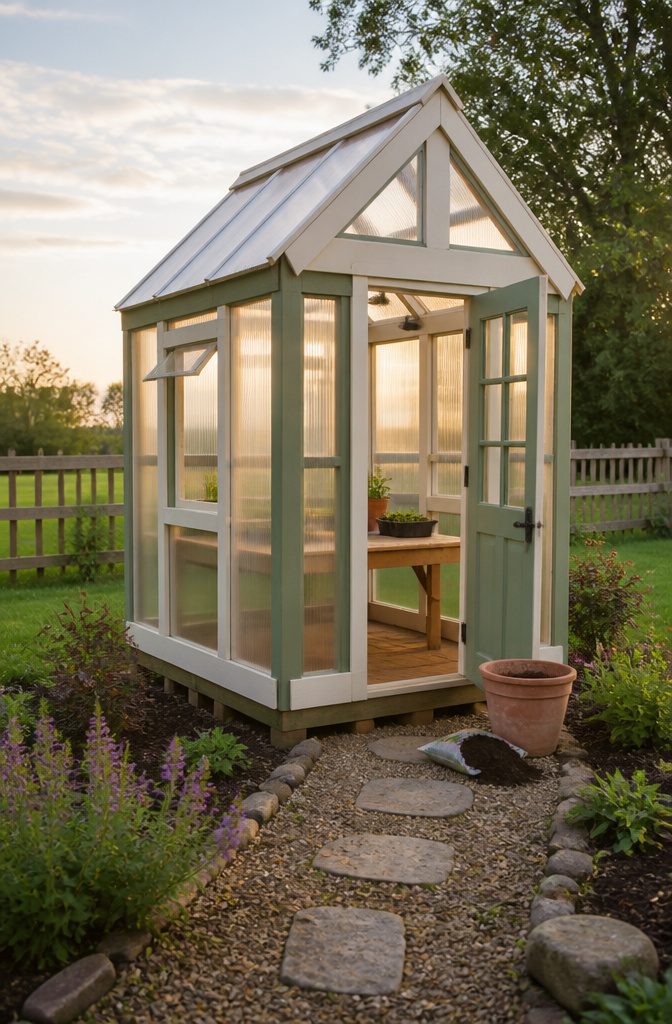
A 5 by 8 foot footprint is 40 square feet, which fits a corner of most small yards without swallowing the lawn.
That’s enough floor for a narrow bench along one wall and a walkway down the middle, with room to keep growing through the cooler months.
The frame is 2×4 lumber on pressure-treated beams, which keep the wood off damp soil.
Plywood, trim, windows, a door and polycarbonate panels finish it. The trim and windows give it the cottage look, and it reads as a garden feature rather than a utility shed.
I’d call this one an advanced build.
You need a saw, drill, sander, tape measure and safety glasses, and the door and window openings must be framed square or nothing closes properly. If you’ve never framed a wall, build a simpler design first.
7. Raised-Bed Greenhouse
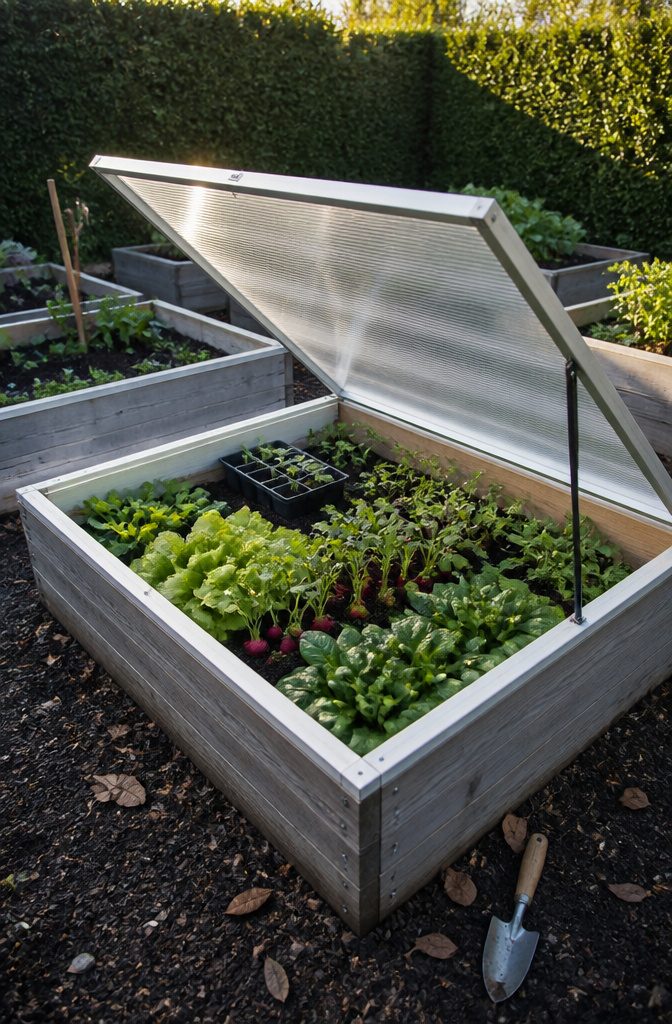
A raised-bed greenhouse is the cheapest way I know to get a real growing-season extension, because the bed already exists.
You build a cover, either a hinged lid or a removable frame, that sits on top of the bed’s sides. Wood-framed beds work best, since you can screw hinges and brackets straight into the rim.
Cover the frame with clear polycarbonate or heavy greenhouse film.
Polycarbonate lasts longer; film costs less and suits a first try. Build the lid so it props open on warm days, because a closed cover on a sunny afternoon can cook seedlings in an hour or two.
The limit is height.
Lettuce, spinach, radishes and young starts fit comfortably, while tomatoes outgrow the lid fast. For tall crops, pick a different design from this list.
8. Wood-and-Mesh Garden Enclosure
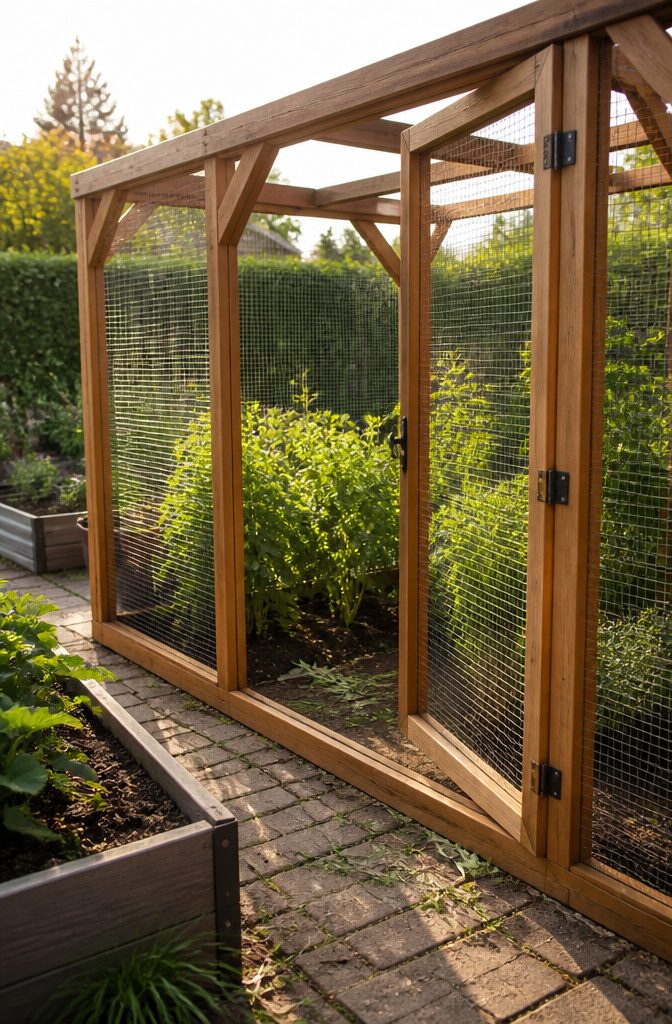
Cedar is the wood to buy for this build, since it holds up outdoors and the frame will sit in soil and weather.
If cedar is too expensive, regular framing lumber works, and douglas fir is the best of that group.
Treat it with a non-toxic exterior stain or oil; ask at the hardware store for the kind sold for raised beds, so nothing leaches toward what you grow.
What sets this apart from an open-air enclosure is the skin.
Chicken wire or mesh gets stapled across 2x and 4x framing, so the structure keeps plants contained and protected rather than just marking out space. Hinges turn one panel into a door, which you’ll want for reaching in.
It suits a beginner: a tape measure, saw, drill, sander and safety glasses cover the tool list.
9. Hinged Hoop Garden Bed
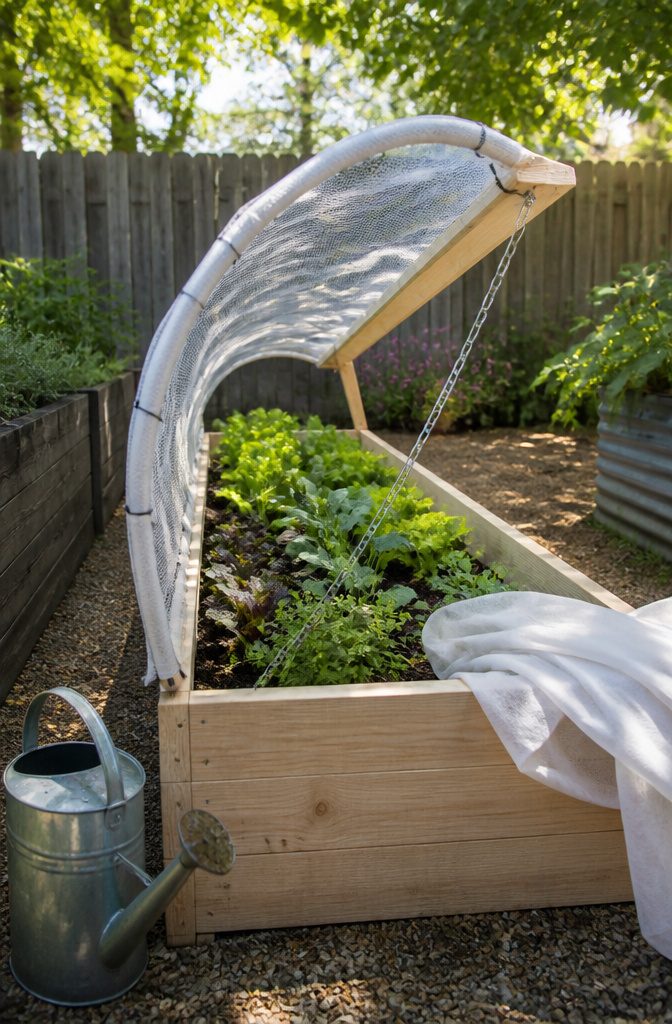
Lifting the whole top on hinges beats reaching through a hole in the side, and that is the reason this bed works.
A frame of 2x lumber holds soil, and a lid of PVC pipe hoops covered in mesh swings up on hinges so you can weed, water and harvest standing at the edge.
A chain from lid to frame holds it open, which keeps it from slamming on your hand or the plants.
The mesh keeps critters out while letting air and rain through. Zip ties fasten the mesh to the pipe, and garden cloth can go over it when nights turn cold.
It suits beginners. You need a tape measure, saw, drill, sander and safety glasses.
I’d sand every edge of the lid frame smooth, since you will be gripping it constantly. Because the bed is narrow, it fits small yards, and you can adjust the length to your space.
10. Mini Greenhouse With a Folding Roof
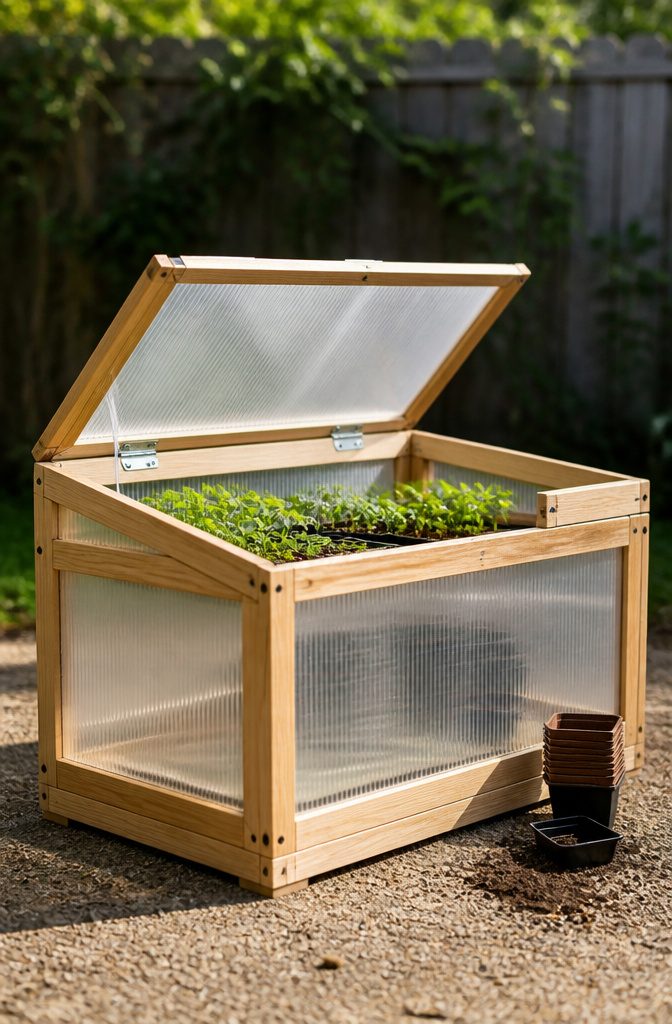
A roof that folds back solves the biggest problem with a small greenhouse: heat. Seedlings under a closed lid can cook on a sunny afternoon, and a hinged top lets you vent them in seconds without carrying trays anywhere.
The plan I’d point you to is built from 1x lumber, polycarbonate sheet and hinges, so the shopping list stays short.
Expect an intermediate build.
You need a tape measure, saw, drill and sander, plus safety glasses for the cutting. Fold the roof back during the day for air and sun, then close it when the evening cools off.
Skip it if you travel often. A roof that needs someone to open it every morning only works for a person who is home.
11. Salvaged-Window Greenhouse
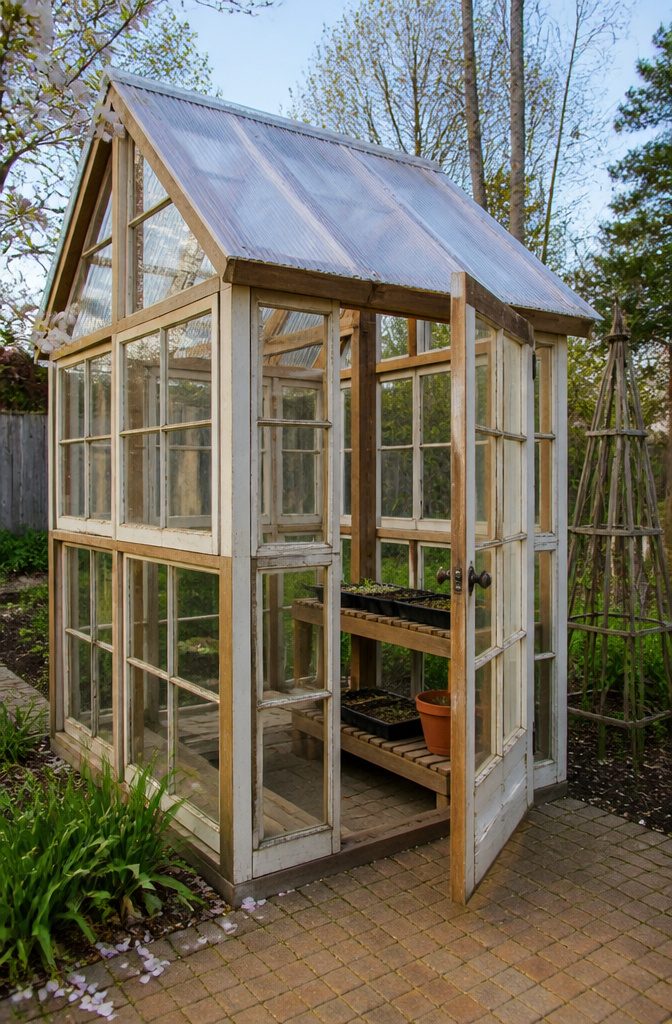
Old wood windows are cheapest at garage sales and antique markets, and the price is the whole appeal: a DIY build can run $100–$500 against $2,000+ for a store-bought kit.
Buy four windows close in size, then join them with hinges and screws for a small box. Matching sizes matter more than matching style.
For a walk-in version, the build gets advanced: 2x and 4x lumber, plywood, trim, a door, and polycarbonate panels filling any gaps the windows leave.
Glass roofing is the weak point. Hail can break it, and glass is heavy on the rafters.
I’d keep the salvaged windows on the walls and put clear corrugated polycarbonate overhead. It is lighter, lets in 95 percent of light, and one maker backs it with a 20-year hail warranty.
Seal the gaps between frames with door-and-window caulk, then silicone over it.
12. Small Sweet-Pea Greenhouse
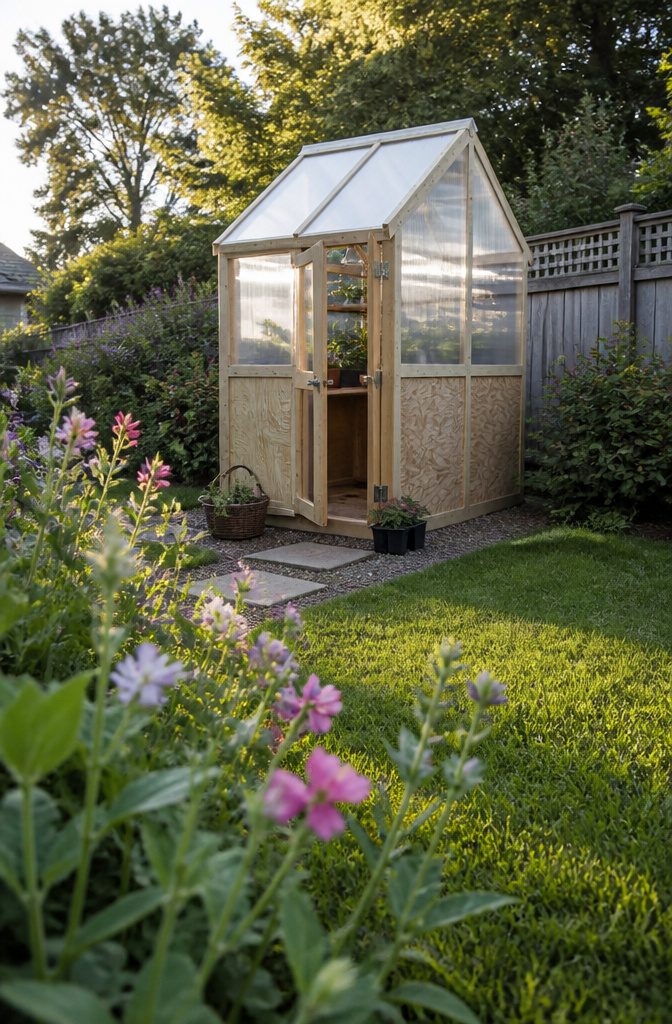
The Sweet Pea design is closet-sized, and that scale is its selling point.
It suits a yard where a full gable greenhouse would swallow the lawn, or a first-timer who wants to start seedlings without committing a whole weekend to framing.
The plans rate it intermediate, so expect real carpentry. You’ll need a tape measure, saw, drill, sander and safety glasses.
The materials are plain: 2x lumber for the frame, plywood, hinges, and polycarbonate panels for the glazing. Panels are the right call over glass at this size, since they’re lighter and won’t shatter if a ball or branch hits them.
I’d sand every cut edge before assembly. A small structure gets handled constantly, and rough 2x lumber near the door hinges will snag sleeves and gloves.
The Hillside Market, which drew up this design, offers several other small plans in the same style if the proportions don’t fit your space.
13. Cold Frame
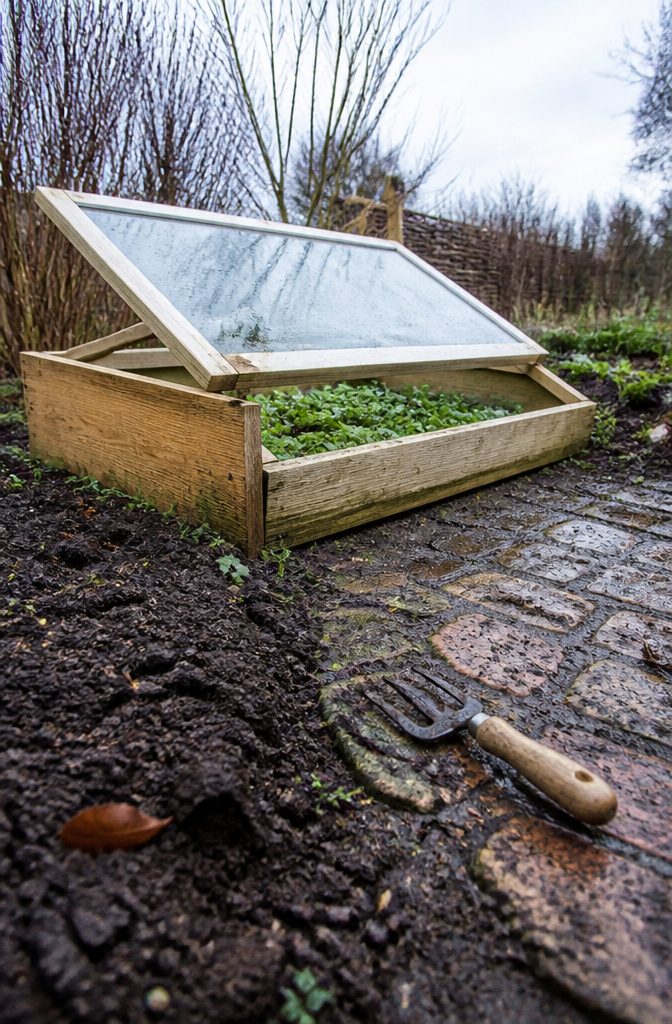
A cold frame is the fastest build on this list: a low box with a lid that traps heat around plants, and one afternoon is plenty.
Basic versions take an hour or two and use inexpensive 1x and 2x lumber, plywood, plastic and a pair of hinges. A saw, drill, tape measure and sander cover the tool list, so it suits a first-timer.
The lid decides how useful it is. A plastic-covered frame is the cheapest route, but a salvaged window makes the better lid because it is rigid, lets in light and is often free.
Build the box around whatever window you find, and make it deeper if you want taller seedlings. Add a vent so the plants don’t cook on a sunny day.
14. Deck or Patio Mini Greenhouse
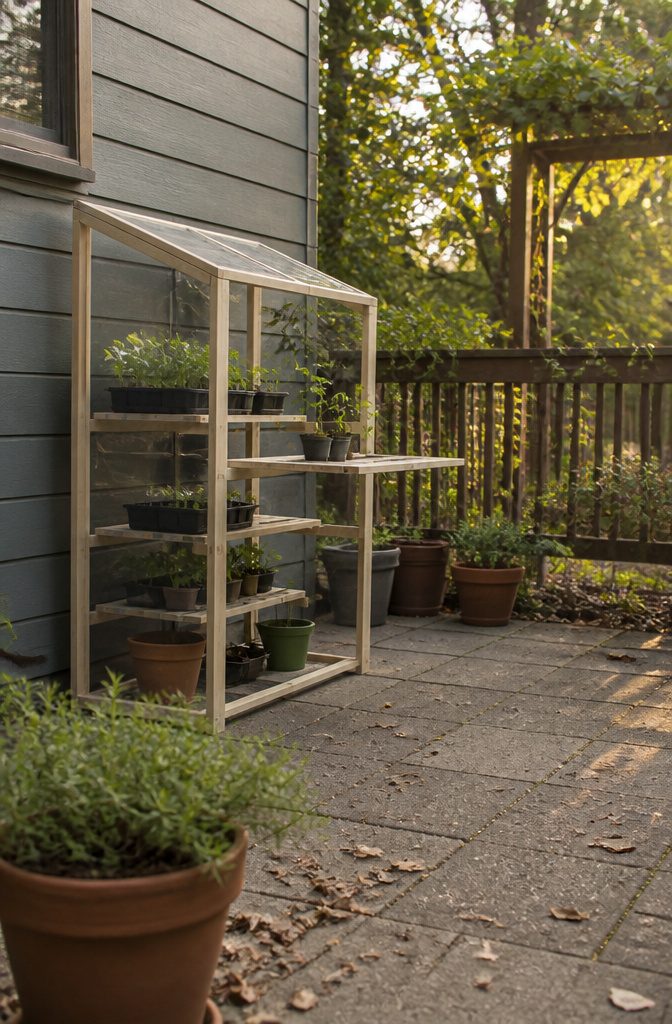
A mini greenhouse for a deck or patio only needs a few square feet of footprint, which is why this is the design I’d point renters and small-yard owners toward first.
The build is beginner level and runs on 2x lumber, with a tape measure, saw, drill, sander and safety glasses covering the tool list.
What sets it apart is the shelf. Removable slats let you pull a level out when a tomato or pepper outgrows it, so one frame holds seedlings in spring and taller plants by summer.
Make the slats loose-fitting rather than screwed down, and sand every edge, since you’ll be handling them all season.
The same frame also works indoors as a seed-starting rack if you add grow lights.
15. Tabletop Greenhouse
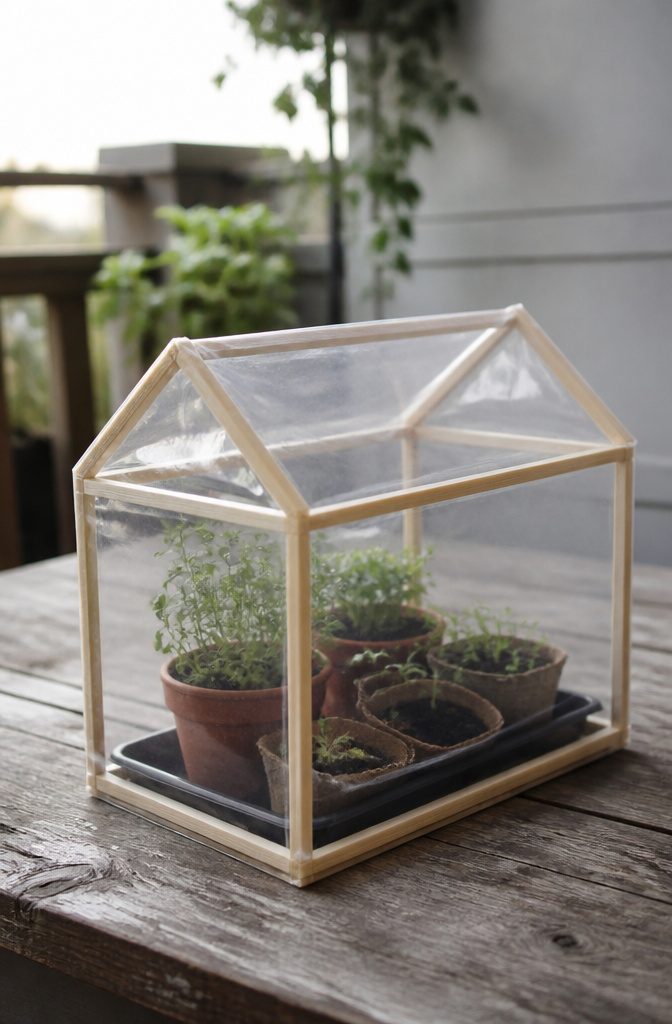
A tabletop greenhouse is the one build in this list that fits on a windowsill or a patio table, and it suits the plants that sulk in a full-size structure: small, delicate ones that struggle in ordinary indoor air.
The plans call for square dowels, glue, and plastic, so the frame is basically a tiny cage you cut and glue together, then cover.
Skill level is beginner. A tape measure, saw, drill, sander, and safety glasses cover the tool list.
I’d sand every dowel end before gluing, because the plastic skin is the only glazing, and rough edges will snag it the first time you pull it tight.
It’s a good fit for a renter, since nothing gets anchored or permanently sited.
16. Pallet-Wood Greenhouse Shelf
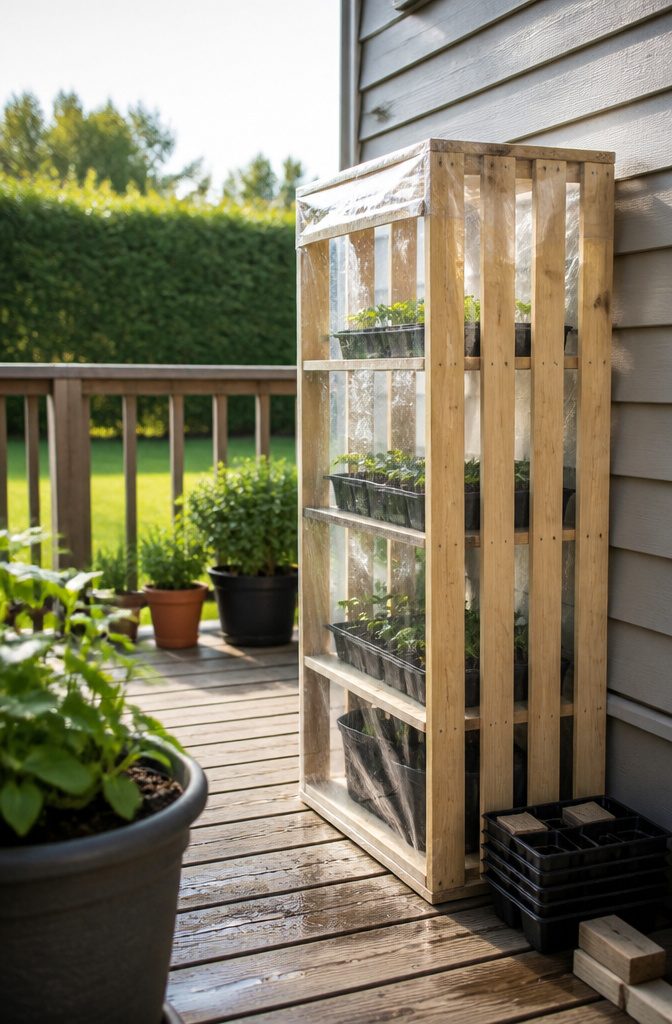
A greenhouse shelf is the right size for a deck, and it’s about as beginner-friendly as this project list gets.
The build calls for a tape measure, a saw, a drill, a sander and safety glasses, plus 2x lumber for the frame, pallet slats or fence pickets for the sides, and plastic to wrap it.
Pallet wood or cedar fence pickets keep the cost low, and fence pickets are the better pick if you want straight, uniform boards that need little sanding.
Pallets cost less but vary in thickness and often need more cleanup. Check any pallet before you saw it, since you don’t know what it carried.
The plan scales easily, so size the shelf to your deck rail or the wall it leans against before you cut a single board.
17. Collapsible Greenhouse
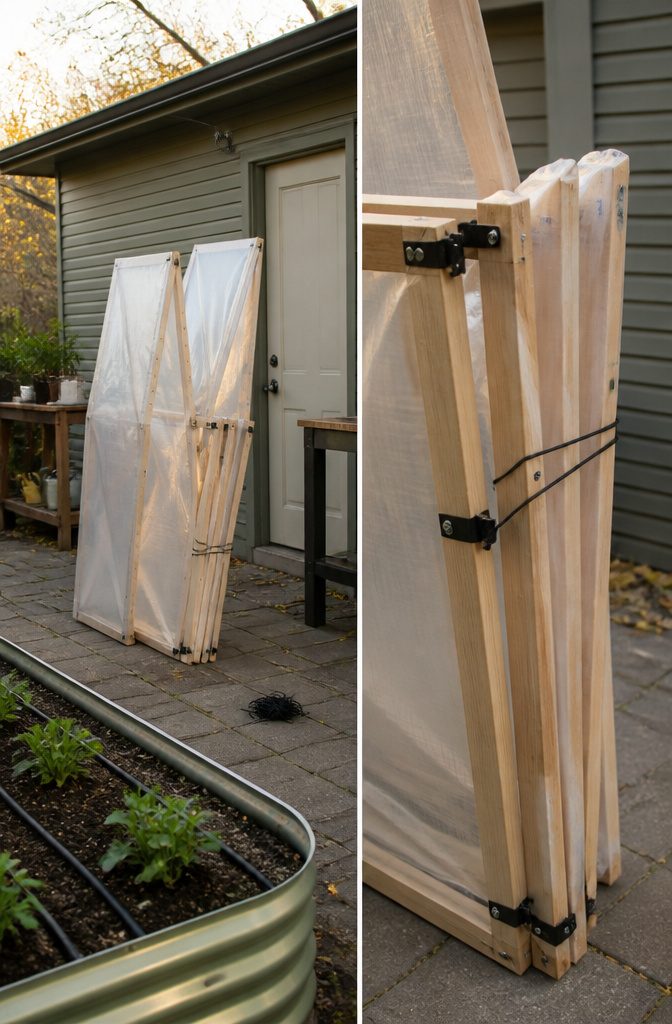
A collapsible greenhouse is the only design here you can take down in an afternoon and store in a garage.
The plan I’d start with uses 1x boards, greenhouse film, hardware connectors, ties and hinges, and it’s rated advanced, which surprised me for something so light.
The skill level comes from the hinges. Every joint that folds is a joint that can loosen, rack out of square, or tear the film at its crease.
Expect a shorter life than a fixed frame, and expect to re-tension or replace the film more often. Thin 1x lumber also won’t take wind the way a bolted-down structure does.
For a first-time builder with a mild climate and a single season of seedlings, it’s worth it. If you want a greenhouse running through winter, build something fixed instead.
18. Luxury Cedar Greenhouse
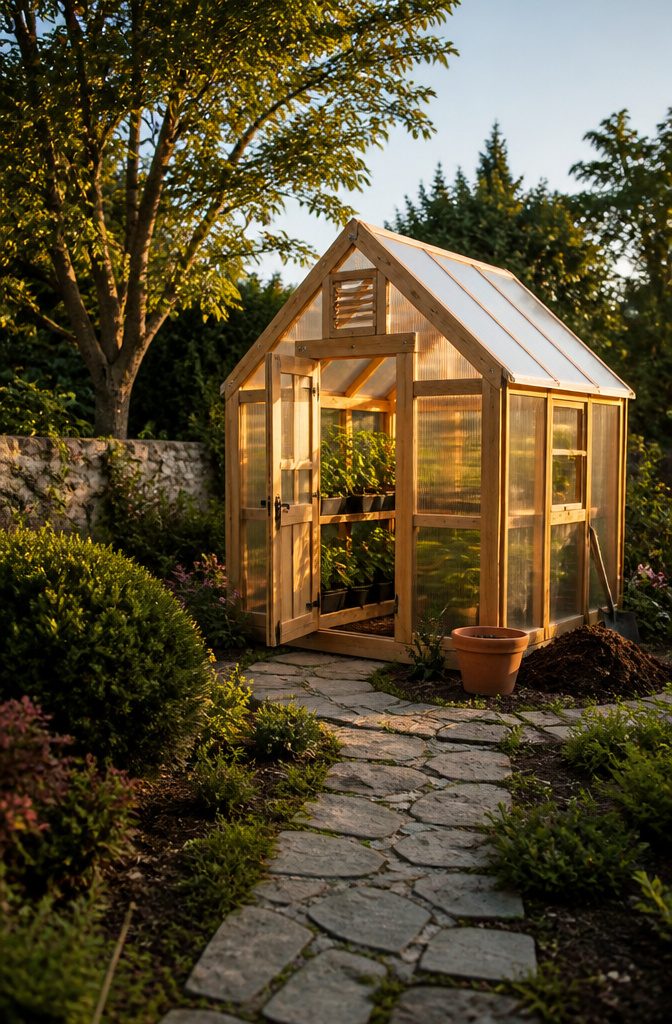
Cedar is what makes this build the splurge: it resists rot without a coating, and it costs far more per board than the pine or PVC used in most of the other designs here.
Paired with polycarbonate panels, it gives you a greenhouse that looks like a small garden building rather than a project.
The plan is detailed and comes with a video, which matters because this is an advanced build. You’ll want a tape measure, saw, drill, sander and safety glasses at minimum, plus cedar lumber, polycarbonate sheeting and screws.
I’d only take this one on if you’ve already built something with framed walls. Skip it for a first project; a cheaper design teaches the same cutting and squaring skills without a cedar-sized mistake.
19. Hoop-House Greenhouse
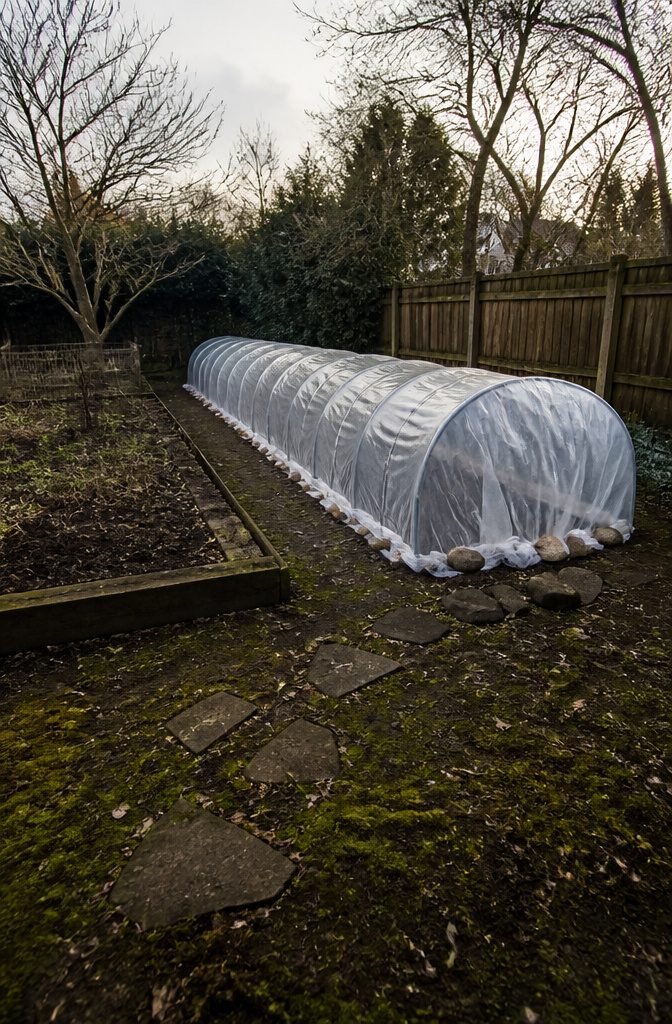
PVC is strong enough for a hoop house in mild-winter or snow-free climates, and it is the cheapest, easiest frame to bend.
Set each pipe about 2 feet into the ground, or slip it over rebar stakes driven 12 inches deep, and tie the arches together with a ridge pipe along the top.
Tape every joint and cap the pipe ends so they don’t puncture the film.
Snow is where PVC fails.
In heavy-snow areas, pull the plastic off before winter, or the weight can flatten the frame by spring. If you want to leave it up, EMT conduit costs a little more and is stronger, especially on larger structures.
Plastic film in 4–8 mil is the usual covering. Cut it with at least 1 foot extra all around, bury two edges in furrows, and weigh the other edges with rocks so you can lift them for access.
20. Budget PVC-and-Vinyl Greenhouse
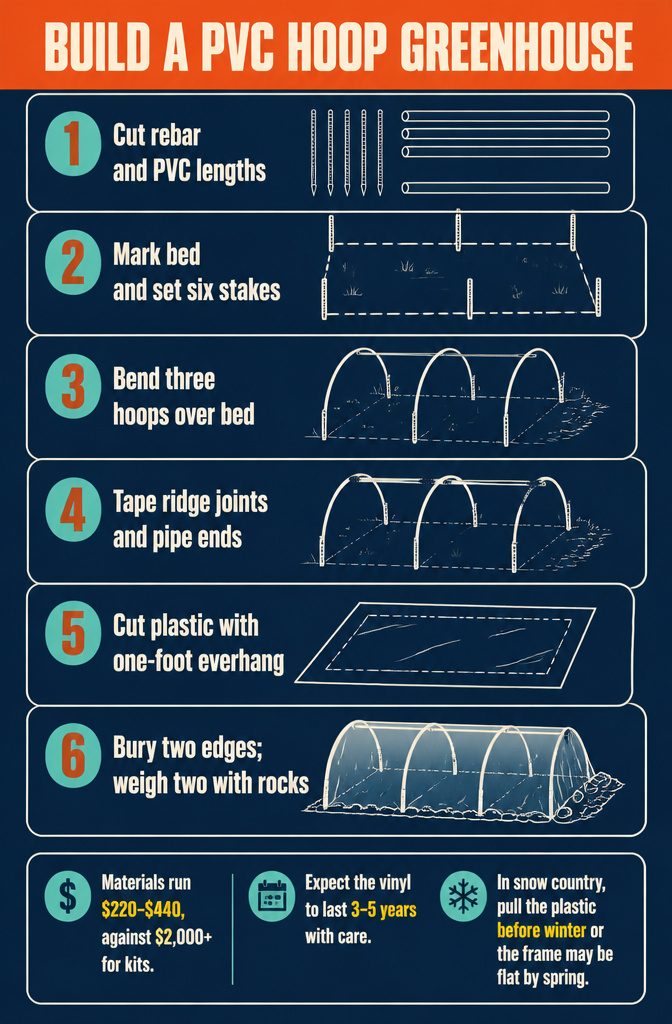
- Cut six 18-inch lengths of rebar, three 10-foot pieces of ¾-inch PVC, and one ¾-inch PVC ridge pipe a little over 6 feet long.
- Mark a 4 by 6 foot bed. Pound rebar 12 inches deep at each corner and at the midpoint of both long sides.
- Slip a 10-foot pipe over one stake, bend it across the bed, and fit the other end over the opposite stake. Repeat for all three hoops.
- Lay the ridge pipe over the hoops and wrap every joint in electrical tape. Tape the pipe ends too, so they can’t puncture the plastic.
- Cut the plastic with at least 1 foot extra all around.
- Drape it over the frame and bury the edges of one side and one end in furrows.
- Weigh the other side and end with rocks, so you can lift them to get in.
Materials run $220–$440, against $2,000+ for kits.
Expect the vinyl to last 3–5 years with care. In snow country, pull the plastic before winter or the frame may be flat by spring.
21. Patio-Door Greenhouse
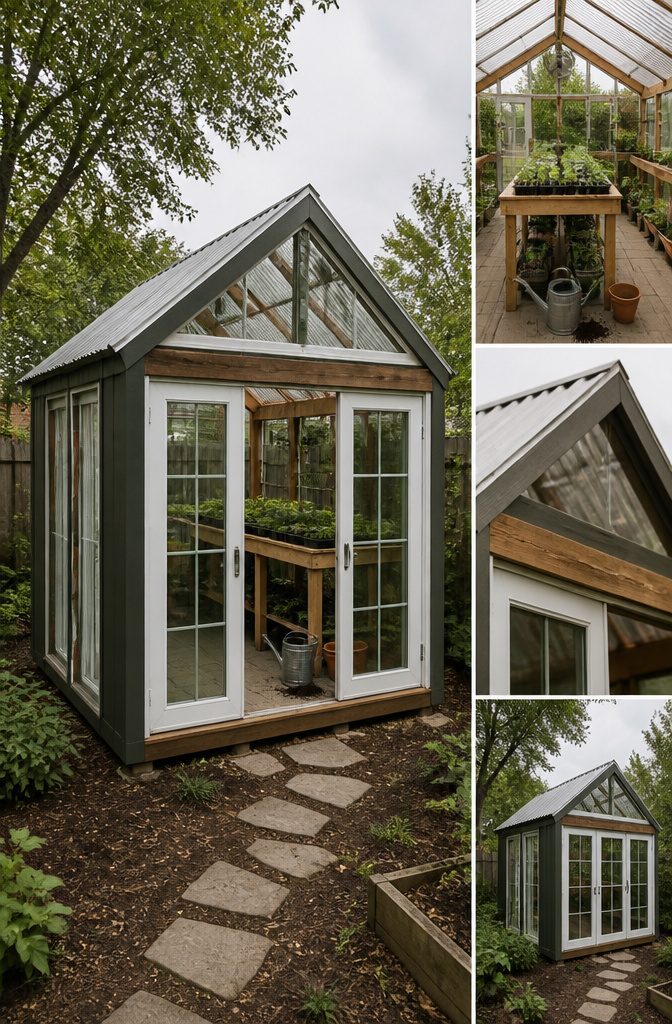
Used patio doors do the heavy lifting here, and at $10 each without the frame they make the glass nearly free.
The doors run 79–80 inches tall and about 36 inches wide, so build the posts to suit: the bottom of the 2-by-12 header should sit 77–78 inches off the floor, leaving 2 or 3 inches above to screw the doors in.
Walls stand 7½ feet, with the center rising to 9½ feet.
Inside, tables are 32 by 36 inches, a waist-high height that lets you reach across. A 4 by 7 foot center bench leaves a 3-foot walkway all around.
Total cost lands just under $1,000, mostly in lumber. Keep the vinyl or aluminum side of each door facing out.
22. Corrugated-Panel Greenhouse
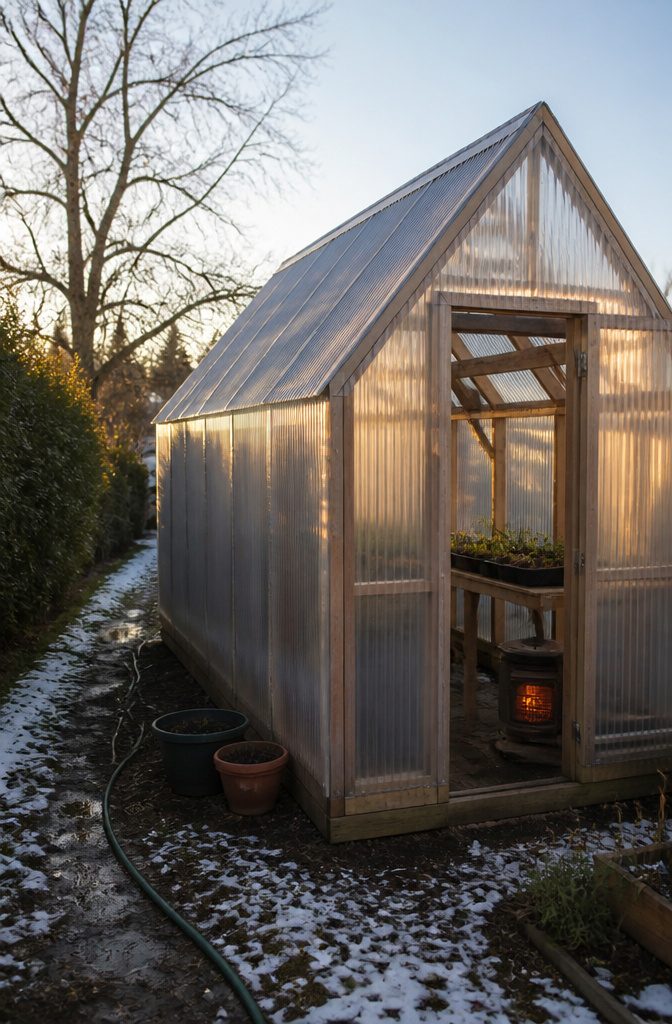
An 8 by 16 foot frame of treated lumber suits corrugated panels well, because the sheets run 8 feet and cover the wall height with almost no cutting.
Studs every 24 inches give each 26-inch-wide sheet solid backing, so the edges meet wood and the screws have something to bite. Treated lumber matters most at the bottom plate, which sits close to damp soil.
Pitch the roof steeply. Snow slides off a steep slope instead of piling up, and corrugated sheets are light enough that I wouldn’t ask them to carry a load.
For winter, a small heater set to hold 40 degrees keeps tender plants safe through freezing nights without running constantly. Corrugated panels pass less light than clear glazing, so this build suits hardy crops and seedlings better than sun-hungry fruiting plants.
23. Rebar-and-PVC Greenhouse
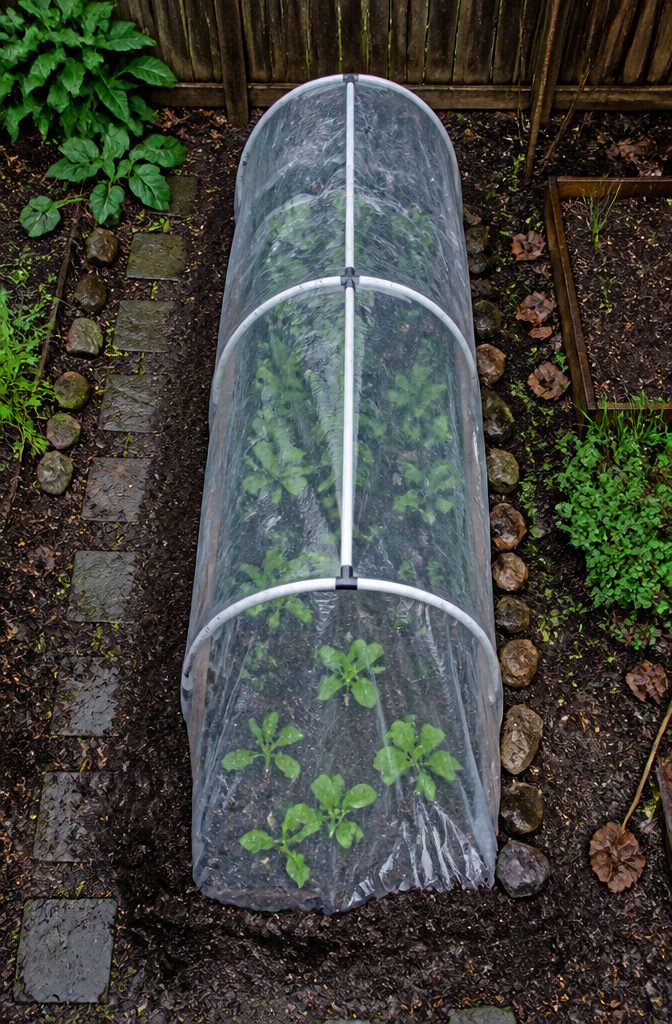
Six 18-inch rebar stakes, three 10-foot lengths of ¾-inch PVC and one extra piece of the same pipe just over 6 feet long make the whole frame.
Mark a 4 by 6 foot bed and pound a stake 12 inches into the ground at each corner and at the midpoint of each long side.
Slip a PVC end over one stake, bend the pipe across the bed, and seat the other end on the stake opposite. Repeat twice.
Lay the 6-foot piece over the tops of the three hoops as a ridge and tape every joint with electrical tape. Tape the pipe ends too, or they will punch through the plastic.
Cut the plastic with at least 1 foot extra all around. Bury the edges in furrows along one side and one end, and weigh the other side and end with rocks so you can lift them to get in.
In snow country, pull the plastic before winter or expect a flattened frame.
24. Small-Space Kit or Balcony Greenhouse
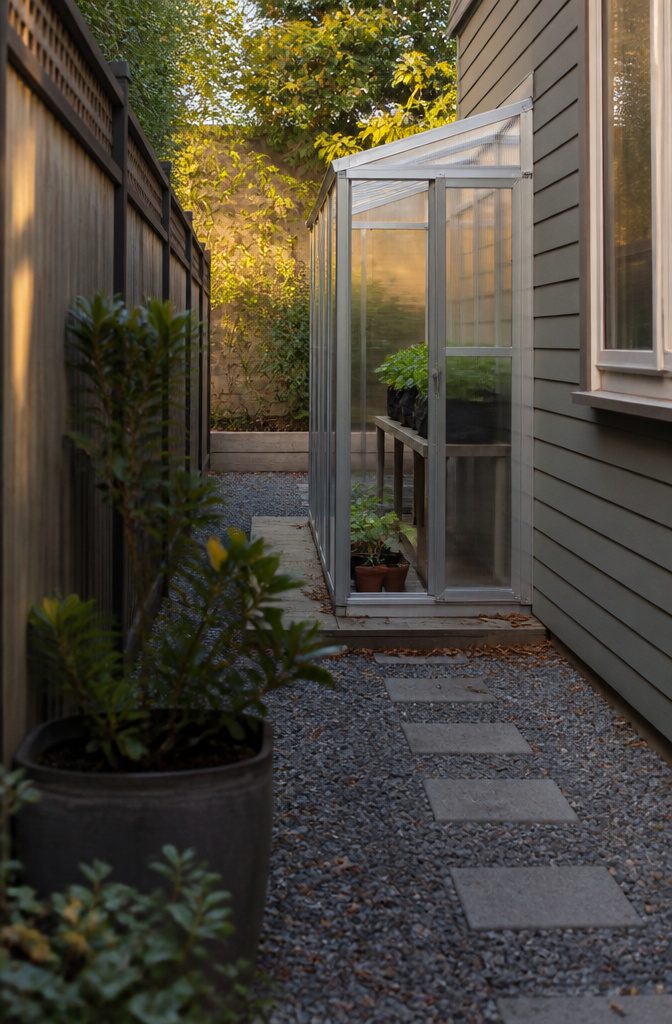
A 6 by 4 foot aluminum kit gives you 2.5m² of growing floor, and that is about the smallest footprint where a real bench and a row of grow bags both fit.
The glazing choices are horticultural glass, toughened glass or polycarbonate. Polycarbonate is the one I’d pick for a first build, since a dropped pane won’t cut anyone.
For a balcony or a narrow side yard, the Primrose design is 4 feet wide and under 4 feet tall, with sliding doors and a ground-fixing anchorage kit. It holds potted plants and seedlings, not tomatoes in the ground.
Hartley Botanic offers 15 colors, so it suits someone matching a house trim. I’d skip it on a few-hundred-dollar budget.
Building from scratch only beats a kit when you already own the lumber or windows.
Choosing Design and Materials
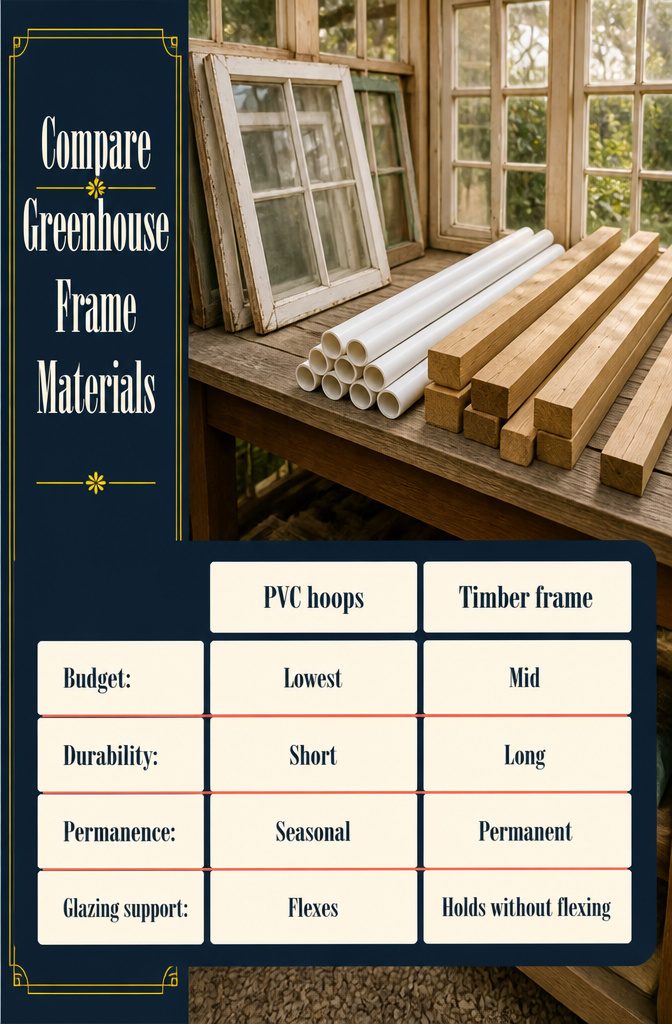
Price your lumber first, because it sets the budget for everything else. Timber framing costs more than PVC but holds glazing without flexing, so it suits a permanent build.
Reclaimed windows and patio doors can cost almost nothing, but they dictate the design: the frame has to be built around whatever sizes you find.
Real Homes tells the story of one builder who got her glazing this way, and it shows how a design can follow the materials:
I contacted a local glazers, and asked them if they had any old windows they were getting rid of. Fortunately, they had lots and were happy for me to take them.
Ask glaziers and demolition crews before you buy anything new.
| Material | Budget | Durability | Permanence |
|---|---|---|---|
| PVC hoops | Lowest | Short | Seasonal |
| Timber frame | Mid | Long | Permanent |
| Reclaimed windows | Lowest | Medium | Semi-permanent |
| Patio doors | Low | Long | Permanent |
| Polycarbonate | Mid | 10+ years | Permanent |
Frequently Asked Questions
Is it cheaper to build your own diy backyard greenhouse?
Usually yes. One builder who bought all materials new spent about $1,600 and said that was closer to a third of a comparable kit’s price, though lumber costs vary over time.
What is the cheapest way to build a greenhouse?
Reclaimed windows and patio doors can cost almost nothing, but they dictate the design because the frame has to fit whatever sizes you find. Ask glaziers and demolition crews before buying anything new.
How long will a vinyl-covered greenhouse last?
Expect 3–5 years with good care.
Marine-grade vinyl can last longer than standard plastic sheeting. In snow country, pull the plastic off before winter so the weight doesn’t flatten the frame.
Is PVC strong enough for a greenhouse frame?
Yes, for small and medium hoop houses in mild-winter or snow-free climates. Heavy snow is where it fails, so either remove the plastic before winter or use EMT conduit, which costs a little more and is stronger on larger structures.
Can you frame a greenhouse with wood?
Yes, and wood is the easiest frame material to work with for most DIYers.
Pick a wood suited to the outdoors: cedar is the best choice, and treated Douglas fir works if cedar costs too much. Keep the bottom plate on treated lumber or pavers so it stays off damp soil.
Do I need a permit to build a backyard greenhouse?
Most small backyard greenhouses don’t, but check your local building codes before you start.
One builder’s township required a permit only for structures over 200 square feet. Your area may set a different limit.
Can I grow year-round in a budget greenhouse?
Yes, but very cold climates may need supplemental heat.
A small heater set to hold 40 degrees keeps tender plants safe through freezing nights without running constantly. Fixed, glazed designs handle winter better than collapsible or film-covered ones.
How do I prepare my backyard for a greenhouse?
Level and tamp the ground first. Then lay landscape fabric, a perforated sheet that lets water through but stops weeds and grass from growing up into the floor.
Pick a spot in full sun, ideally on the south side of the house and clear of trees and buildings that cast shade.
Should a greenhouse have a raised floor?
It’s a personal choice. The structure can sit directly on the ground, on a raised wood floor, or on a more permanent base such as concrete.
Prepare the ground the same way for any of them, and check local rules, since foundation requirements can vary.