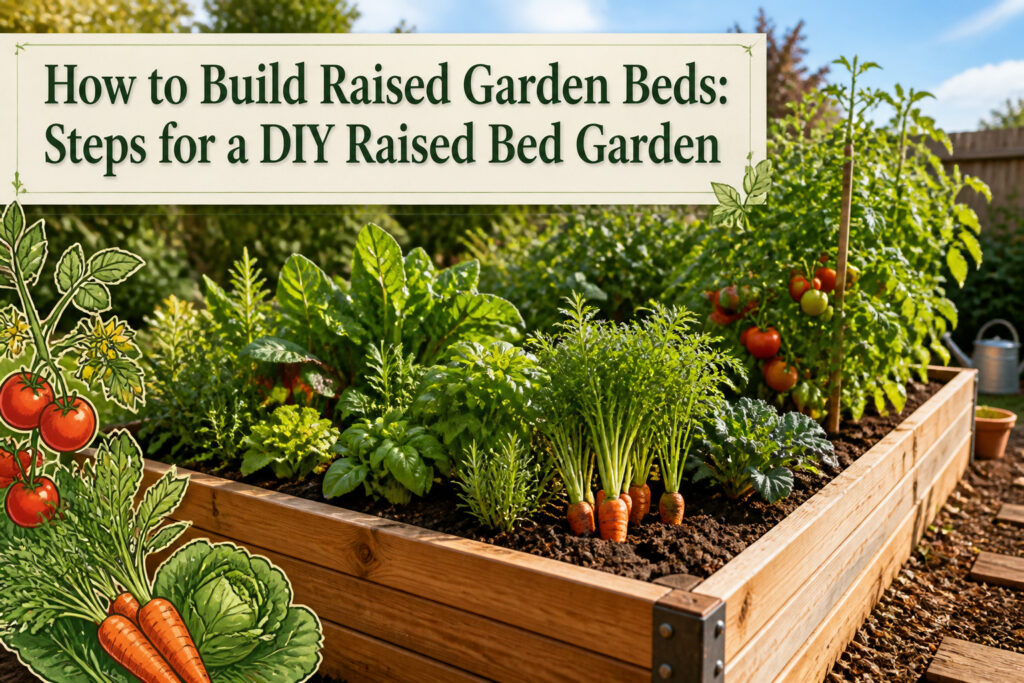
A finished raised bed costs $100 to $300 in lumber plus another haul of soil most people forget to budget for, and the whole thing takes a weekend if you have straight boards and a level spot. The stage that breaks most builds is not the corners or the screws; it is the soil mix. Straight topsoil from the yard packed too tight, drained poorly, and left my first spring’s carrots stubby and pale by June.
1. Choose a Location
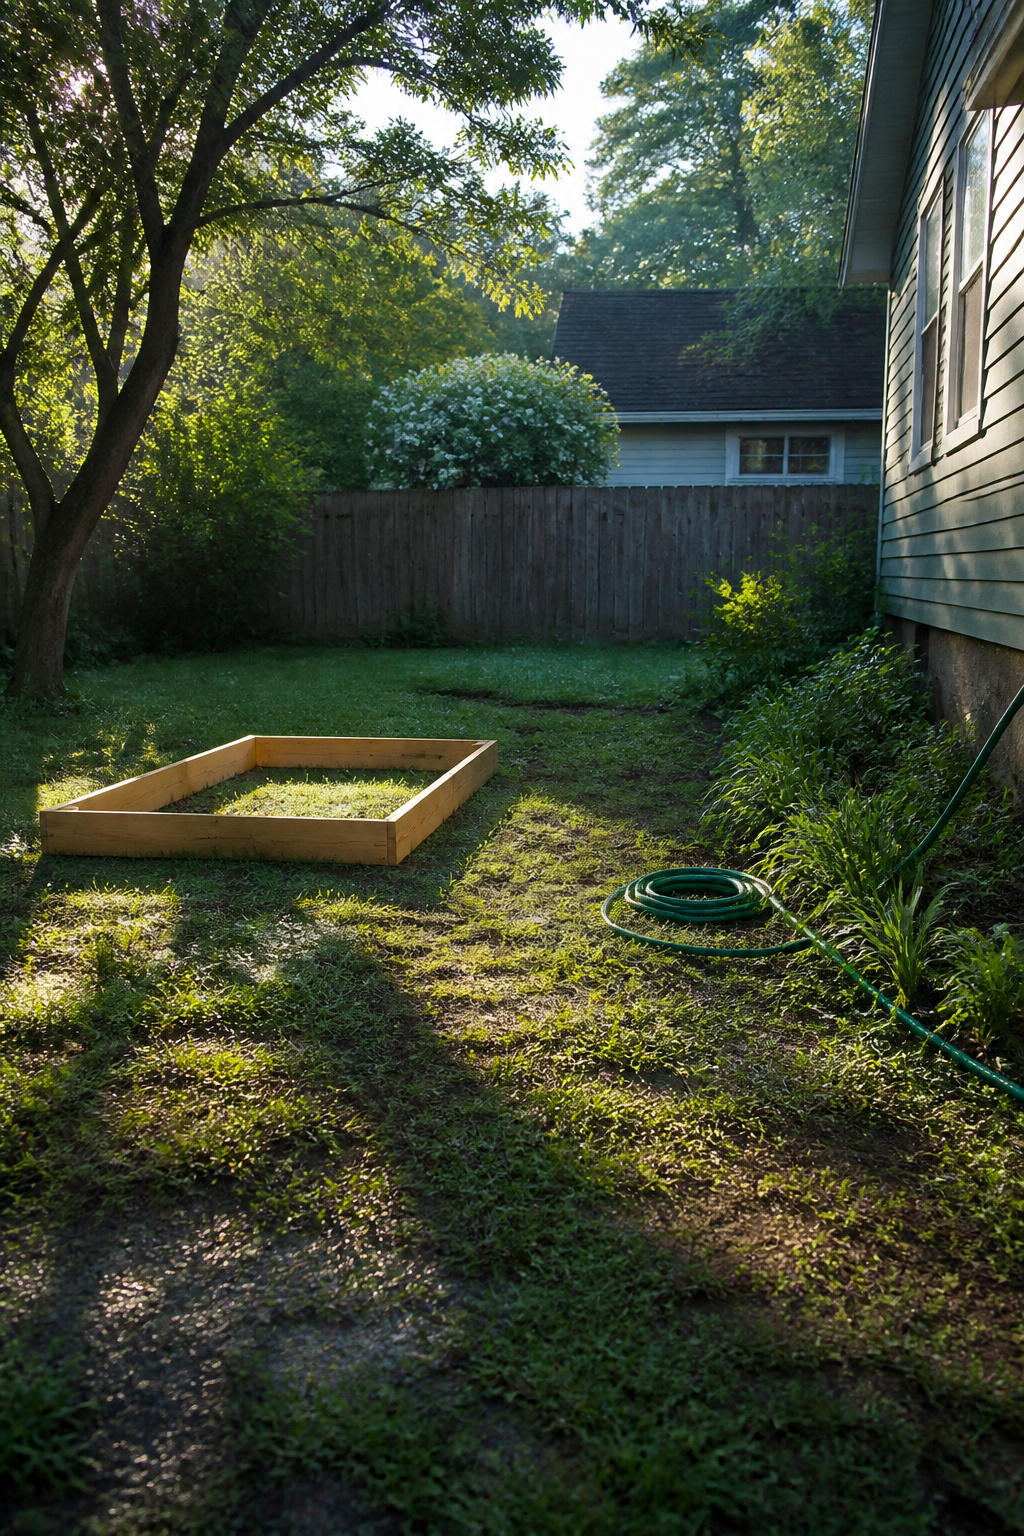
Vegetables need at least 6 to 8 hours of direct sun to produce well, so the first thing I checked was which parts of my yard actually got that light and which just looked bright. Morning sun turned out to be the steady workhorse. In my spot, the beds caught eastern light from sunrise until early afternoon, and that consistent exposure kept the soil warming early without the brutal late-day stress that fried my lettuce one July. Afternoon sun in that same yard would have pushed tomatoes harder but demanded daily watering through August.
Drainage mattered as much as light. I watched where puddles formed after rain and where the grass dried out fastest, then put the beds on the higher ground that drained within a few hours. South of the house worked best, with the long edge running east to west so both rows of plants got sun. North of any building stays shaded too long for most vegetables, and I learned that the hard way with a trial bed against my back fence that grew nothing but leggy kale.
A water source nearby keeps the habit alive. I ran a hose to within ten feet of my beds after one dry week when hauling buckets made me skip a day and the peppers sulked for two weeks after.

OUTDOOR POTTING SOIL: Miracle-Gro Organic Outdoor Potting Mix contains a quick-release natural plant fertilizer and also feeds plants for up to 2 months

OUTDOOR POTTING SOIL: Miracle-Gro Organic Outdoor Potting Mix contains a quick-release natural plant fertilizer and also feeds plants for up to 2 months

2. Determine the Size
A 4-foot width is the widest any bed should be if you want to reach the middle without stepping inside and compacting the soil. Length can run 6, 8, or even 10 feet, though boards longer than 8 feet start to bow under soil pressure unless you add center bracing. Depth is where I made my first real mistake. I built a 4-by-4 bed only 10 inches deep, figuring shallow soil would do for lettuce and herbs. Tomatoes and peppers sulked all summer, roots hitting bottom, and I ended up digging the whole thing out the next spring.
The standard 4-by-8-foot footprint, 16 to 18 inches deep, hits a balance most vegetables actually want. Taller beds mean less bending and better moisture retention, but every extra inch of height multiplies how much soil you haul. A 4-by-6 at 9 inches deep swallows about 18 cubic feet of fill; scale that up and the wheelbarrow loads add up fast. I went 4-by-8 at 18 inches for my second build, working with standard 8-foot lumber I halved on site, and that bed is still in use six years later.

NO MORE HARD INSTALLATION - SET UP IN MINUTES. Tired of struggling with stiff barbed fittings? This drip irrigation system features quick-connect fittings that let you push, lock, and secure tubing effortlessly. No tools, no leaks, just a smooth setup experience. Enjoy a frustration-free installation and get your garden watering system running in minutes.

【Even & Consistent Root Watering】Features micro-pore seepage technology that distributes water evenly along the entire hose, transforming spot watering into uniform line watering directly to plant roots. Unlike traditional drip irrigation systems with clog-prone emitters, this soaker hose creates a continuous moisture band for healthier, deeper-rooted plants

Hybrid Design - 1/4" Quick Connected with 360°Automatic Irrigation: this kit combines two of the most trending watering technologies in one system: 360° curved bendable misting nozzles for adjustable directional misting; Quick-connect drip sprinkler system with vortex & 8-hole stream design for stable and efficient watering. This hybrid design makes it a versatile micro drip irrigation system for modern gardens.
3. Gather Materials
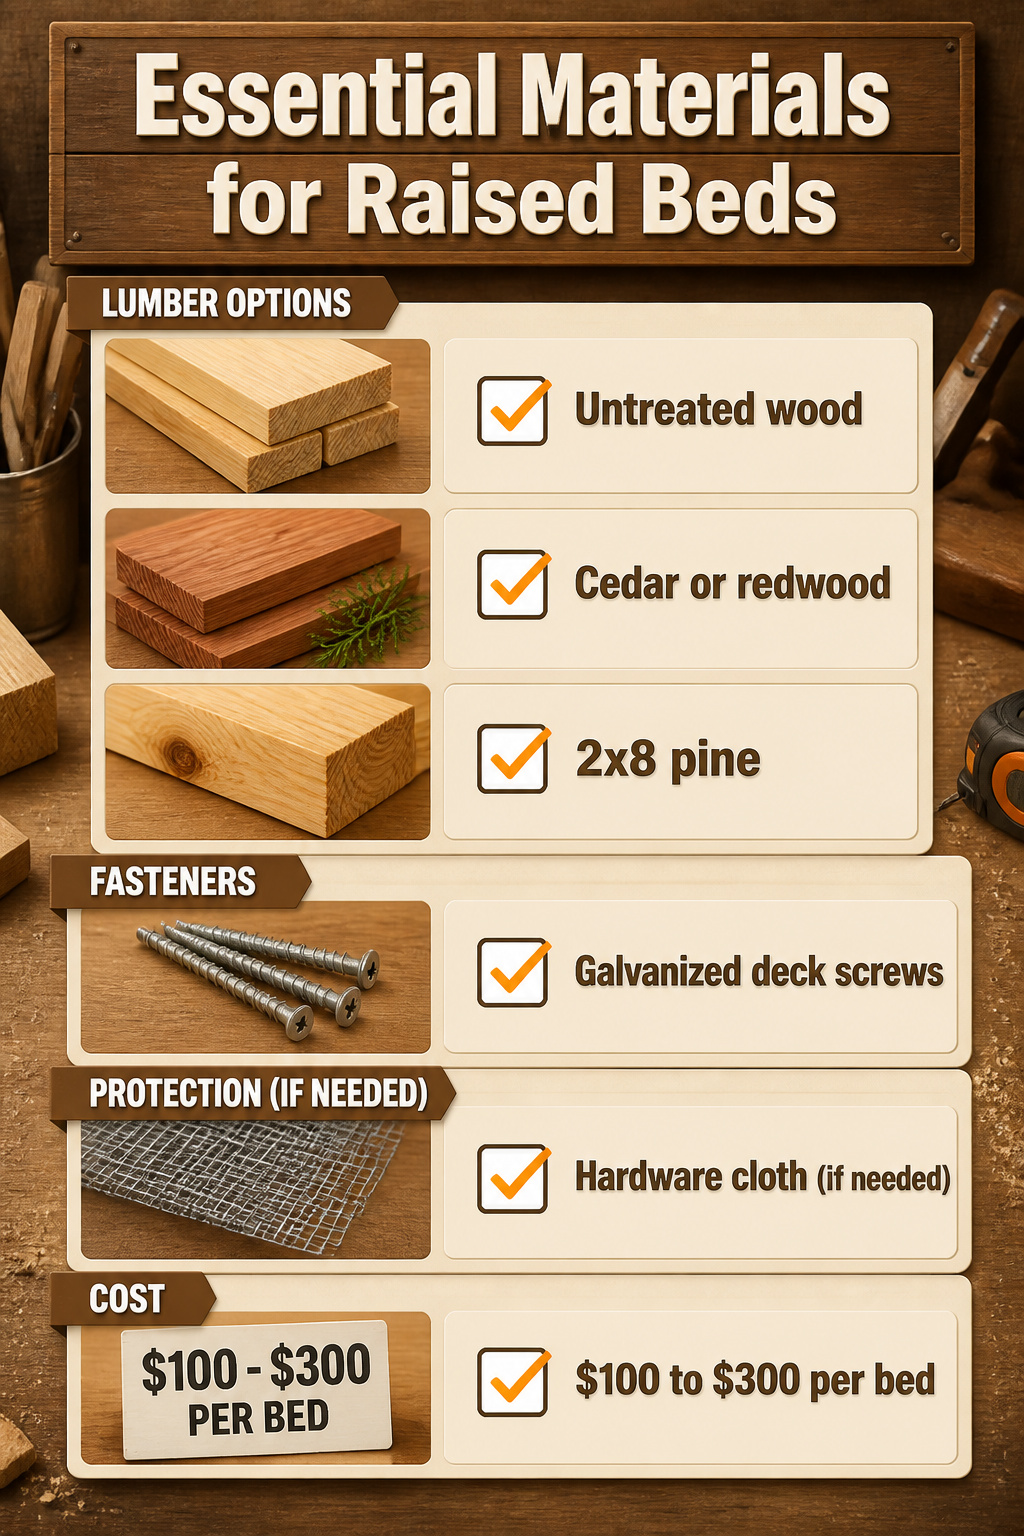
Untreated wood is the only material that belongs in a raised bed if you are growing food. Treated lumber resists rot, but the chemicals leach into soil and can stunt plant growth. Cedar and redwood carry natural oils that fight decay without additives, and they last years longer than pine. Pine is the budget path: it will hold up five to seven years and costs far less, which matters when you are building two or three beds at once.
For screws, galvanized deck screws are the standard. A 3-inch length joins the box corners, while 2.5-inch screws work for any internal bracing. I skip the hardware cloth in most builds, but if gophers or voles are active in your yard, a layer of half-inch mesh across the bottom of the frame stops them from tunneling up into the roots.
The total for lumber and fasteners runs $100 to $300 per bed, depending on your local market and whether you spring for cedar or stick with pine. That figure does not include soil, which is a separate line item and usually the larger spend. I bought my last batch of 2×8 pine at a regional lumberyard after checking the big-box store; the difference was small, but the yard let me pick through the stack for straighter boards.

DIMENSIONS: 32. 3 in. L x 14. 7 in. W x 30. 7 in. H

Eco-Friendly Recycled Smart Gravel: Made in the USA from 100% recycled plastics to help reduce environmental waste and plastic pollution
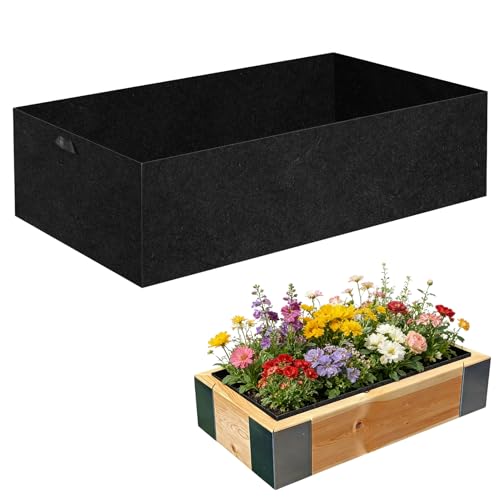
Garden Grow Bed Growing Bags: The package includes 1 packs of thick fabric garden grow bed bags. The raised garden bed liner allows you to plant various flowers, fruits, and vegetables. Bring you the fun of diversified planting and let your garden show a rich and diverse landscape
4. Prepare the Site
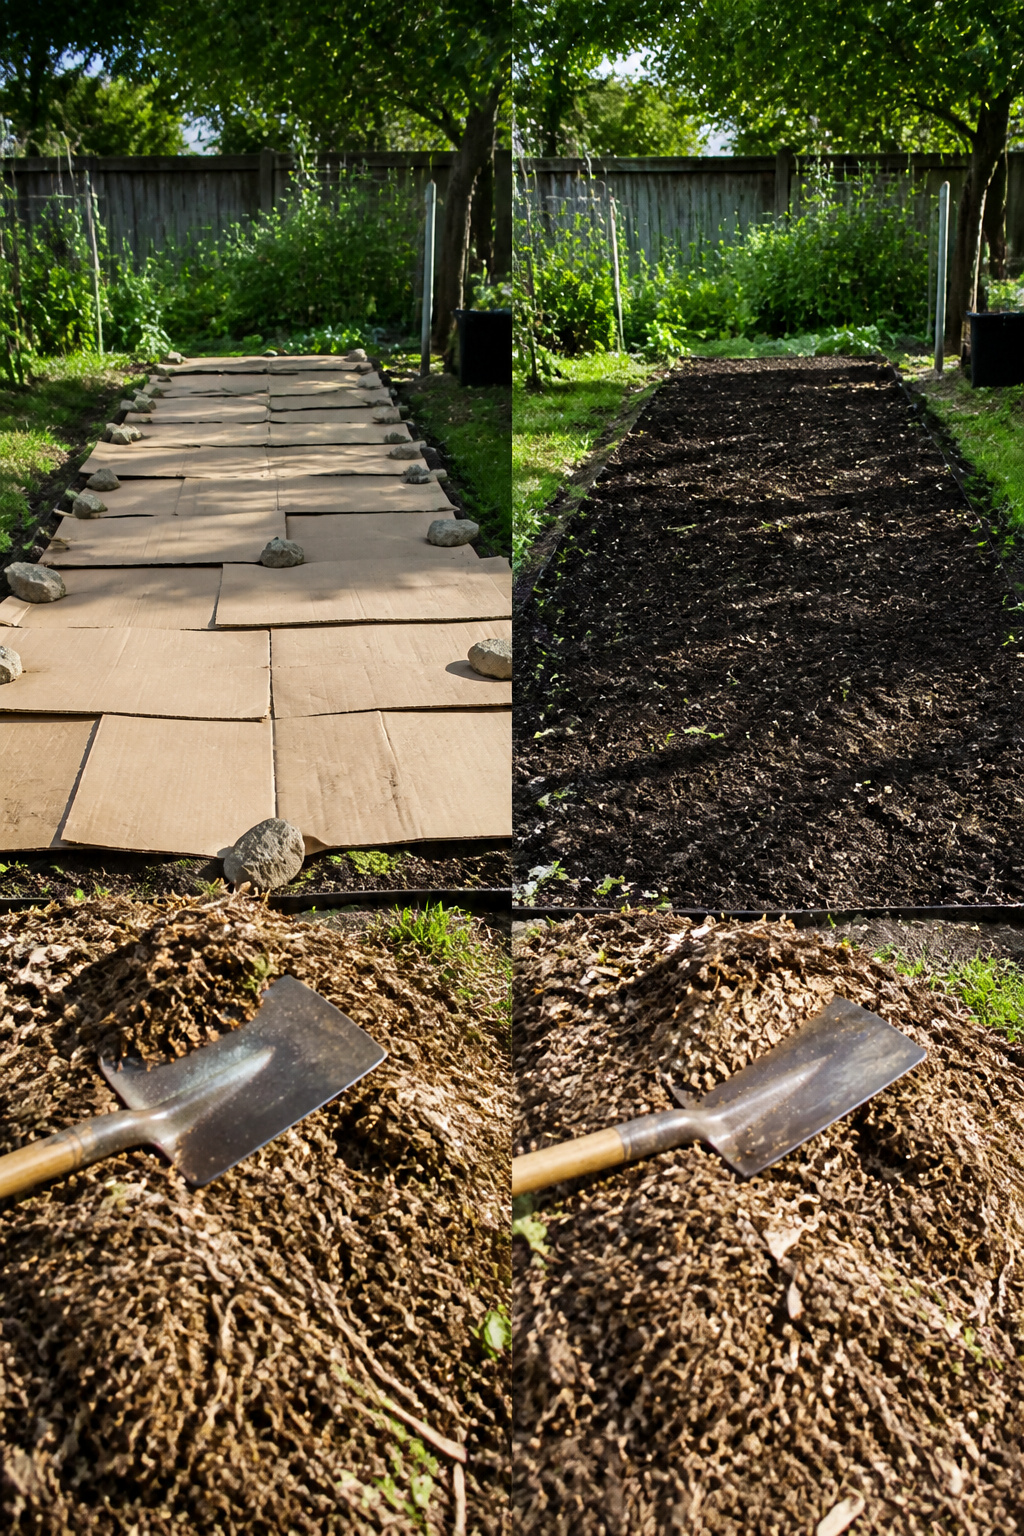
Clearing the ground sounds simple until you try it. My first bed, I spent a full Saturday with a flat shovel, peeling sod off in strips two inches deep, flipping them grass-side down in the hole I’d dug. The Cornell method: mark the bed area plus eighteen inches around it, strip the sod, dig four inches down for the frame to sit in, pile that topsoil separately. It works. It also works your shoulders into jelly.
The shortcut changed my weekends. Corrugated cardboard laid over mown grass, moistened, and pinned down with earth staples or stones, then mulched over, smothers what’s underneath without the digging. I place it, wet it, weigh it, and walk away. The grass dies off, the cardboard breaks down, and by the time I’m filling the bed, the soil beneath is workable and nearly weed-free. For the walkway around the bed, that same cardboard barrier topped with wood chips or crushed stone keeps the grass from marching back in. Two ways to play this: sweat through the sod removal for instant planting space, or lay the cardboard and wait a season. The cardboard wins if your timeline allows, and for most weekend builders, it should.

Our garden bed corner brackets are about 12 inches in length and 4.5 inches in width, 4.5 inches in height, holding up to 2'' x 12'' planks; They are lightweight and portable, can be stacked for storage, will not take up much space

Ergonomic Height: Standing at 30 inches tall, it reduces strain from bending and kneeling, promoting more comfortable gardening.

Generous Planting Space: Ample bed space provides your plants and vegetables with room to thrive, promoting healthy growth and robust yields.
5. Build the Frame
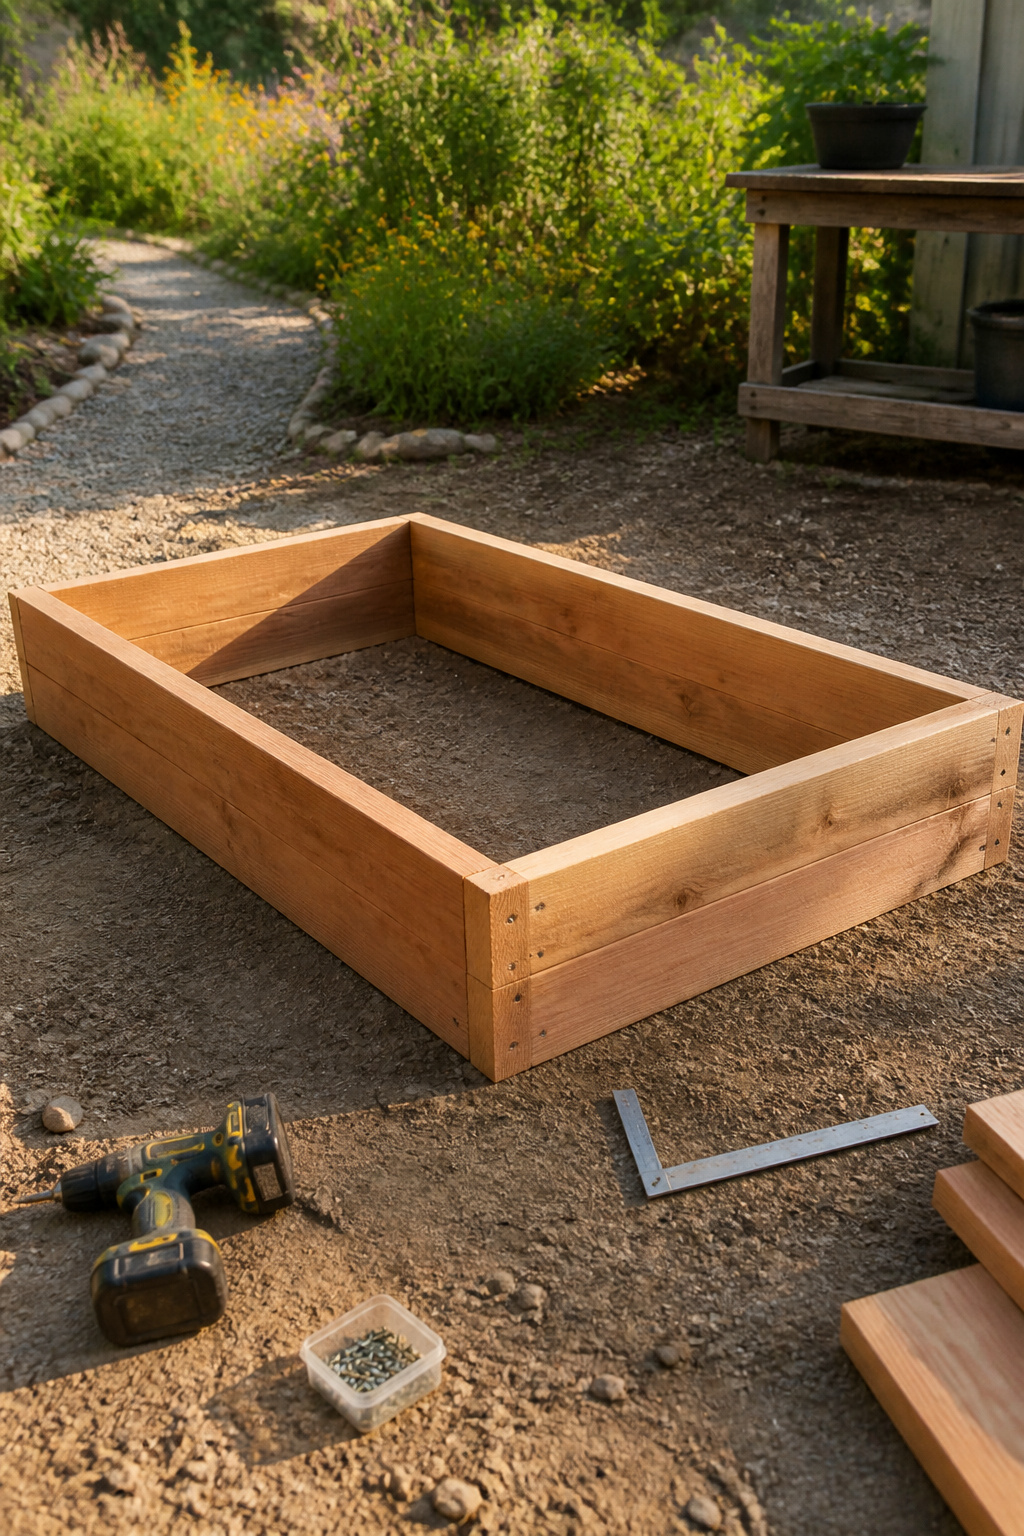
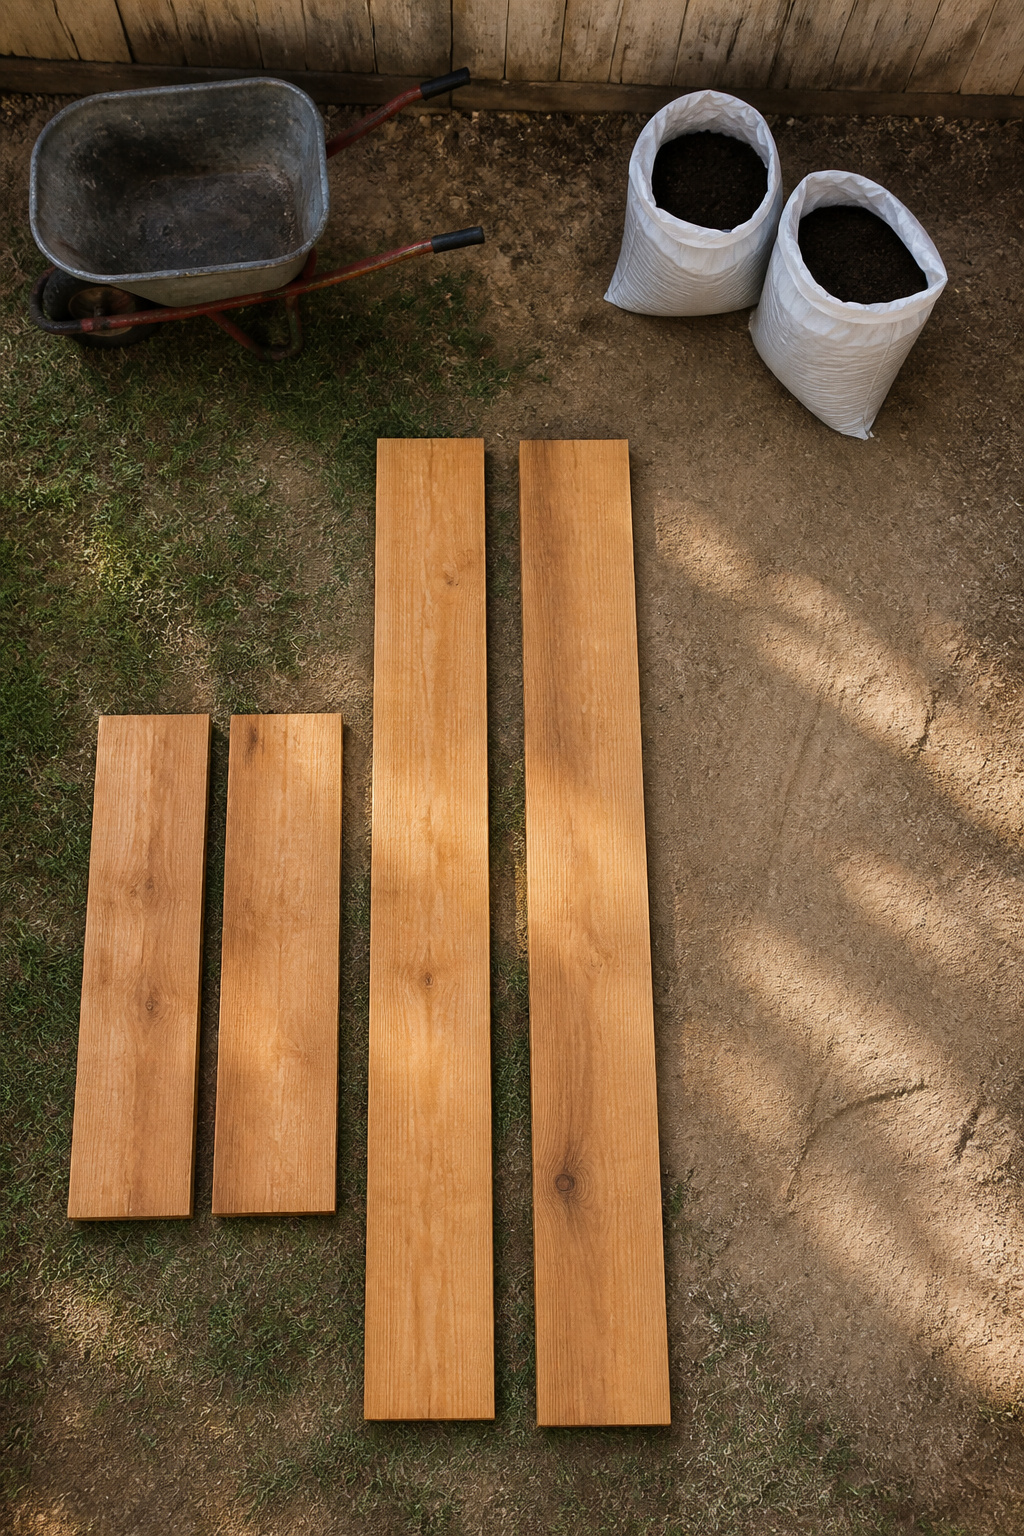
The 10-foot boards get laid out first, with the shorter four-footers fitting inside them at the ends. A framing square is the tool that saves you here, not a tape measure held at arm’s length. I learned that the hard way on my first corner, where the pilot holes went in straight but the boards themselves sat at something closer to a rhombus than a right angle. Three 3-inch deck screws per corner, pre-drilled so the cedar doesn’t split, and then you check again because wood bows and ground shifts.
Level on sloped ground means the box is level, not that the ground beneath it is. You dig down where the grade runs high, or pack paver sand under the low corners, until the bubble sits center. Skip this and you’ll watch soil wash out every rain, same as I did on beds I rushed through years back. The framing square gets you close; the level tells you when to stop fussing. Neither will be perfect, especially with bowed stock, but within an eighth inch keeps the soil where you put it.
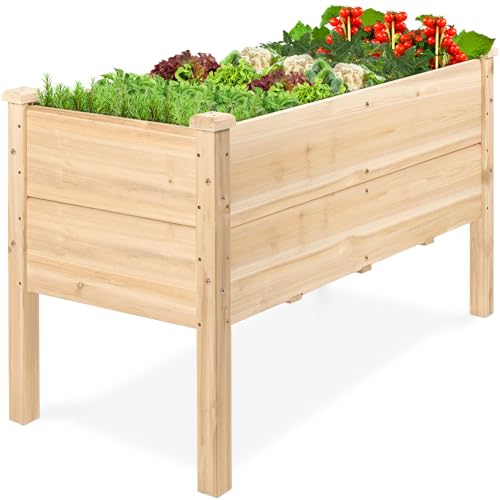
DEEP PLANTER FOR MAXIMUM YIELD: With 16" of soil depth and a spacious planting area, this elevated bed supports healthy root vegetables like carrots, beets, and radishes while allowing more crops per bed, boosting overall harvest and garden productivity

【18’’ Growing Depth】Measuring 48"(L) x 24"(W) x 18"(H), the metal raised garden bed holds 89 gallons of soil and provides extra large growing space for vegetables, fruits, flowers and other plants.
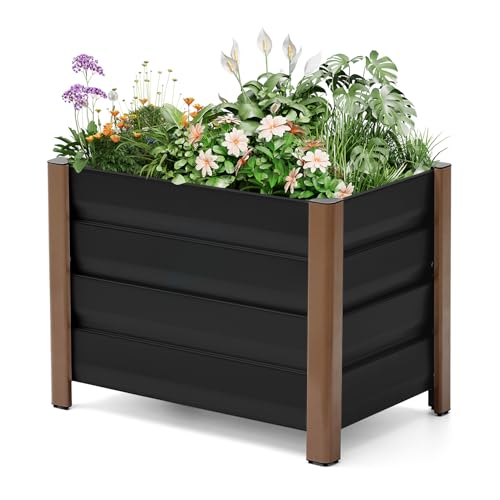
PREMIUM ALUMINUM CONSTRUCTION: Unlike heavy galvanized steel planters, this raised garden bed is crafted from lightweight aluminum alloy that won't rust or corrode over time. It maintains its sleek white finish through rain, sun, and snow—built for lasting durability on patios, balconies, and gardens
6. Add a Bottom Layer
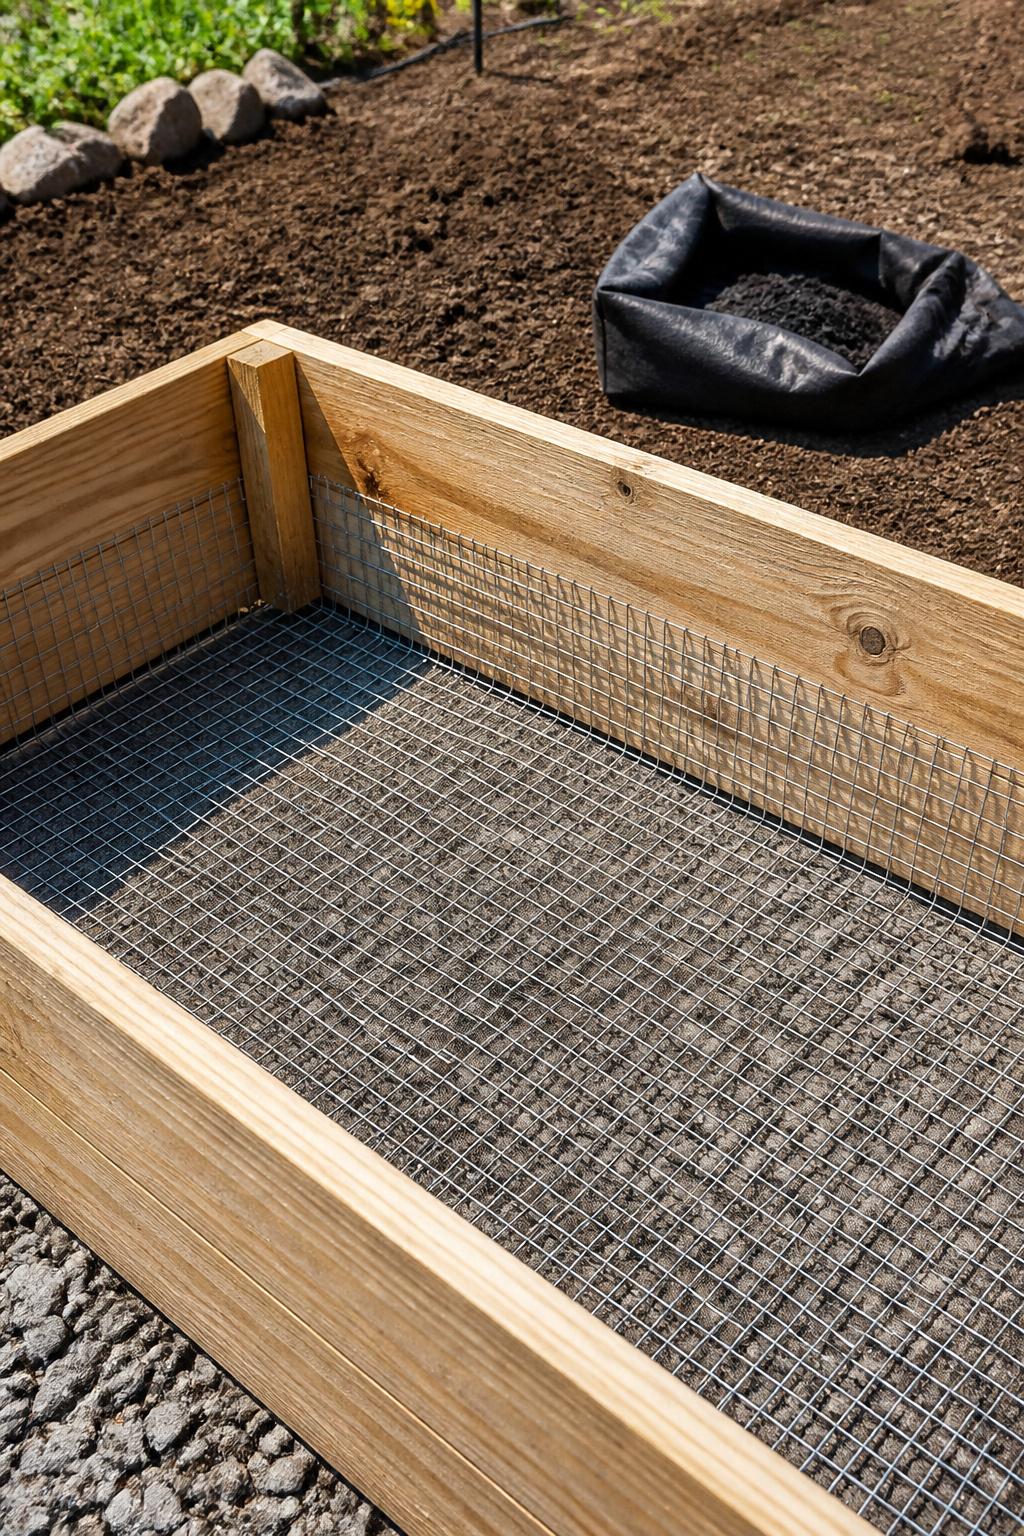
A layer across the bottom of the bed keeps soil from washing out after heavy rain and slows weeds pushing up from below. Landscape fabric or a dedicated raised bed liner does this job; both are laid flat and run a few inches up the sides before the frame goes in.
Half-inch hardware cloth is what actually stops moles and gophers. Chicken wire is too flimsy: they push through or chew past it. I learned that after finding a tunnel straight through a bed I thought I’d protected. The heavier mesh, fastened with wide-head screws or a staple gun, sits under the soil layer like a floor. Galvanized mending braces on the longest sides keep the frame from bowing once the weight is in.

● HARVEST: Miracle-Gro Organic Raised Bed & Garden Soil is guaranteed to grow more vegetables for a bigger harvest versus unfed plants (satisfaction guaranteed or your

Ready-to-Use Formula: No mixing or extra steps required. Simply pour and plant - perfect for gardeners of all experience levels.

Feed your raised bed for up to 3 months
7. Fill with Soil
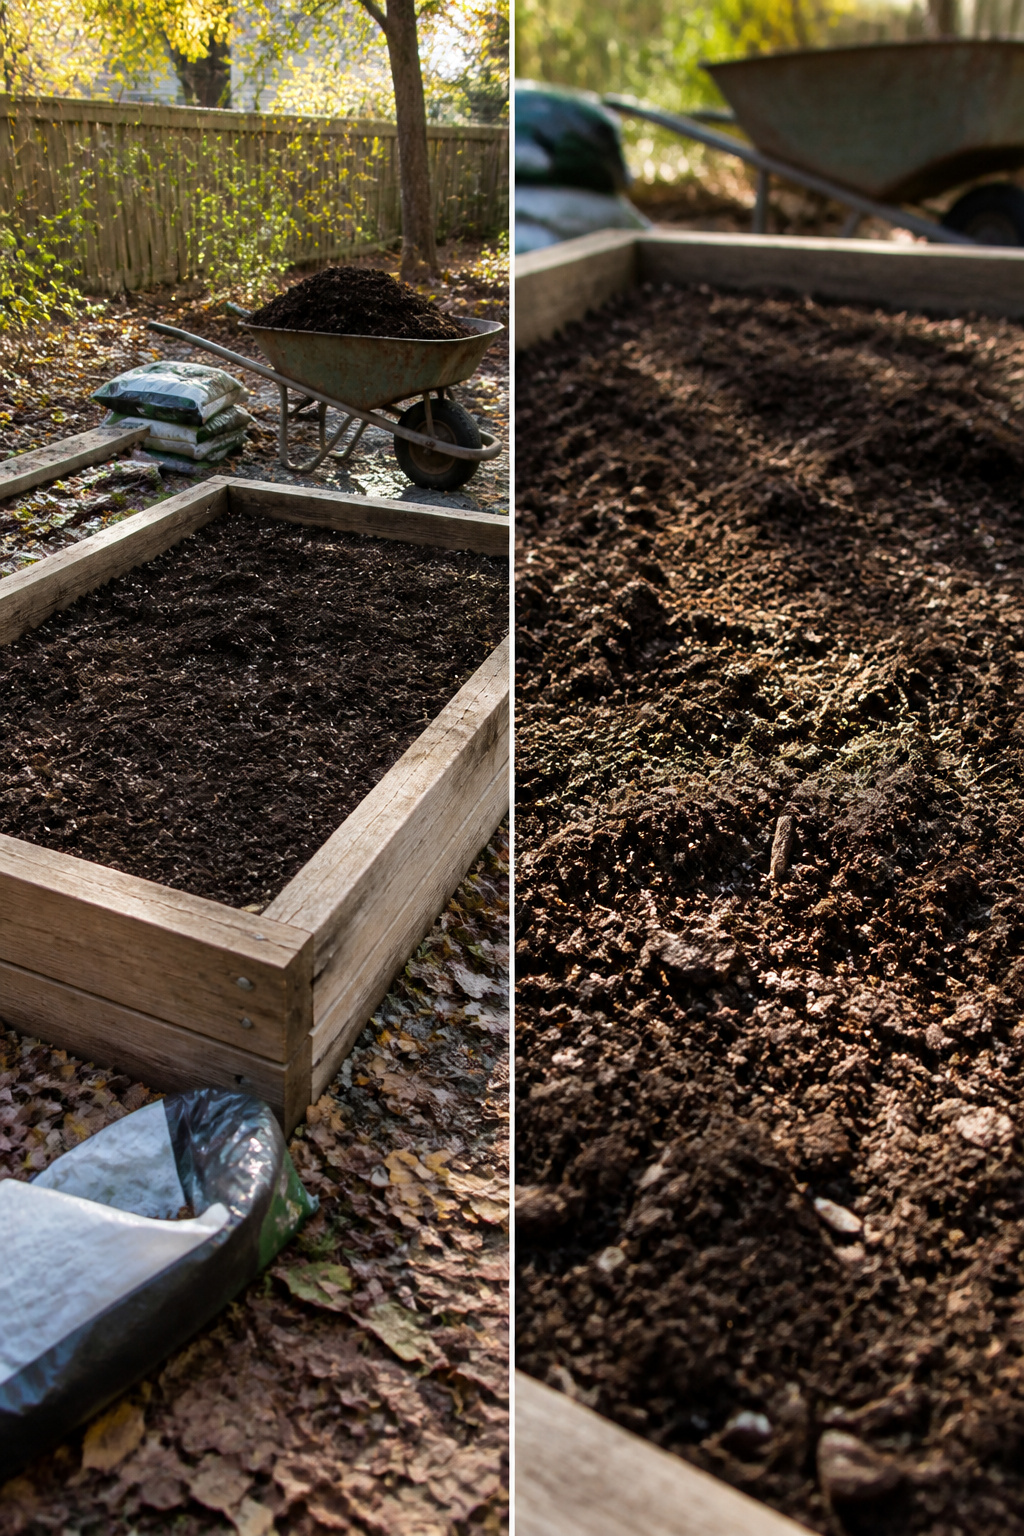
The soil mix matters more than the bed itself. My first spring I filled the whole frame with straight topsoil from the local yard, figuring dirt was dirt. By June the carrots were stubby and the lettuce leaves looked pale and tired. Topsoil alone packs too tight, drains poorly, and holds almost nothing the roots actually need.
The mix that fixed it follows a 60/30/10 ratio: 60 percent topsoil, 30 percent compost, and 10 percent potting soil. The compost feeds the plants across the season, and the potting soil keeps the whole blend light enough that water moves through instead of pooling. For my 4-by-8 foot bed built 10 inches deep, that recipe took about twenty bags of topsoil, ten bags of compost, and three or four of potting mix to fill, accounting for the settling that happens after the first few rains. Bagged delivery ran more than bulk would have, especially for several beds, but I only had the one frame that year and the pickup truck made the math easy.

【Quick-Connect Fittings for Simple and Fast Installation】Our drip irrigation system contains quick-connect features. No hassle steps and tools required. Simply connect the components and start watering your large garden with minimal effort. This user-friendly design ensures you can set up your irrigation system quickly and saves your time and effort.

Be a Gardening Master with the help of our superior and complete Drip Irrigation Kit: 10 Drip Irrigation Emitters Vortex + 20 Drip Emitters Spray + 50ft flexible & durable 5/16 irrigation tubing + 50ft 1/4 inch Drip Irrigation Tubing + 12 tubing coupler + 5 ¼ Tubing Tee Splitter + Tubing End Plugs + Water Connector + 1 x Complete Instructions Guide Hard Copy + 2 Grow your Own Vegetables & Fruits Guide full with pieces of advice and practical tips Digital Format.

🌱 Maximize Coverage with 110FT of Customizable Watering – Effortlessly hydrate every corner of your garden! Our expanded 110FT tubing lets you create 4 separate irrigation lines, delivering precise moisture to up to 120 sq ft of plants, hanging baskets, or raised beds, no thirsty patch left behind.
8. Plant Your Crops
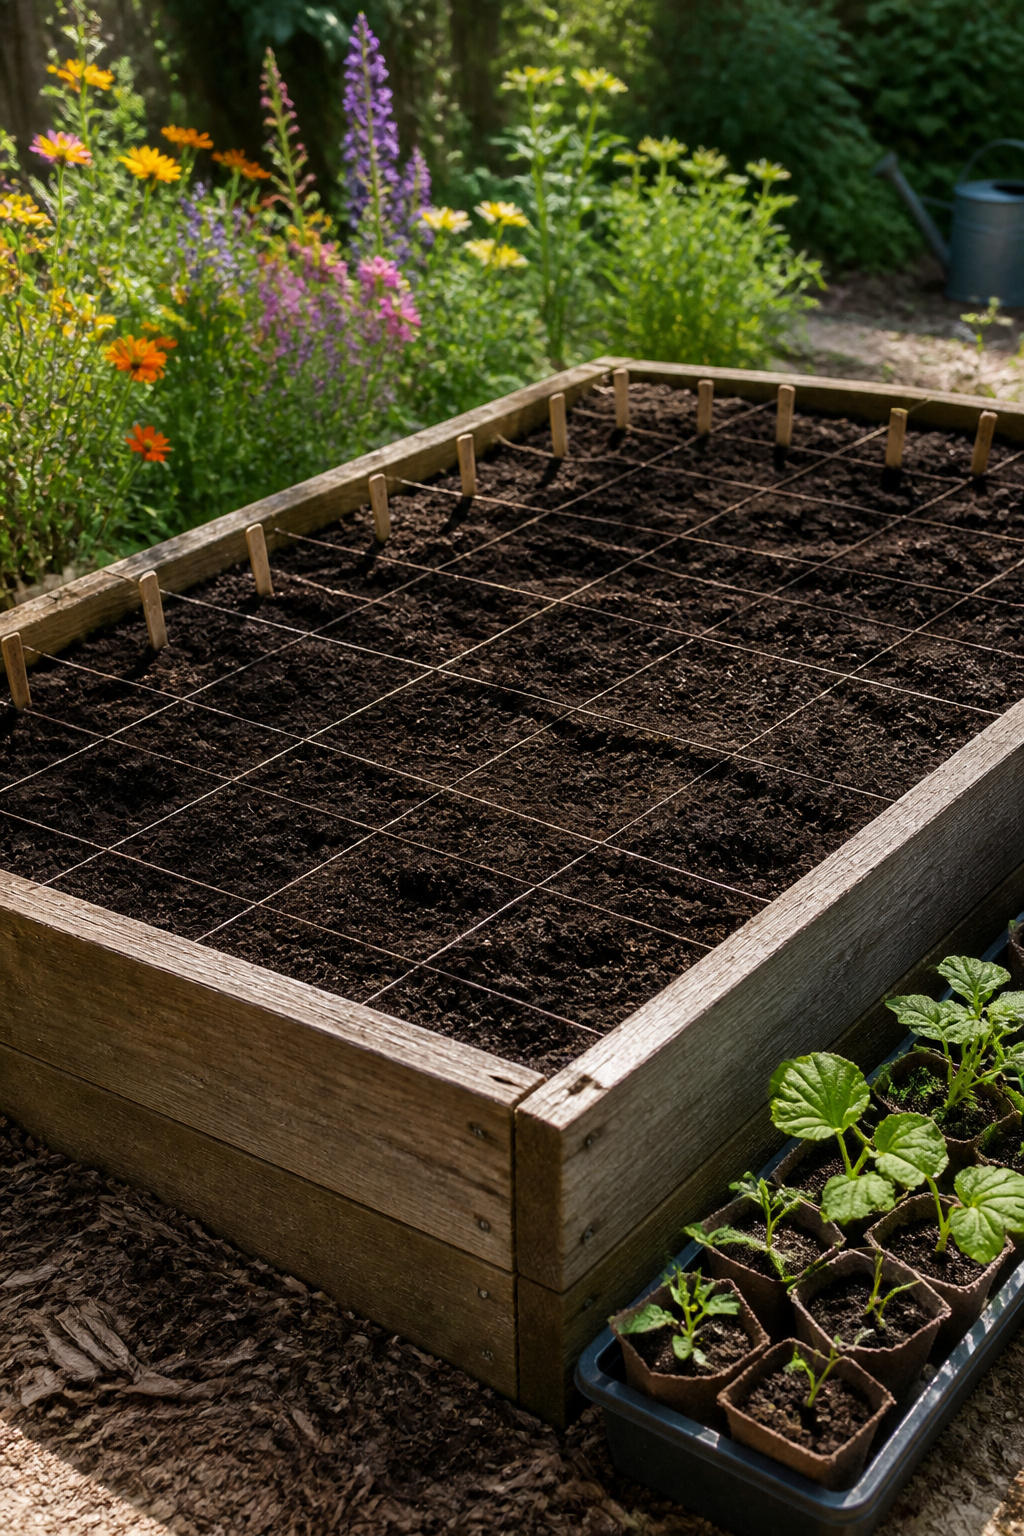
Spacing is where a raised bed earns its keep, or where it turns into an expensive lesson in crowding. The square-foot grid, the one Mel Bartholomew popularized back in his 1981 book, gives you a clean way to stop guessing. Carrots thin to 3 inches, so 16 of them fit in one square. Bush beans at 4 inches give you 9 per square. Lettuce wants 6 inches, so 4 per square. Broccoli needs 12 inches or more, meaning 1 per square, period.
My first spring, I looked at the tomato label, saw 24 inches, and planted them 12 apart because they looked so small. By August they were a single tangled hedge with blight running through it like a rumor. The label meant it. The grid means it. Keep seed beds moist with frequent shallow watering; a light layer of mulch or even a burlap bag on top holds that moisture in until seedlings establish.

Generous Planting Space: Ample bed space provides your plants and vegetables with room to thrive, promoting healthy growth and robust yields.

What You Will Receive: you will receive 6 pieces of 35 gallon outdoor raised garden boxes, each is designed with 6 partition grids and drainage holes, coming with 4 pieces of white cotton gardening gloves, enough to meet your daily use and replacement needs

Maximize Space: The large elevated planter bed with a stand features a storage shelf at the bottom, which can hold your favorite gardening tools, soil bags, watering cans, fertilizers, or small accessories. It keeps all your planting essentials neatly organized and within easy reach, making your gardening area tidy, orderly, practical and efficient while fully utilizing the planting space
Types of Raised Beds
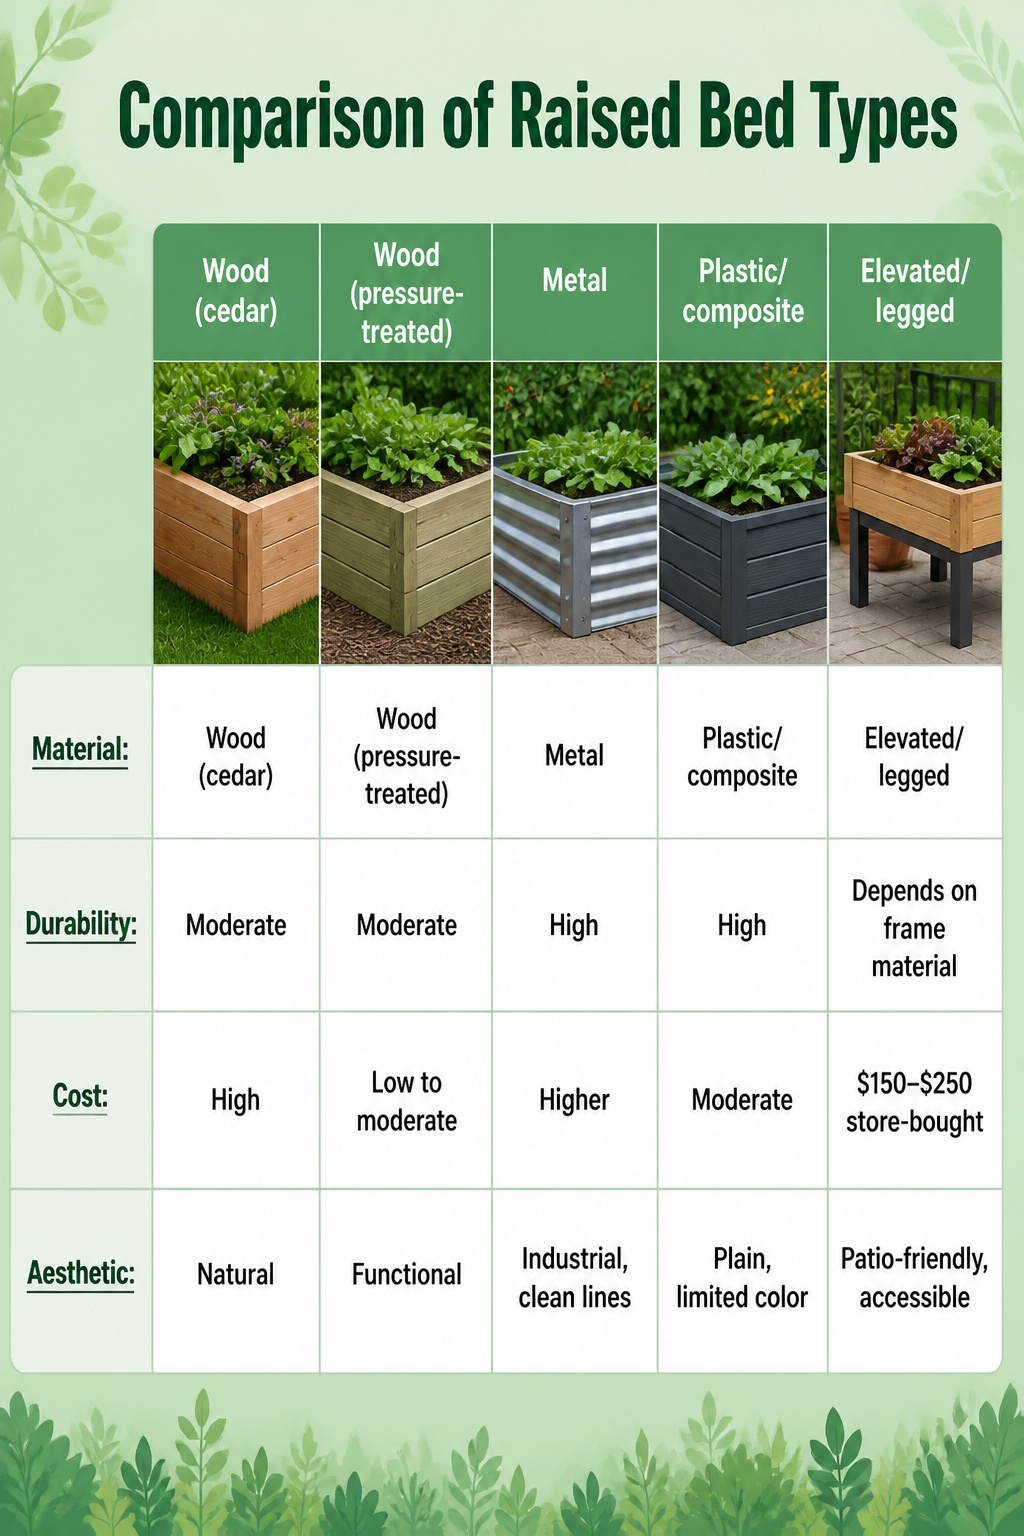
Wood still dominates the conversation, but it is not the only way to get a bed off the ground. Cedar kits carry natural rot resistance and weather to a soft silver, though the price stings compared with pressure-treated pine. Metal beds outlast both by decades and stop burrowing pests cold, yet a quality kit runs higher than most weekend budgets want to spend. Plastic and composite boxes are the grab-and-go option: light enough to haul up to a rental balcony, maintenance-free, and they will not rot, but the look is utilitarian and the color choices rarely blend into garden beds the way timber does. Elevated beds on legs solve access for bad backs or knees and keep rabbits off lettuce without fencing; store-bought versions sit in the $150–$250 range, while a DIY frame on posts costs less lumber but more planning than a ground-level box.
| Material | Durability | Cost | Aesthetic |
|---|---|---|---|
| Wood (cedar) | Moderate; weathers, eventually rots | High | Natural, ages well |
| Wood (pressure-treated) | Moderate; rot-resistant with treatment | Low to moderate | Functional |
| Metal | High; rust-proof coatings common | Higher | Industrial, clean lines |
| Plastic/composite | High; maintenance-free | Moderate | Plain, limited color |
| Elevated/legged | Depends on frame material | $150–$250 store-bought | Patio-friendly, accessible |
For renters, the plastic kit or a lightweight metal box wins on portability. If you own the dirt beneath the bed, cedar or metal earns back its cost over the years you will not spend rebuilding.
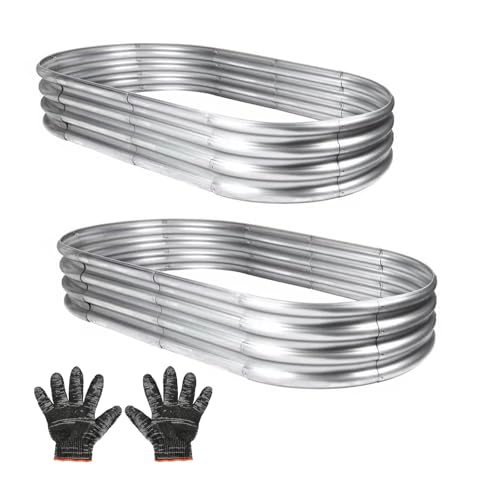
PRO-GRADE GALVANIZED STEEL: The average garden beds sheet reaches 0.79mm, and the thickest part can reach 1.59mm. The surface of our garden beds are double-galvanized with an extra layer of chrome-free passivation technology, resist rust 3X longer than standard metal planter boxes, ensuring 10+ years of durability in rain, snow, and extreme temperatures
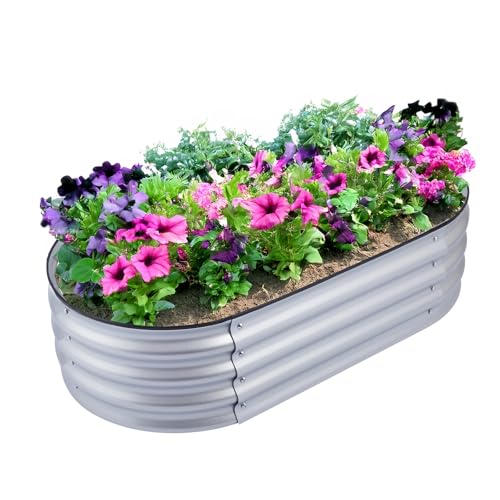
Spacious Growing Area: Measuring 4 feet by 2 feet, this raised garden bed provides ample space for cultivating a variety of plants, making it ideal for both small and large gardens

Tool-Free Assembly: Quick and easy setup with no tools required, allowing you to assemble the raised garden bed in approximately 10 minutes
Soil Quality and Maintenance
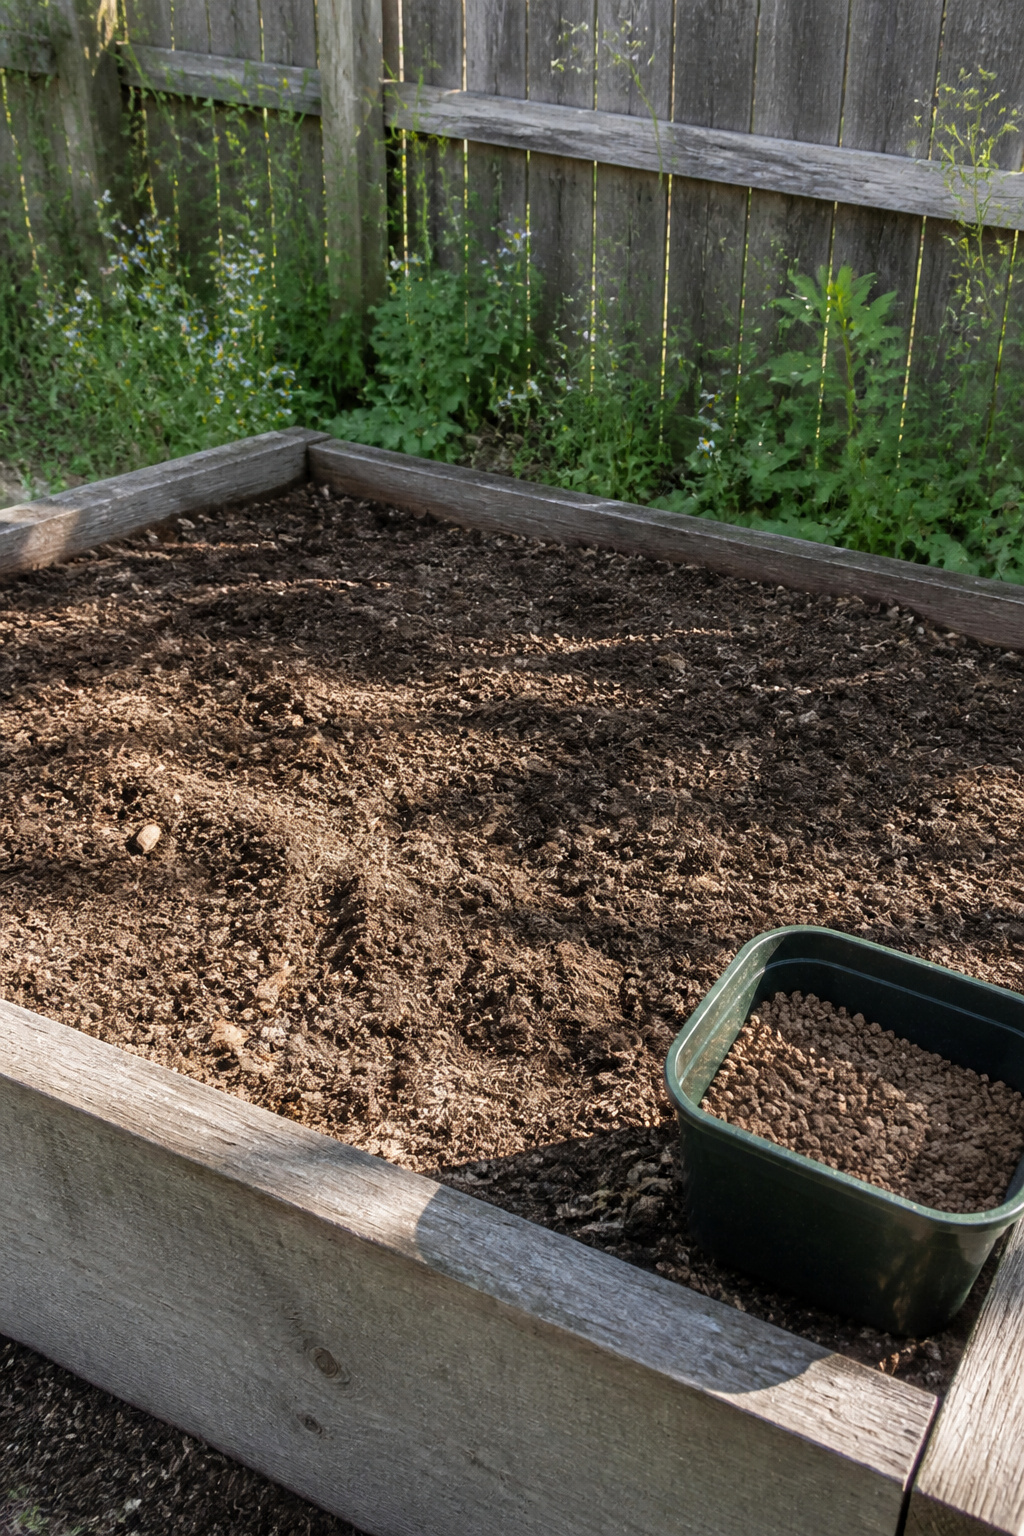
The soil you fill the bed with matters more than the wood you built it from. After reading through a pile of these guides, what convinced me was the consistency: every experienced builder calls this the make-or-break step, and the ones who skimped it spent the next season fighting.
A quality mix designed for raised beds, not bagged topsoil from the parking lot, gives plants the nutrients and texture they need from day one. Sandy loam with compost worked in is the blend I kept seeing cited by people who actually track what their vegetables produce. The beds are your chance to start fresh, so treat the soil like the investment it is and calculate the volume you need before you order; running short halfway through means mismatched batches and uneven growth.
Drainage sits right next to soil in importance. A layer of coarse sand or gravel at the bottom keeps water moving so roots don’t rot in saturated corners. Pair that with deep, less frequent watering rather than light daily sprinkles, and the bed develops the kind of root system that weathers a hot weekend when you forget to check.
On the wood question, pressure-treated lumber is the common choice for durability, but the copper azole in it gives some growers pause. The studies I found suggest copper leaches only a couple millimeters into the soil, so planting a few inches from the edge keeps roots clear if you go that route. White oak or eastern red cedar avoids the question entirely, though sourcing them takes more legwork. A food-safe plant-based sealer is the middle path if you already built with treated boards.
Weeding, feeding, and mulching finish the job. Pull weeds before they seed, add compost or a balanced fertilizer through the season, and lay mulch once plants are up to hold moisture and block what weeds remain. Fish emulsion came up repeatedly as a reliable organic feed if you can source it. The work never fully stops, but a bed kept up this way produces for years without rebuilding from scratch.

Spacious Planting Area: This 4x2 ft raised garden bed offers 9.5 cu. ft. of planting space, ideal for growing vegetables, flowers, herbs, and plants with various root depths.

PREMIUM ALUMINUM CONSTRUCTION: Unlike heavy galvanized steel planters, this raised garden bed is crafted from lightweight aluminum alloy that won't rust or corrode over time. It maintains its sleek white finish through rain, sun, and snow—built for lasting durability on patios, balconies, and gardens

DEEP PLANTER FOR MAXIMUM YIELD: With 16" of soil depth and a spacious planting area, this elevated bed supports healthy root vegetables like carrots, beets, and radishes while allowing more crops per bed, boosting overall harvest and garden productivity
Pest Control and Drainage
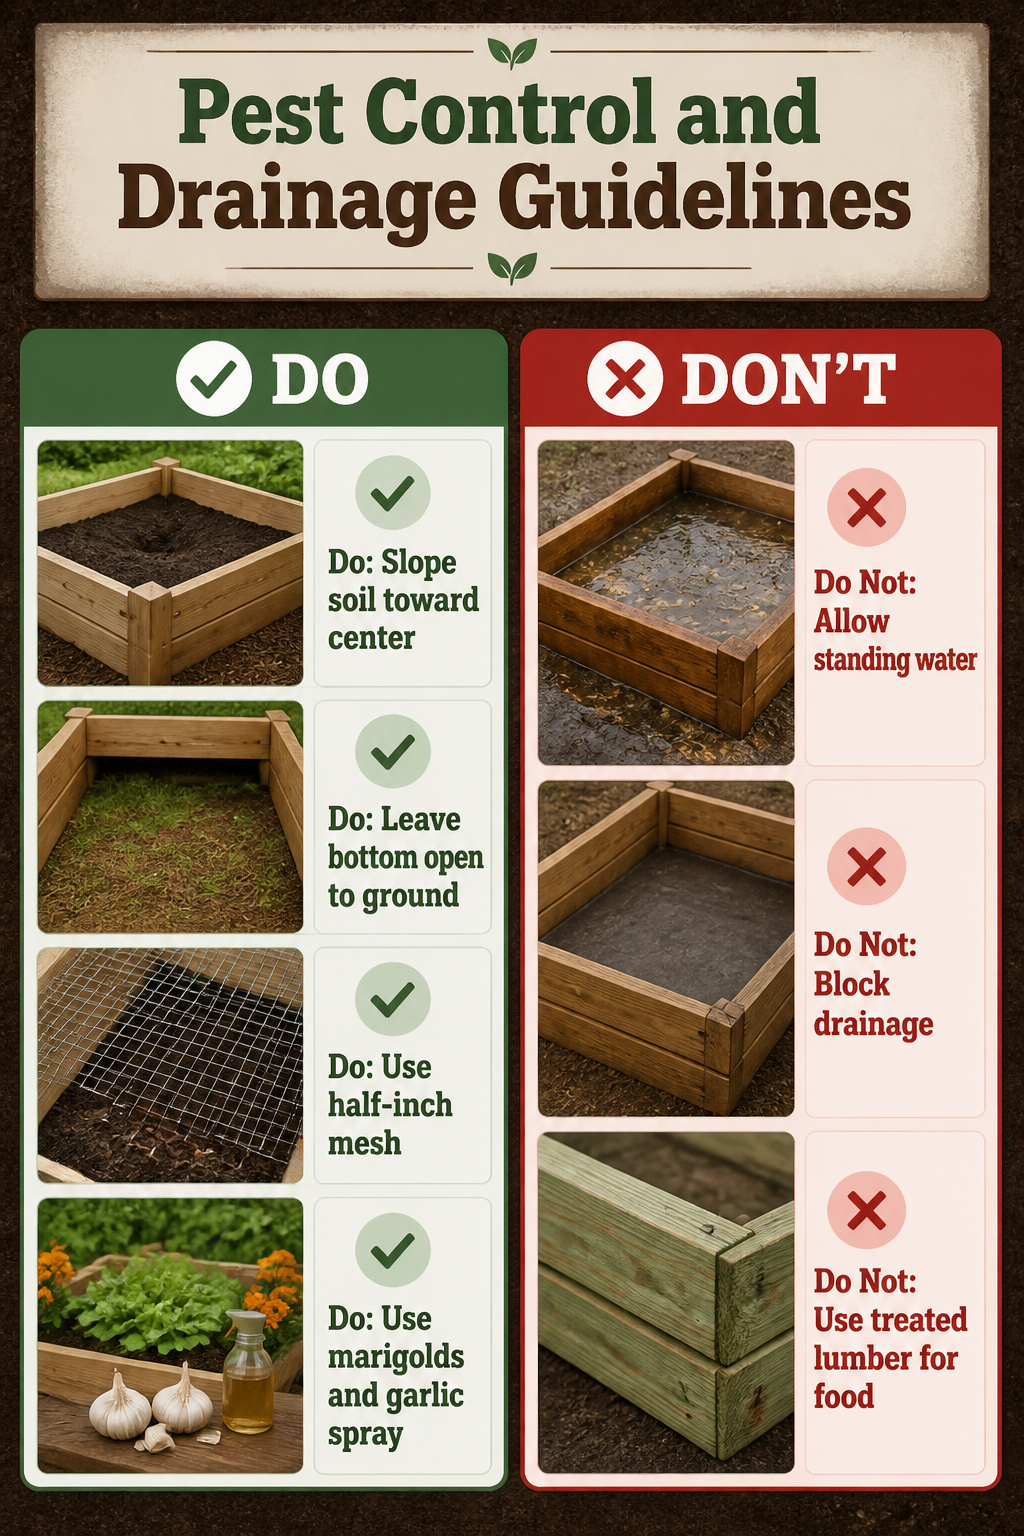
A bed that holds water like a bathtub will rot your roots before the season ends. I learned to slope the soil slightly toward the center and leave the bottom open to native ground whenever possible; if you must close it, a few half-inch gaps in the base boards matter more than a perfect frame. Hardware cloth pinned across the bottom stops gophers and ground squirrels without blocking the drainage that open soil gives you, and the half-inch mesh size lets earthworms move while keeping burrowers out. Cedar’s natural oils handle rot without the copper treatments in pressure-treated lumber, though that ACQ-treated stock is the budget path if you are filling several beds and replacing them in five to seven years. Depth depends on what you grow: strawberries and greens manage in ten inches of soil, but tomatoes and carrots want the full sixteen. For pests above ground, marigolds tucked at the corners and a garlic spray every two weeks have kept my leaves intact without the cost of row covers.
Cost and Design Tradeoffs
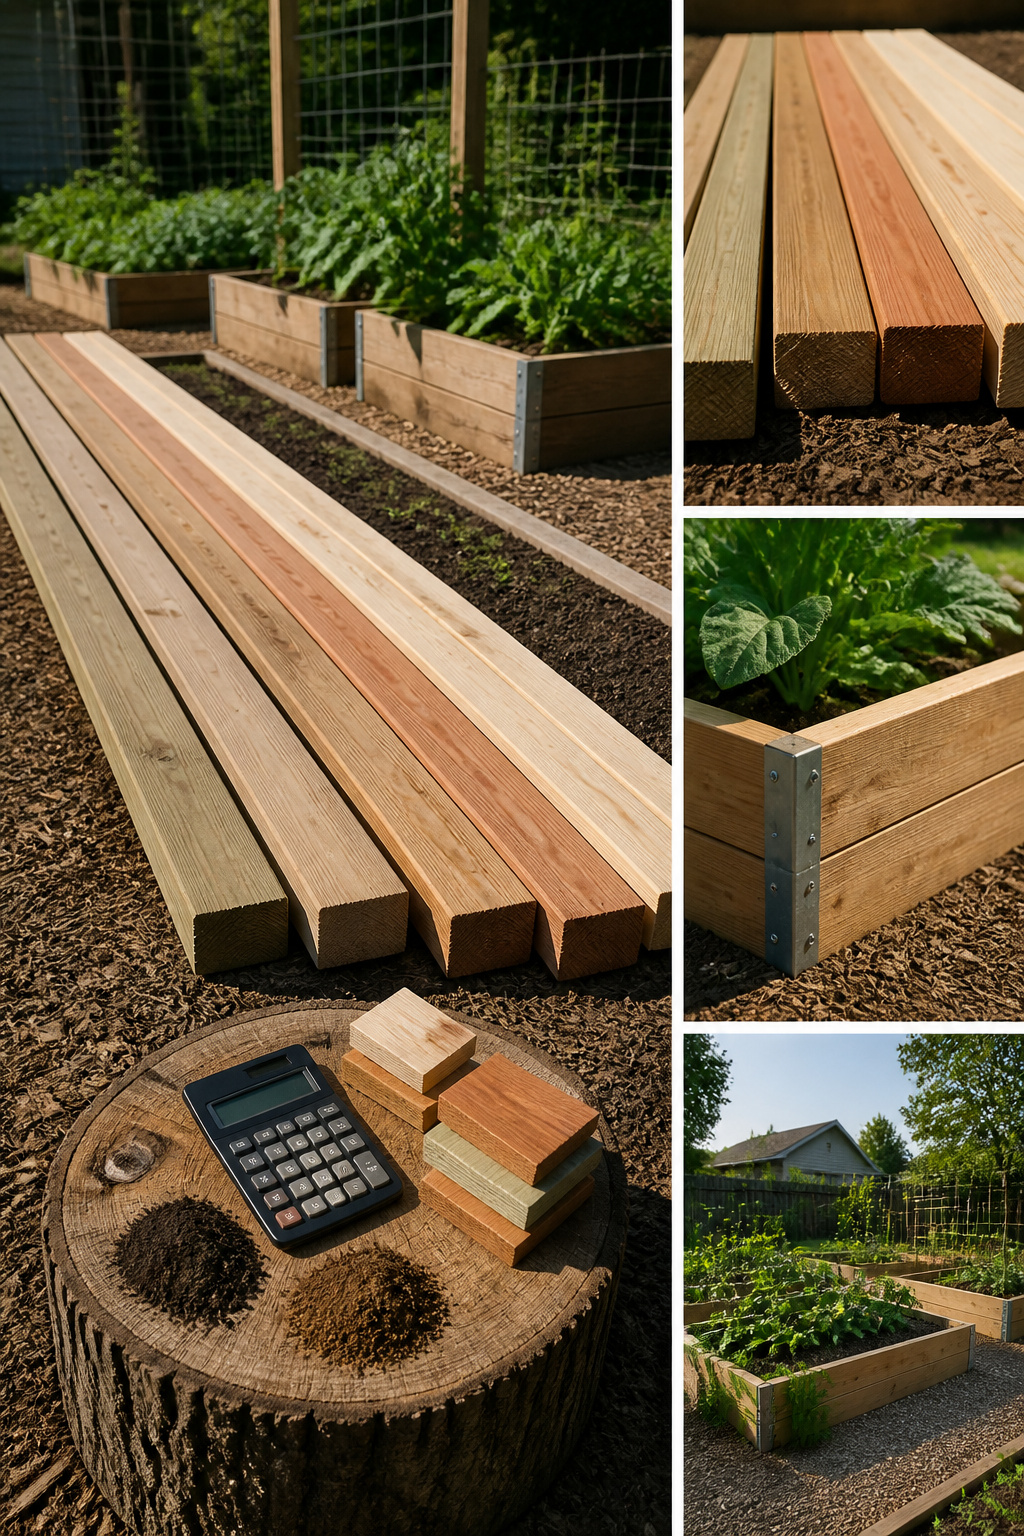
Lumber prices swing enough that a single number goes stale before you finish the bed. What I can say from watching this market is that the average bed lands somewhere between $100 and $300 for the frame alone, and the gap between those two numbers is mostly wood choice and bed size. Pressure-treated 2×8 ground-contact boards are the budget play: copper-based ACQ treatment is rated food-safe, and the stuff resists rot for years. Western red cedar runs much steeper, but the natural oils do the same job without chemicals, and it looks better doing it.
Soil is the cost most people forget. Bagged potting mix adds up fast; bulk delivery from a local yard is usually cheaper once you are filling more than one 4×10 bed, and the math shifts hard in bulk’s favor at four or five beds.
Design choices change the lumber count more than you’d think. A 4×8 bed sixteen and a half inches deep needs nine 8-foot 2×6 boards or six 12-footers, plus one 8-foot 4×4 for corners. Sketch the cuts before you buy. One 12-foot board can give you two 6-foot sides and three 4-foot ends if you plan right; buy blind and you are hauling home scrap.
Frequently Asked Questions
What is the best wood to use for raised garden beds?
Untreated cedar or redwood is the best choice for food gardens because their natural oils resist rot without chemicals that can leach into soil. Pine works for a tighter budget and lasts five to seven years, though it will need replacing sooner. Pressure-treated lumber is durable but the copper azole in it gives many growers pause; if you use it, plant a few inches back from the edges to keep roots clear of any leaching.
How deep should a raised garden bed be?
The standard depth is 16 to 18 inches, which suits most vegetables including tomatoes and carrots that need room for roots. Greens and strawberries manage in as little as 10 inches, but shallow beds will limit what you can grow from season to season. Every extra inch of height means more soil to haul, so balance what you want to plant against the work and cost of filling the frame.
How do I prevent pests in my raised garden bed?
Half-inch hardware cloth pinned across the bottom of the frame stops gophers, voles, and ground squirrels from tunneling up into roots; chicken wire is too flimsy and they will push through. Above ground, marigolds tucked at the corners and a garlic spray every two weeks help keep leaves intact without needing row covers. Hardware cloth still lets earthworms move and water drain, so you get protection without creating a bathtub that rots roots.