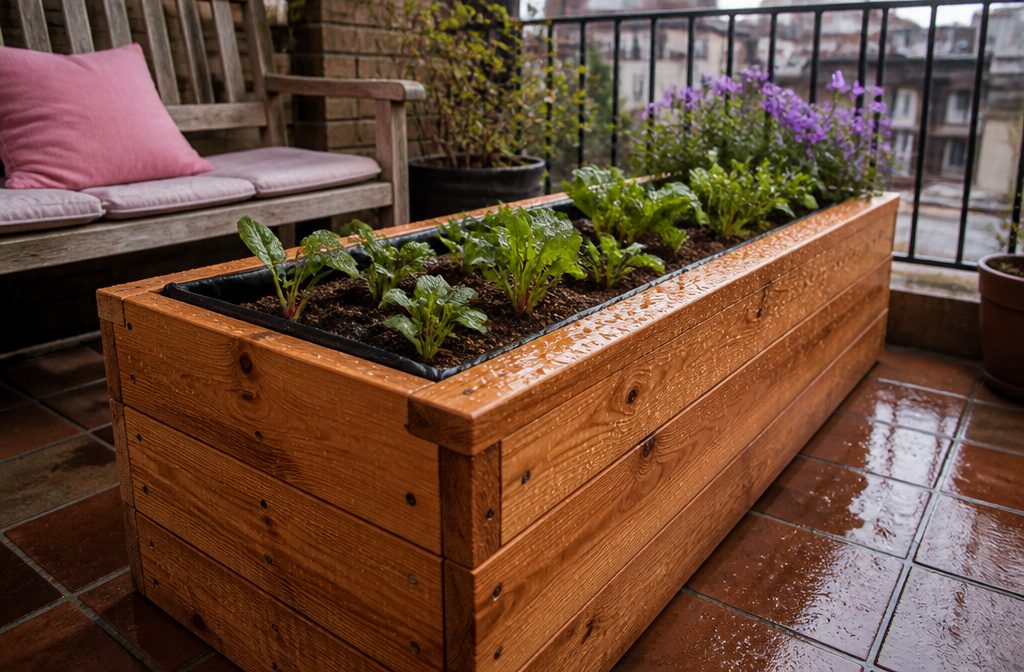
A planter box is a wooden frame you fill with soil, and the wood you pick sets the price: real builds run about $50 to $170.
Pressure-treated pine is cheapest, but for vegetables you should line the inside or choose another material. One tested cedar build with stain cost $130.26, tools not counted.
Choose a Design and Size
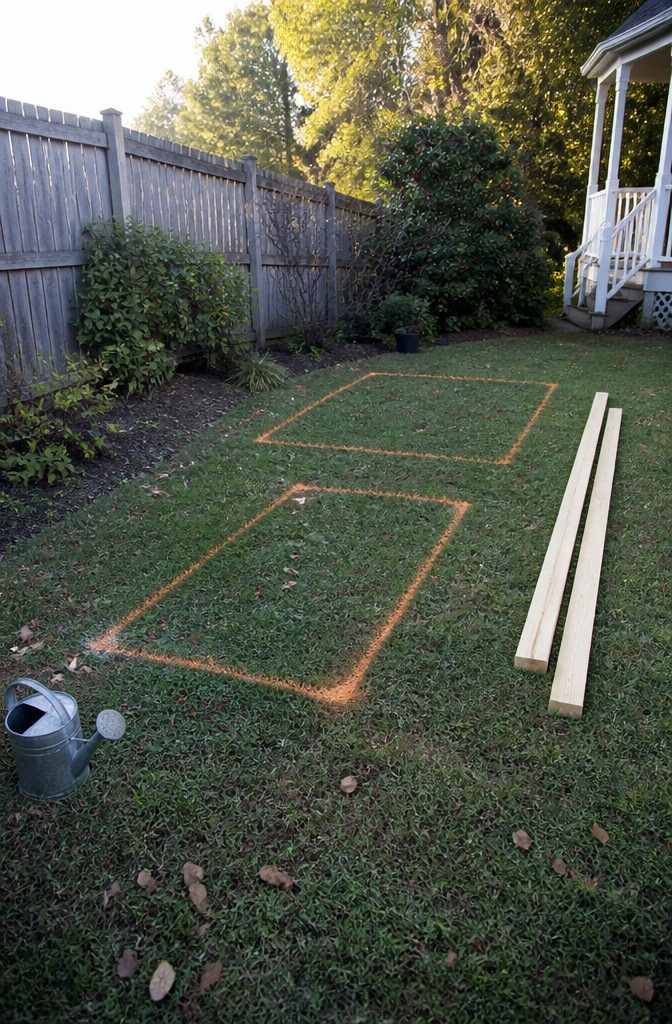
Mark the footprint on the ground with spray paint before you buy a single board.
Laying out the beds this way shows how many boxes fit and what size each one should be, and it is easier to repaint a line than to move a built box.
Two sizes are worth copying: a medium box at 5’×3′ and a large one at 8’×4′.
Small porch planters work differently. A small box takes two 1×6 fence pickets across the bottom with no fuss, while a block-and-board bed can be cut to whatever length your space allows.
Nothing sets one right size; these are examples, not a rule.
I would pick the footprint first, then buy lumber to match it. Choose dimensions that use whole board lengths, so you cut less and waste little.
Gather Materials and Cut Lumber
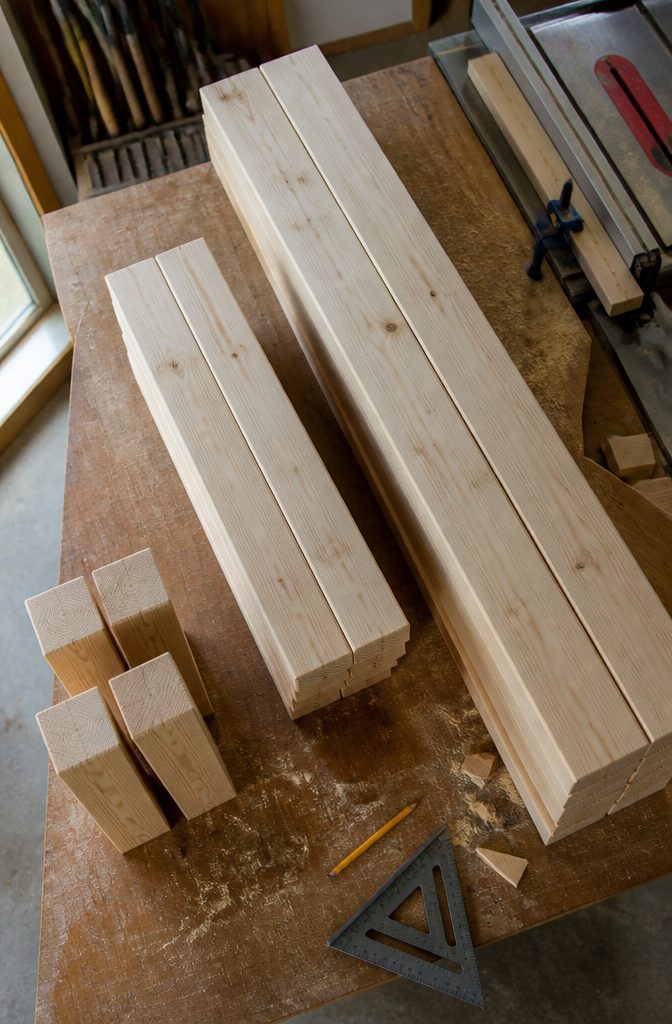
Cut every part before you drive a single screw.
The medium box takes six 2×6 boards at 36 inches, six at 60 inches, and four 4×4 posts at 18 inches. You can get one long and one short side out of a single board: cut it at 60 inches and the leftover comes out at 36.
Make the 4×4 posts taller than the box walls. The extra height gives you a spot for solar cap lights at the corners later.
Cut all the side boards in one session so matching sides come out identical. A stop block clamped to the saw fence makes each repeat cut the same length.
If you buy pretreated lumber, let it dry for two weeks before building. If you want the sides to sit flush, notch the posts to seat the boards.
Build the Frame
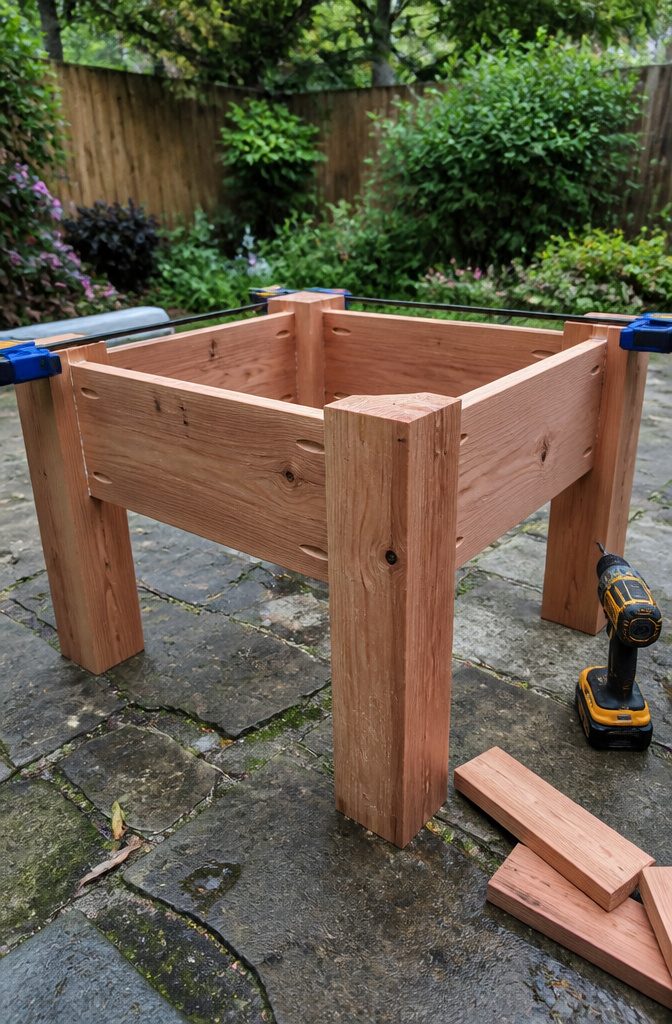
Pocket screws make the cleanest frame, and they are what most builders reach for. Drill the pocket holes at ½-inch depth on both ends of each piece, then drive 1¼-inch screws with a dab of wood glue.
The 1-inch screws that the Kreg chart suggests can slip too deep and split cedar, so the slightly longer, larger-headed screw grips better in 1½-inch stock.
Tall legs change the build.
A bench-height planter runs 35–36 inches, with two legs per side panel and short 12-inch crosspieces tying the panels together. Clamp everything square before you drive a screw.
If you would rather skip joinery, exterior screws at 3 inches (or 3½ for thick stock) work fine through 2×4 ends. Or slide 2×6 boards into cement blocks and cut nothing but lengths.
Join the Sides and Add Trim
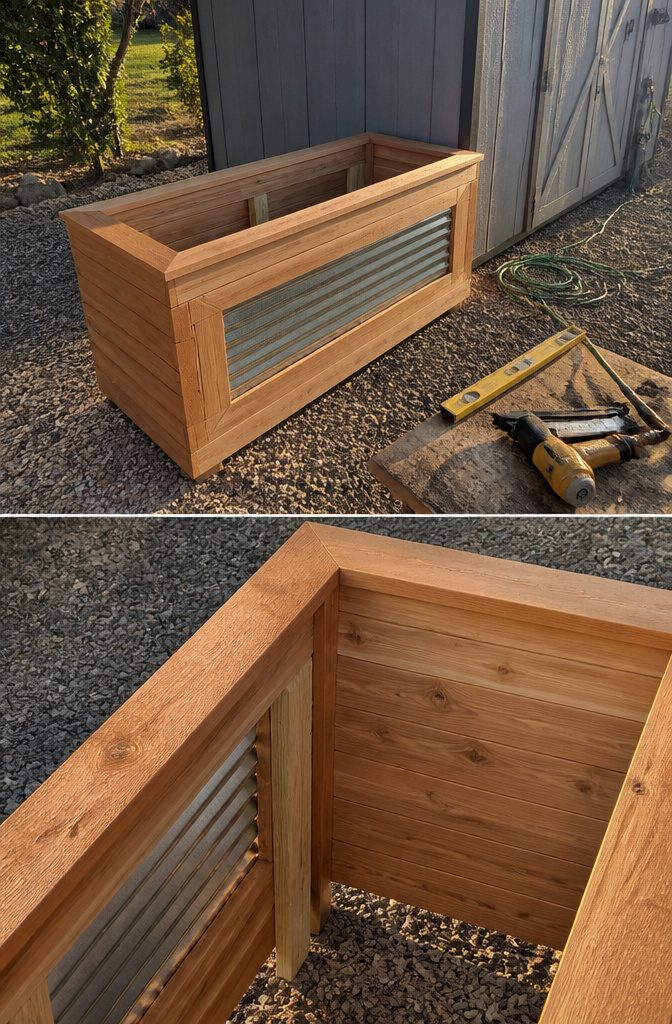
Cut the six 24-inch 2×4 end sections, stand the side panels up, and join them with 3-inch exterior screws.
Add a third 2×4 brace at the center of each side if you’re using a corrugated metal panel, because its edges aren’t fastened to wood and the middle will bulge without support. Fasten the metal with 1-inch roofing screws.
For a cedar look, trim the dog-ear tops off the fence pickets and nail them on from the bottom with a finish nailer. Keep that first picket level, since every board above it follows its lead.
One picket usually yields one long and one short side piece. Rip the last row to width on a table saw, then rip a few more for top trim, cutting its corners at 45 degrees.
Add the Bottom and Drainage
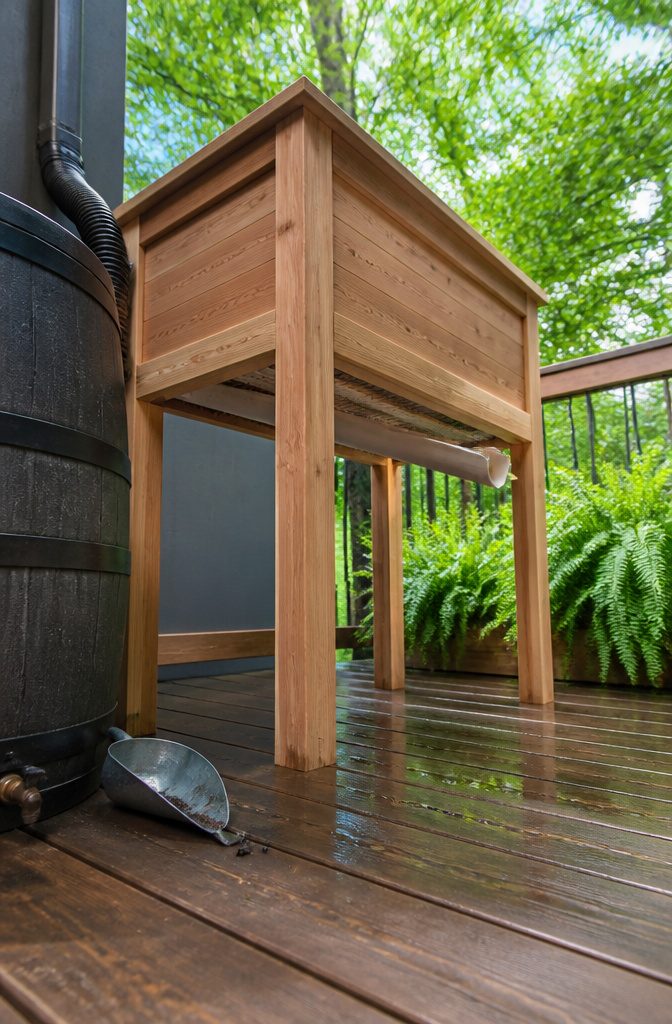
Water has to leave the box somewhere, and the simplest exit is the bottom itself.
Cut enough boards to cover the base, leave gaps between them, and line the inside with a contractor bag trimmed to fit, stapled around the edges, with a few rocks on top.
The liner keeps soil in and the boards from sitting in a puddle.
For an elevated box, the neater route is angled cleats that slope ½ inch from the outside toward the middle, with bottom slats screwed on top.
A 2-by-3-inch PVC downspout laid down the center, cut with tin snips so one end pokes past the planter, carries water out of sight. Hardware cloth stapled over the supports holds soil back while still draining.
If you’re dropping in plastic pots, set supports at pot height plus 1½ inches: 10½ inches down for 9-inch pots. Use 2x3s, since 2x2s cracked.
Finish, Fill, and Plant
Spar urethane in two heavy coats is the finish I’d pick for a box that lives outside: it protects well and warms up cedar.
Behr Black in two coats works if you want a solid color, and Valspar’s semi-transparent Chocolate Chip stain is water-based, so cleanup is easy.
Brush it on in small sections and wipe it back with a rag if it runs too dark.
Under $10, food-grade mineral oil suits mild climates and can be reapplied anytime. Bare wood is also an option.
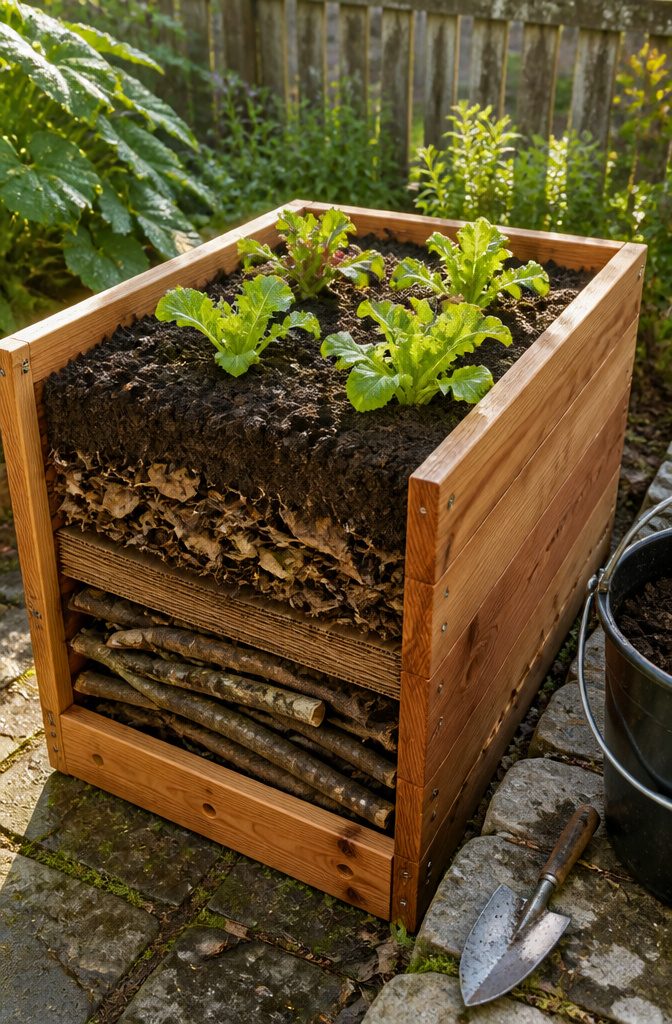
Drill drainage holes before filling. Fill a deep box in layers: large branches first, then cardboard, then dead leaves, with topsoil on top.
Each layer saves you buying soil. Top up with compost yearly and test the soil each season.
Styles and Custom Sizes
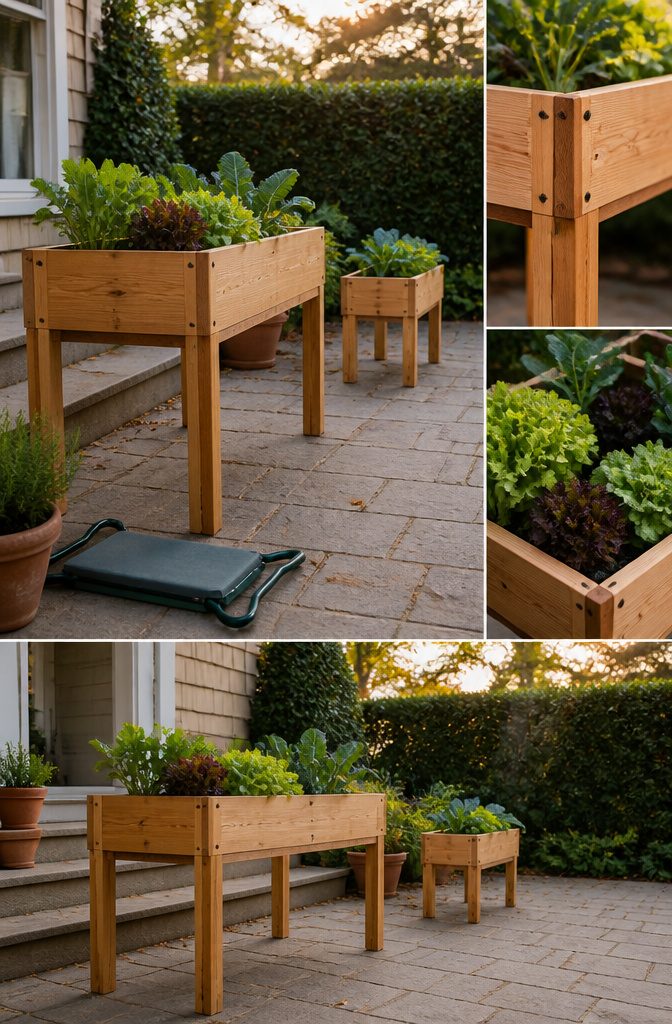
Window boxes are the fastest build in the range: a basic one goes together in under an hour.
Porch and patio boxes take a bit longer, though matching pairs can be built in a day, and plans come in two sizes so one fits a narrow step and the other a wide landing.
A raised box is what I’d build first for vegetables. Standing height saves your back and knees, and the lift also makes it harder for rabbits to reach your lettuce.
This attractive planter provides 8 square feet of planting space—enough for a bountiful salad garden. Need more planting space than that? Make multiple planters!
Eight square feet feeds a salad habit, and a second box costs less than stretching one design too large.
Garden beds scale up easily: 5’x3′ and 8’x4′ both work, and spray-painting the outlines first shows what fits. Self-watering versions take about two days.
Materials Compared
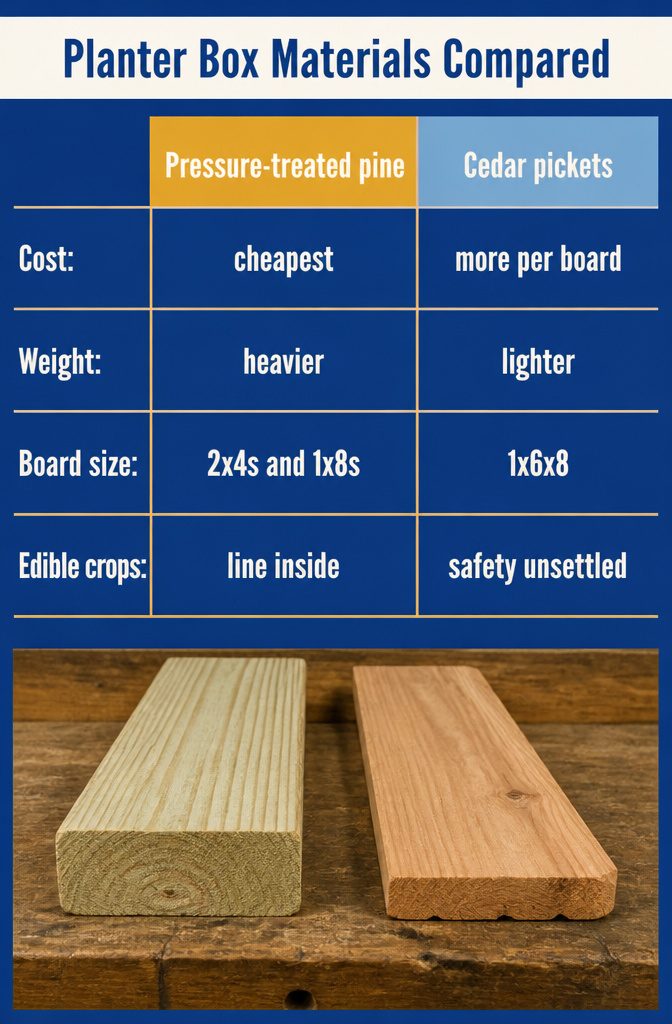
Pressure-treated pine is the cheapest wood to work with, and it suits a box built from 2x4s and 1x8s with screws and waterproof glue.
Cedar fence pickets (1x6x8) are lighter and rip down easily, but cost more per board. Wood safety around edible crops is not settled, so for vegetables I would line the inside or choose another material.
No single list fits every box, so match the material to your tools.
| Material | Joinery | Best for |
|---|---|---|
| Pressure-treated pine | Exterior screws, glue, galvanized nails | Large, sturdy boxes |
| Cedar pickets | Pocket-hole screws, brad nails | Small, finished-looking boxes |
| Cement blocks + 2x6s | None; boards slide into the blocks | Renters, no-saw builds |
| Corrugated metal, 33-gauge | 1-inch roofing screws into 2x4s | Raised beds |
| Plastic pots | Drop-in inside a cedar frame | Easy swapping and cleanup |
Cement blocks with 2x6s win for a first build, since cutting the boards to length is the only cut.
What a Build Costs
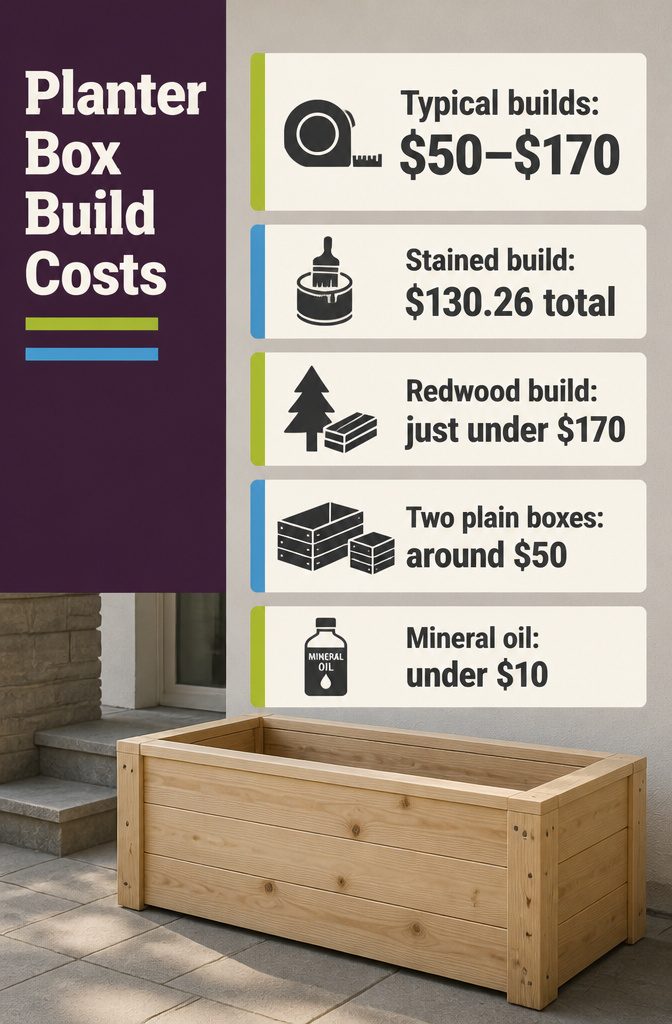
Real builds land between about $50 and $170, and the wood you pick moves the total more than anything else.
- A full build with stain ran $130.26: lumber $38.29, 13 cedar fence planks at $2.58 each ($33.53), a box of 50 screws $12.48, two flower boxes at $11.99 each ($23.98), and a quart of stain $21.98. Tools weren’t counted, so add those if you own none.
- Redwood pushes a single build to just under $170.
- Two plain boxes, one large and one small, cost around $50. Two large ones cost about the same, and that’s well under what ready-made wood planters sell for.
- Skip the stain and use mineral oil, which costs under $10. It’s food grade, brings out the raw wood tone, and you can reapply anytime. It suits mild climates better than harsh weather.
Frequently Asked Questions
What kind of wood should I use to build planter boxes?
Cedar is the pick for small, finished-looking boxes, while pressure-treated pine is the cheapest option and suits large, sturdy ones.
Cedar pickets are lighter and rip easily but cost more per board. Wood safety around edible crops is not settled, so for vegetables, line the inside of the box or choose another material.
How much does it cost to build planter boxes?
Expect about $50 to $170 depending on the wood.
Two plain boxes, one large and one small, run around $50, and one full cedar build with stain came to $130.26. Redwood pushes a single build to just under $170, and tools are extra if you own none.
Is it cheaper to build or buy a planter box?
Building is cheaper.
Two plain boxes cost around $50, which is well under what ready-made wood planters sell for. Two large ones cost about the same, so extra size adds little.
What is the best material for a raised planter box?
Cement blocks with 2×6 boards are the best for a first build, since cutting the boards to length is the only cut.
For sturdier large beds, pressure-treated pine works well, and corrugated metal on 2×4 frames also suits raised beds. Match the material to the tools you have.
How tall should a raised planter box be?
Height is up to you, since it depends on how many rows of boards you stack and how wide each board is.
A bench-height planter on legs runs 35–36 inches. A standing-height box saves your back and knees, and it makes it harder for rabbits to reach your lettuce.