Wall height decides which of these ideas is yours: a low dry-stack or paver wall is a weekend job, while anything that reaches 3 feet or more usually needs a building permit and structural plans stamped by a licensed engineer.
Ideas range from a gravel bed behind a low gray wall to tiered sandstone with built-in stairs, and timber, stone and concrete block each land at a different price.
Drainage works the same way behind every wall here: a perforated pipe set in gravel, because water pressure is what pushes walls over.
1. Tiered Retaining Walls
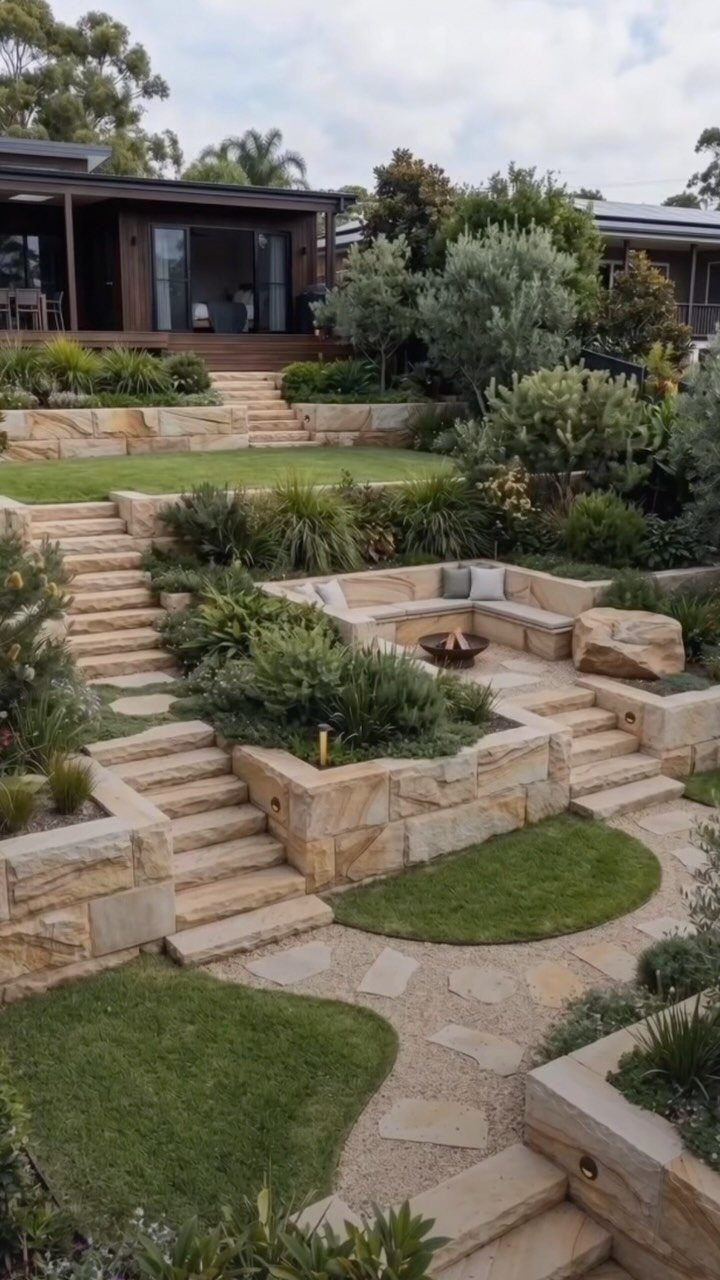
Tiered walls turn one steep slope into a set of short, usable steps, and that is why they beat a single tall wall.
Each level can hold a patio, a planting bed or a seating spot, and the lower walls stay easier to build and easier to handle.
Sandstone with built-in stone stairs keeps the whole slope reading as one design. If a project involves tall walls or a heavy slope, ask a local pro or your building department about height limits and permits before you start.
2. Curved Retaining Walls
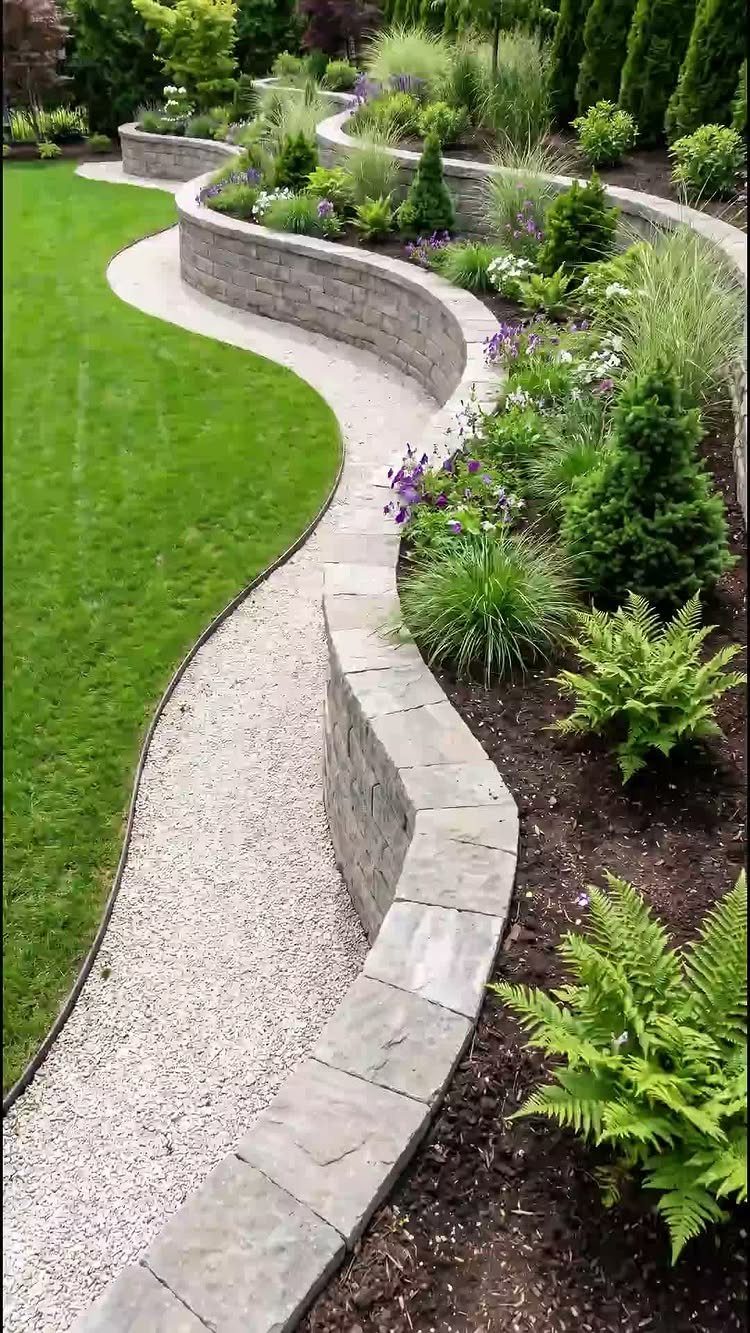
A curve does what a straight run can’t: it makes the eye drift along the bed instead of stopping at an edge. Pairing a curved wall with a gravel path gives people a reason to walk the line of it.
Mark the curve first with a garden hose or spray paint, then adjust until it looks natural from the house. Small, stackable stones follow a bend more easily than large blocks, so I’d pick those for a first build.
3. Natural Stone Retaining Walls
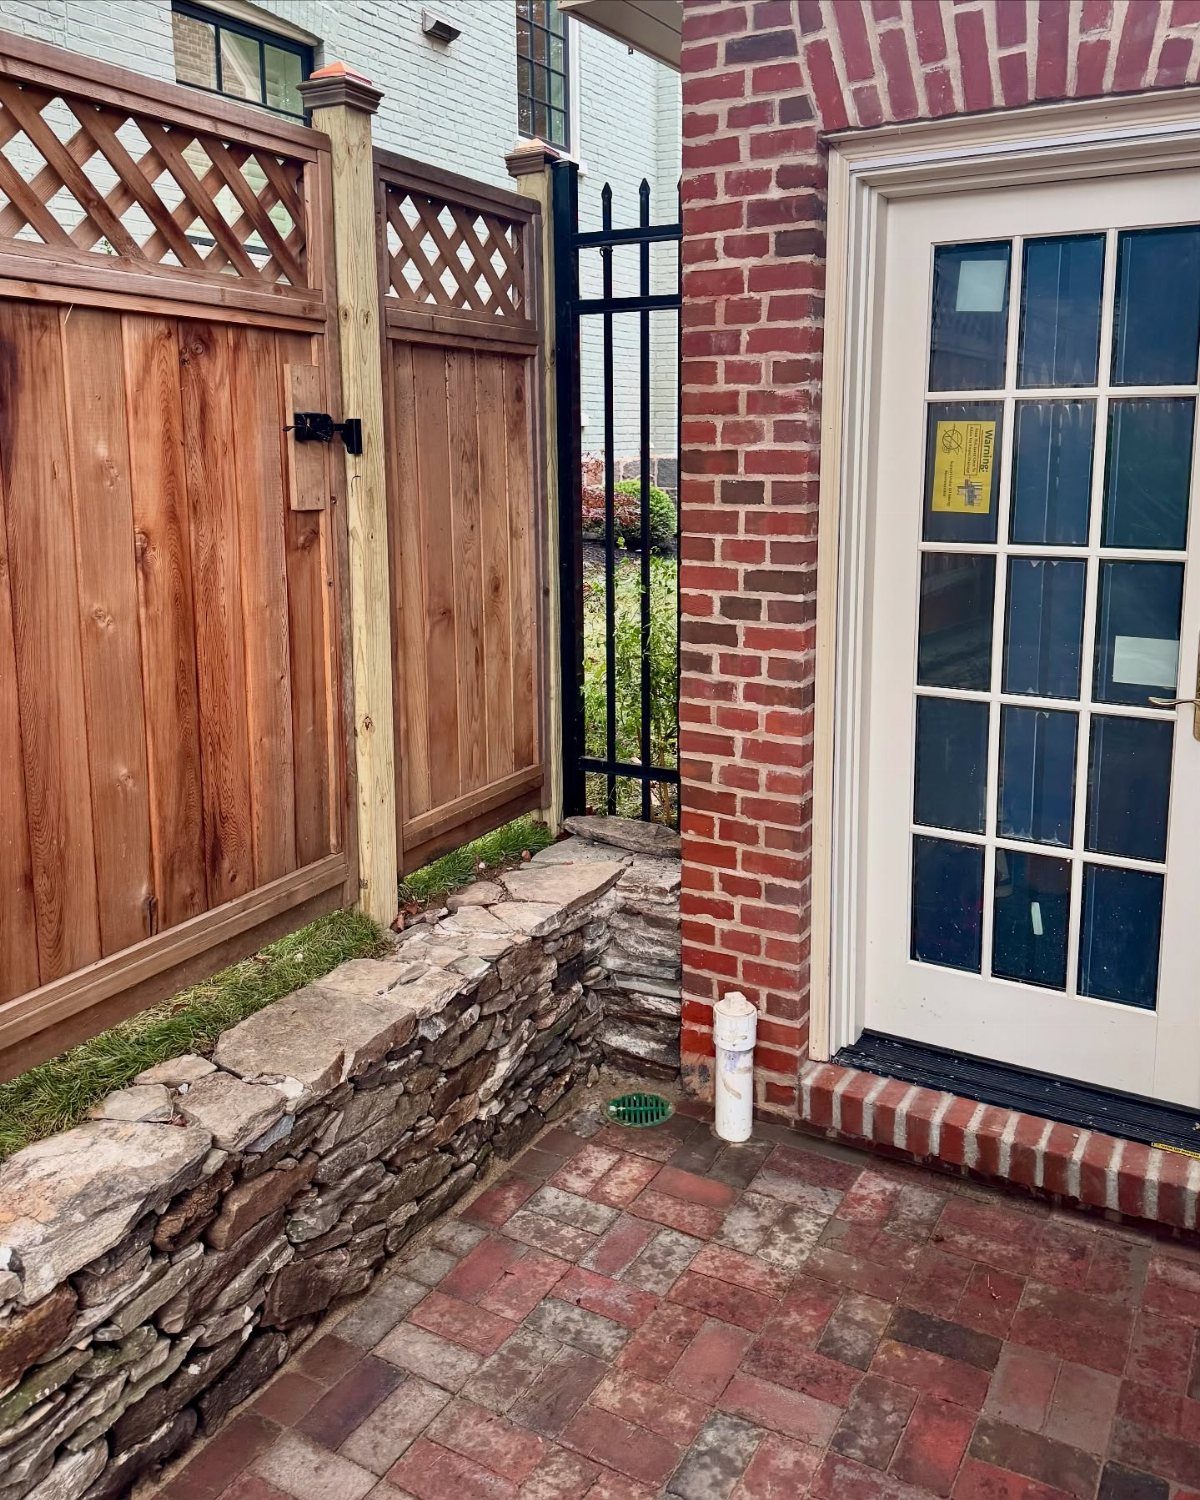
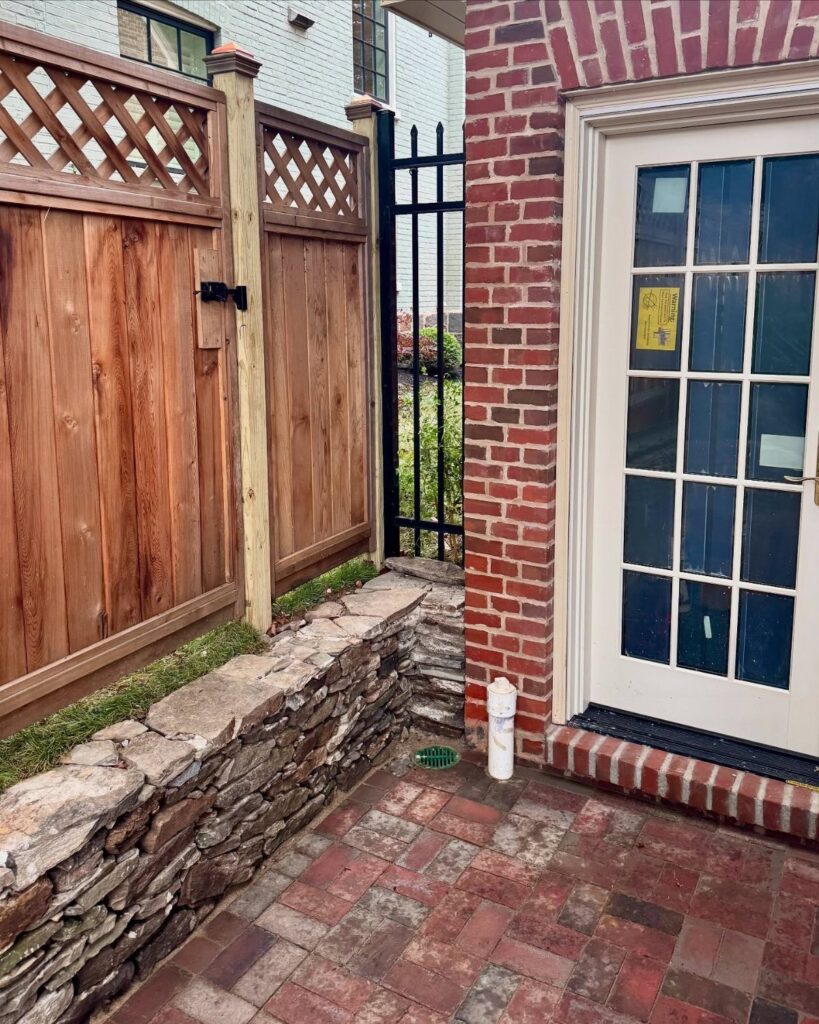
Dry-stack stone, laid without mortar, gives a low wall an easy, settled look, especially against brick and wood. Gaps between stones let water move through, and a drain pipe behind the wall helps it get out.
For a weekend DIY, keep the wall low and choose stones of fairly even size. Heavy lifting is the real cost here, so line up a helper before the stone arrives.
A wood retaining wall is a more cost-effective choice than stone or concrete, but lacks the same longevity. The biggest concern is water, which will rot the wood if you don’t take the proper precautions.
4. Natural Stone and Wood Retaining Wall
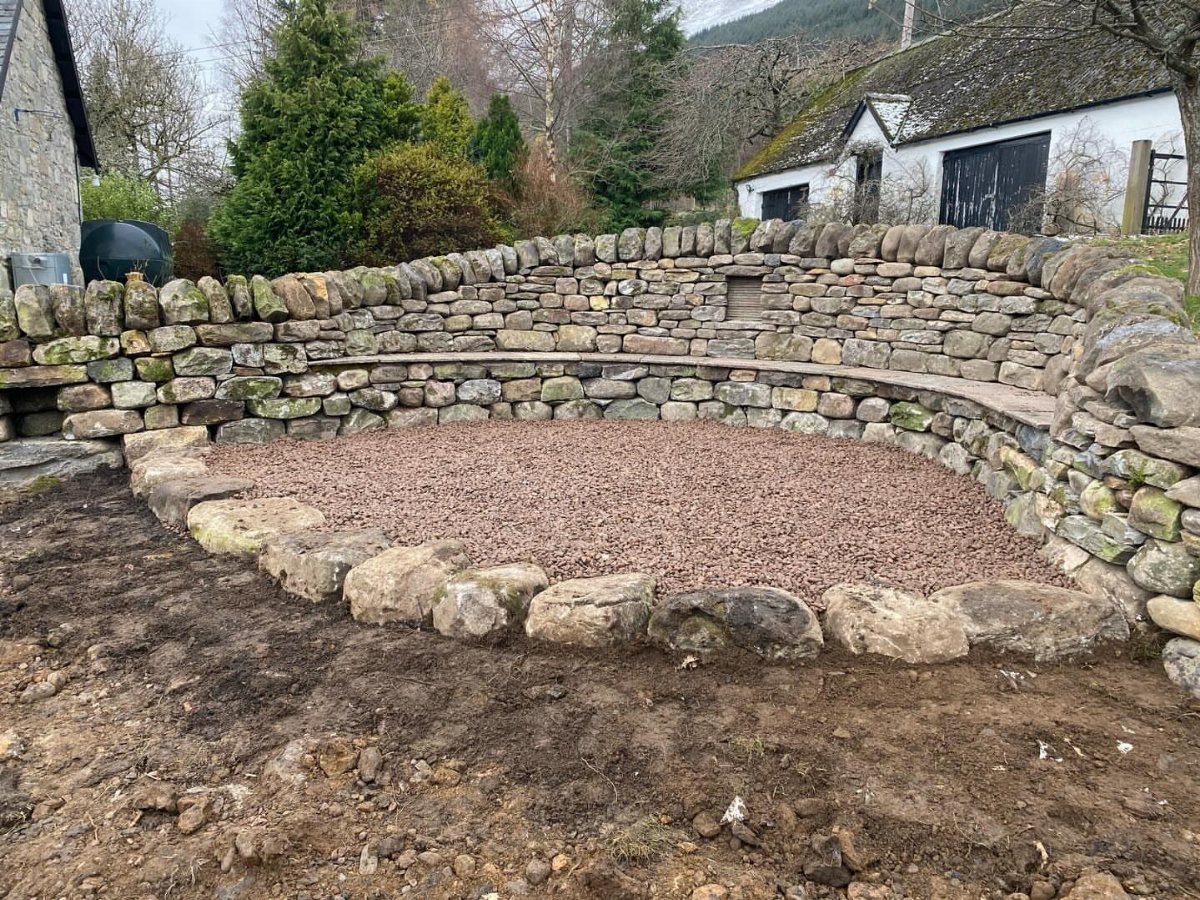
Building a bench into the wall means the retaining wall earns a second job.
Set a wood plank on top of a curved stone base and the wall becomes a bench, so a tight backyard gets seating without a single piece of patio furniture.
Wood is the softer, warmer partner for rough stone, and it’s the part you can swap later if the weather wears it down. A gravel floor in front keeps footing firm and drains easily.
5. Retaining Wall with Built-In LED Lights
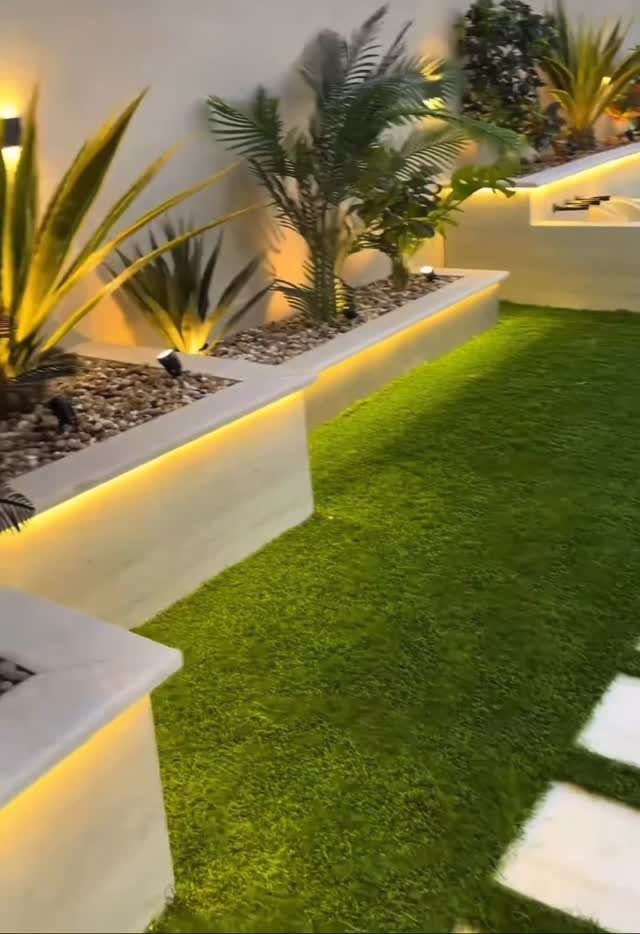
LED strips tucked into the wall’s top edge wash light down across the face, so a plain white wall becomes the feature after dark. Low-level light also makes plants and pebbles in the bed stand out.
Plan the wiring before the wall goes up, because hiding a cable in finished concrete is far harder than leaving a channel as you build. Outdoor-rated strips are the one thing I would not compromise on.
6. Raised Patio Walls
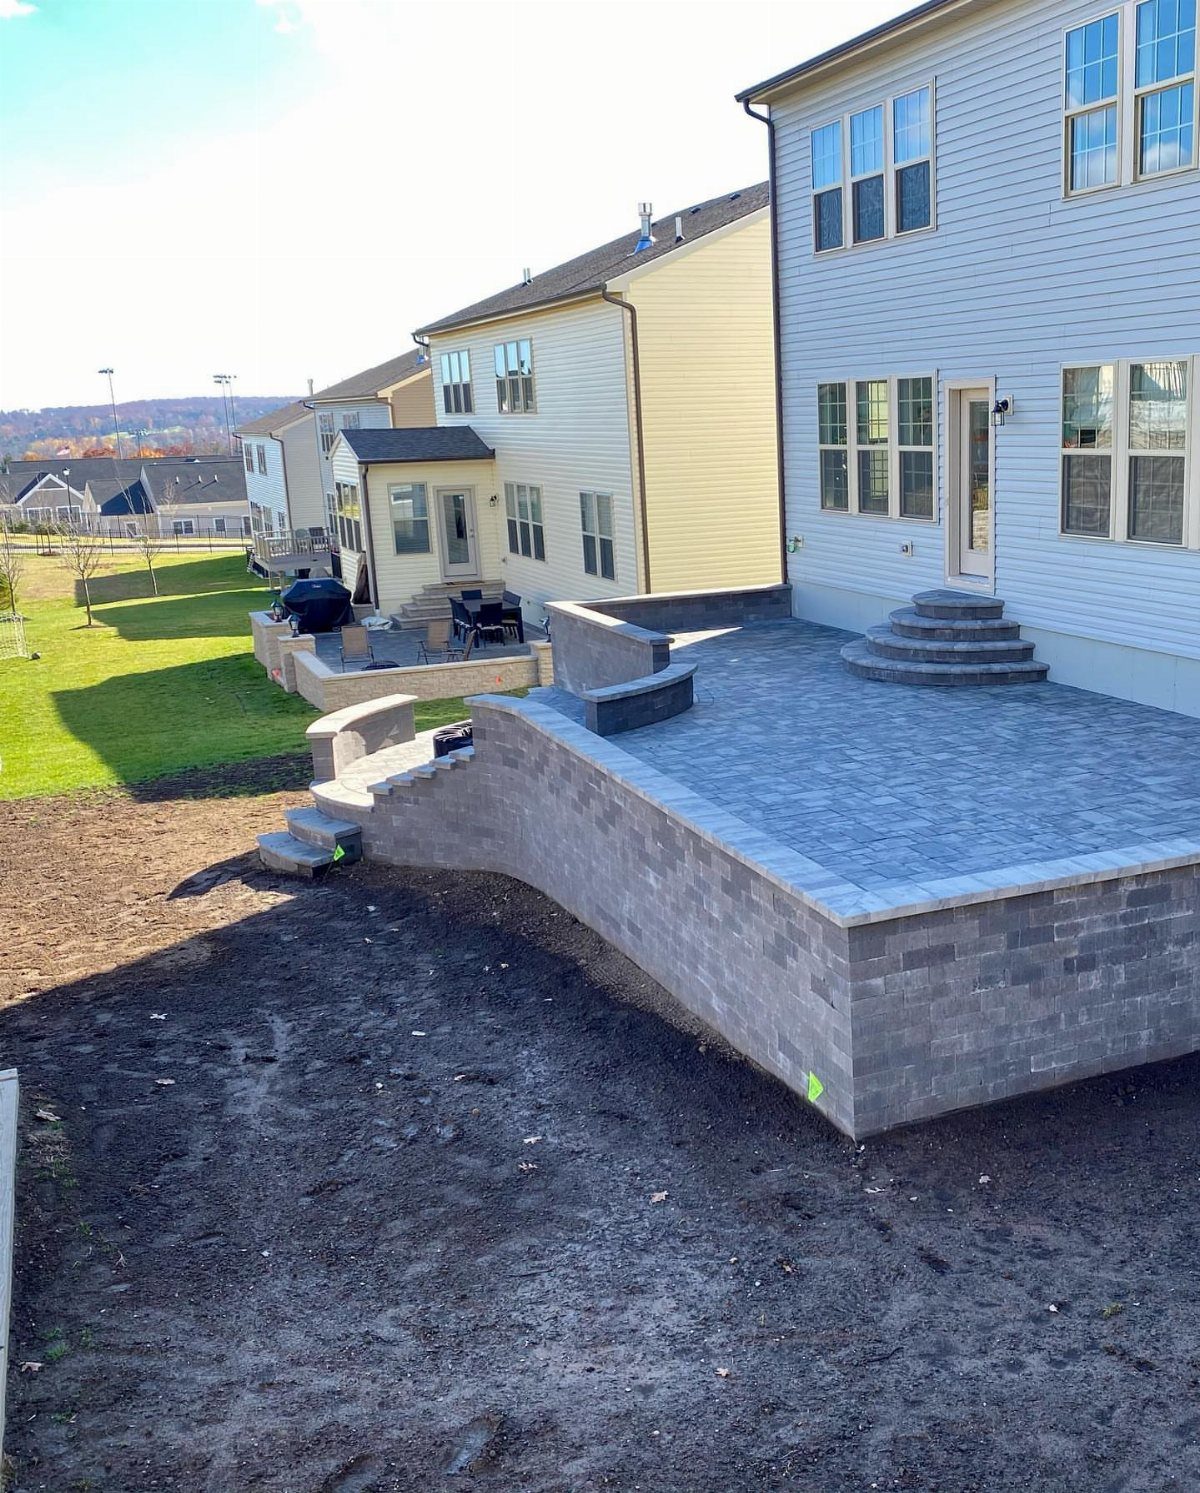
Raising a patio with its own retaining walls gives the space a clear edge and a bit of height off the yard. Walls that double as seating save floor area, which matters on a small lot.
Plan steps into the design from the start, and make the walls curve or stay straight to match the house.
Fill and compaction behind the walls are where most of the work, and most mistakes, happen, so budget more time there than for the stonework.
7. Sunken Conversation Areas
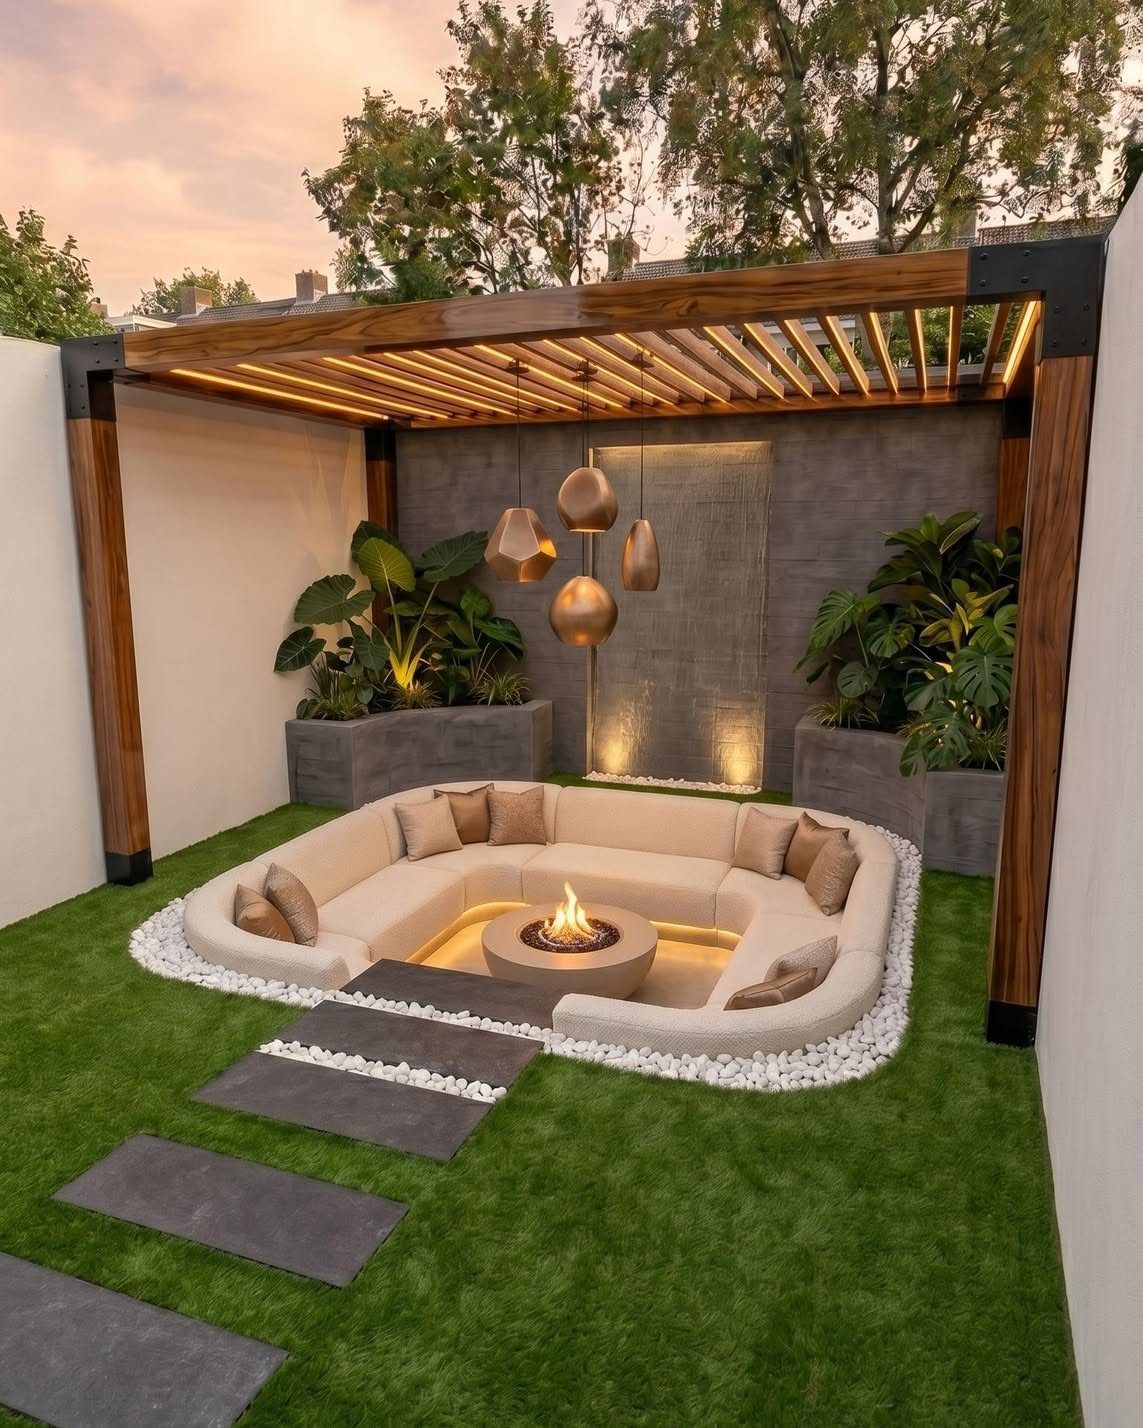
A sunken lounge uses the walls around it as shelter, so a fire pit and curved seating end up feeling like a room with no roof.
Dropping the floor below the yard gives a small space a clear edge and a sense of enclosure.
Retaining walls hold the soil back on every side, so plan the drainage and the steps down before you dig. Stepping stones across the grass make a simple path in.
A wooden pergola overhead adds a ceiling, and I’d treat it as an add-on for a second season.
8. Retaining Wall with Decorative Rocks and Gravel
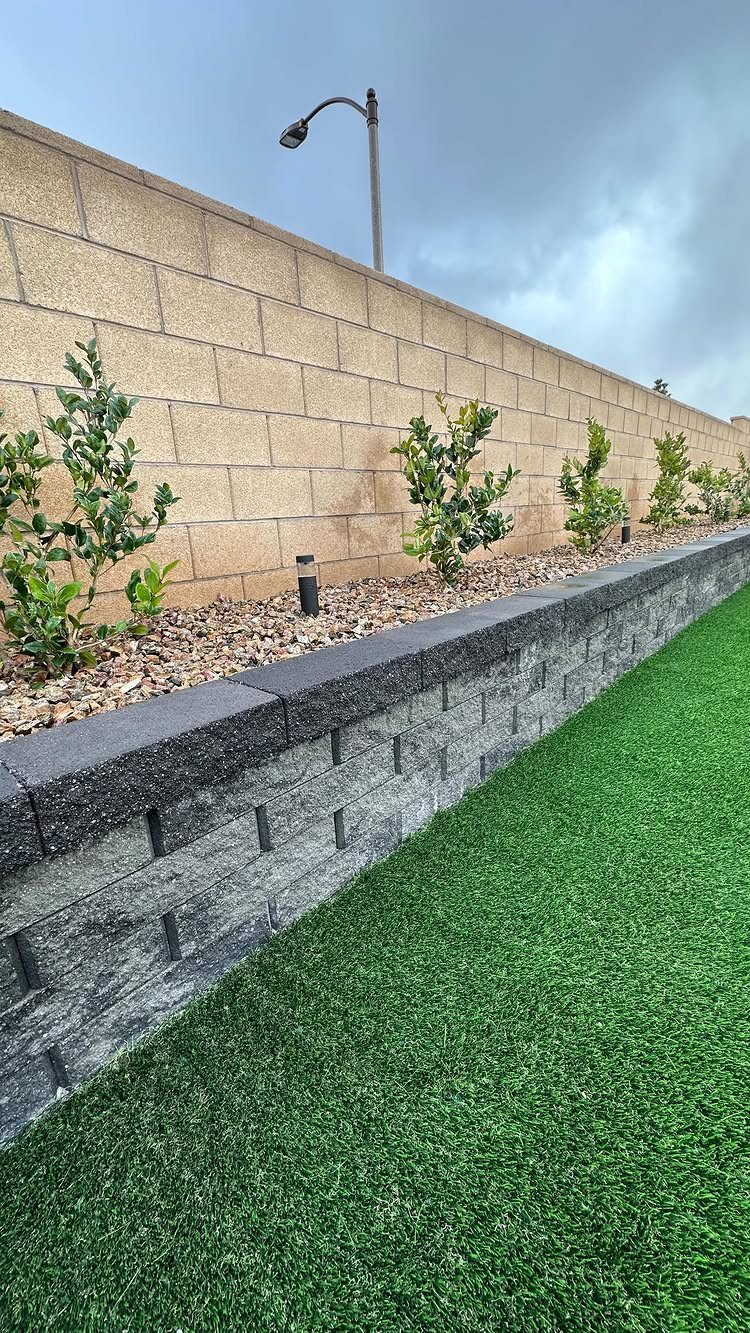
Brown decorative gravel in the bed behind a low grey wall gives small shrubs a clean, tidy base. The warm gravel color also sets the bed apart from the cool grey wall, so the 2 read as separate bands.
Gravel is a good fit for a first project: it needs no mortar and no special skill, only a level bed and a weekend. Keep the shrubs small and the gravel layer neat against the wall face.
I like it most where the lawn is artificial, since the whole yard then stays low on upkeep.
9. Built-In Garden Beds
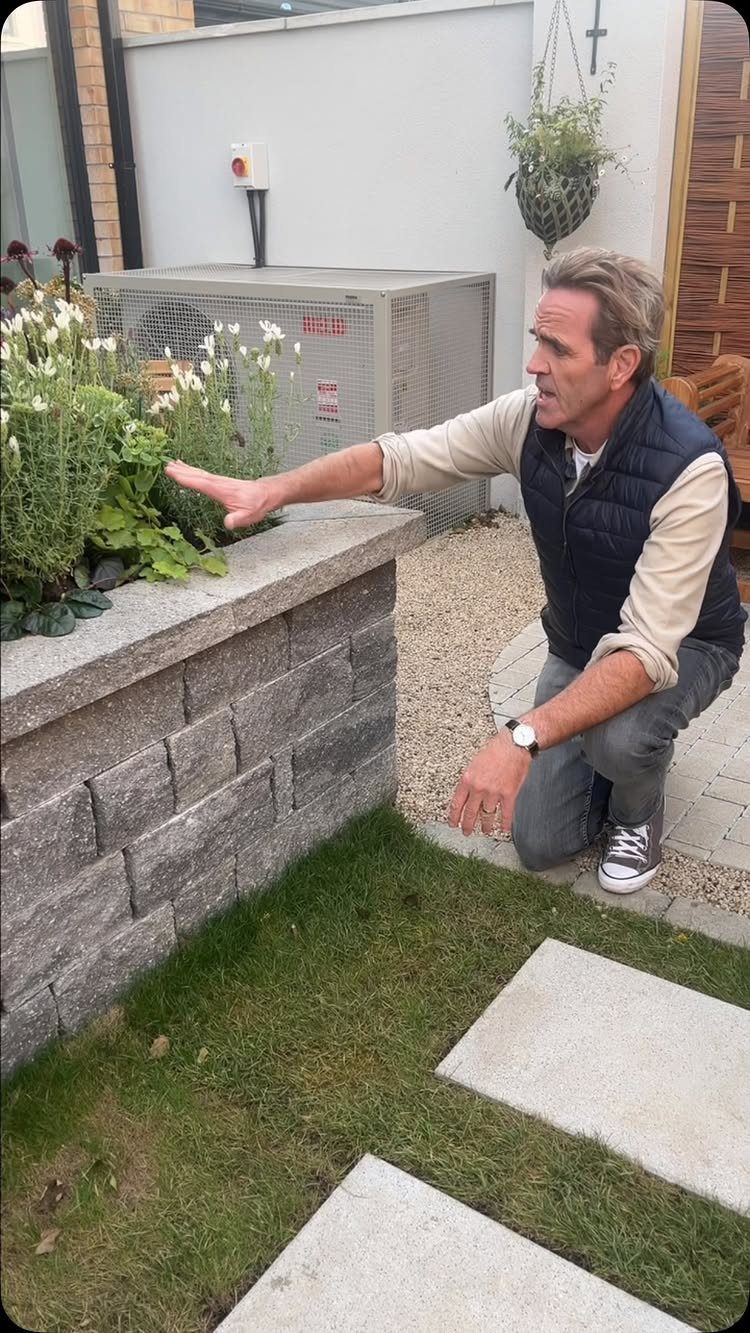
Planting spaces built into the top of a stone wall lift flowers closer to hand height, so tending them takes less bending. White blooms stand out well against grey stone.
Decide where the beds go before the wall is built, because leaving the cavity open is far easier than cutting one later.
Set the stone to hold soil in, and choose plants that suit the amount of sun the wall gets.
On a small lot, the wall then holds soil and a garden at once.
10. Paver Retaining Walls
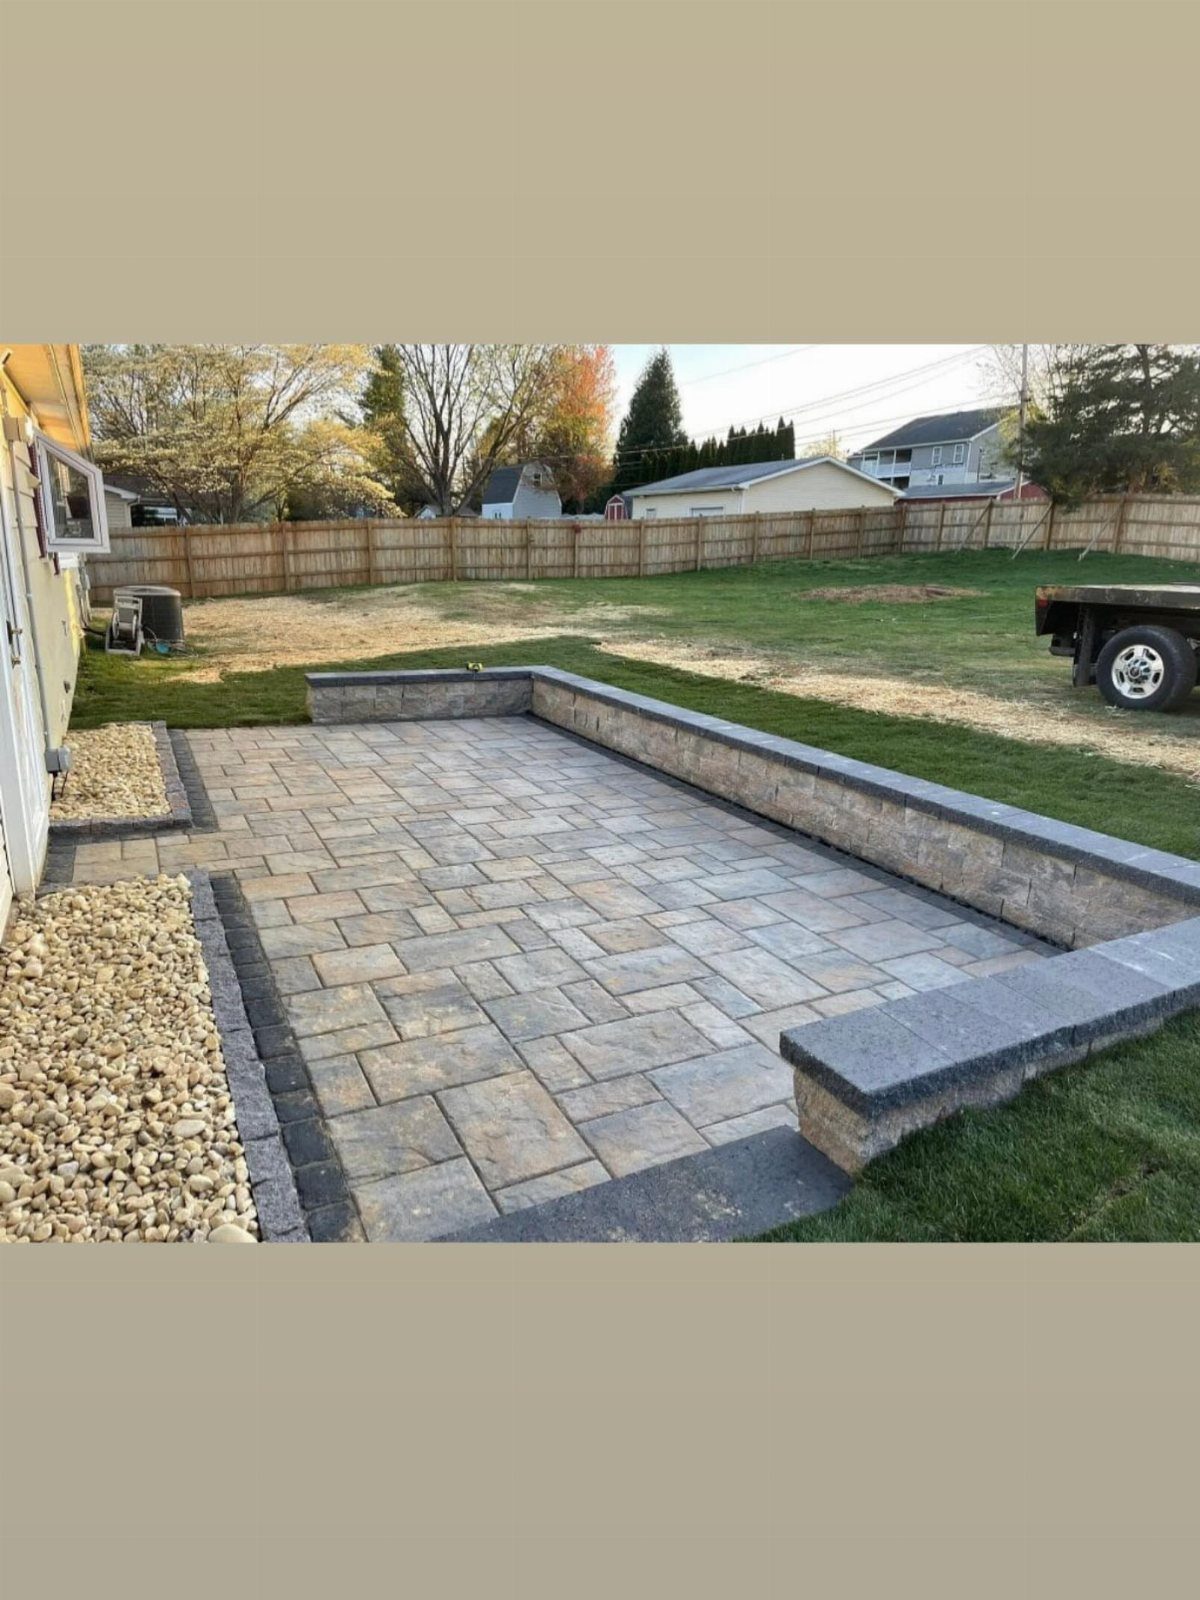
Pavers make a wall from material sold in most home centers, in a wide spread of colors and sizes. Grey stacked pavers beside a patio of the same stone tie the two together without much effort.
Matching the wall to the patio is my favorite move, since it looks planned. Keep the wall low for a DIY build, and for anything taller ask a local pro or your building department about height limits and permits first.
Pavers are also easy to carry, which helps if you’re working alone.
11. Plantable Vertical Walls
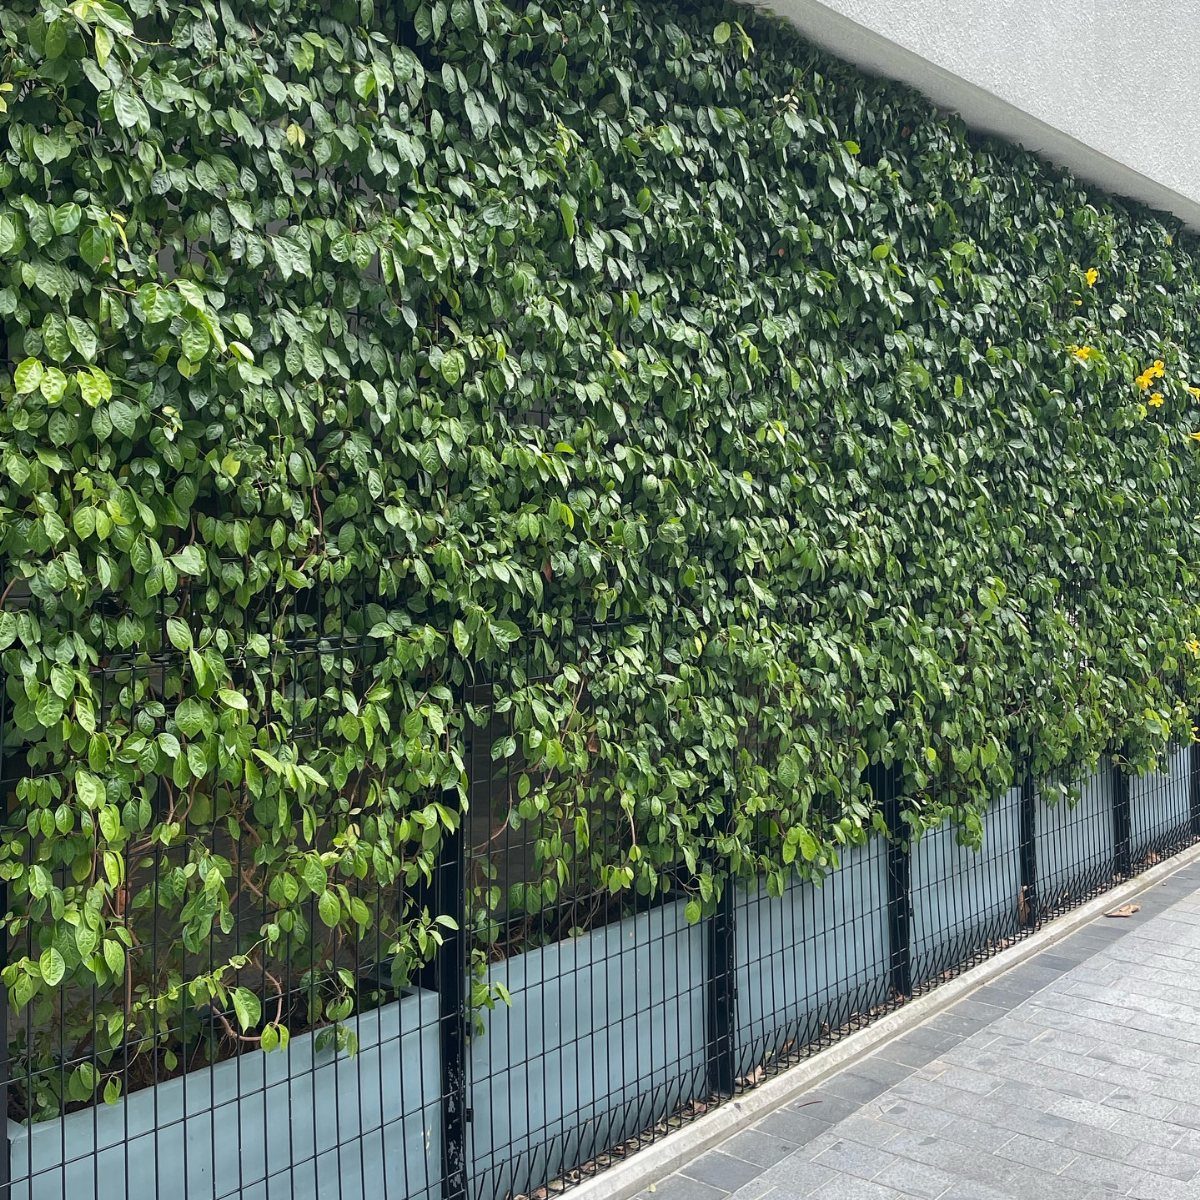
When there’s no ground left for planting, a wall can carry the garden upward. A black metal grid gives climbing plants something to grip, and in time the green covers the fence and softens a hard sidewalk edge.
Pick a climber that suits your light, and train the first stems onto the grid by hand. A grid like this is a good option for renters if you choose a freestanding frame rather than fixing anything to the wall.
Expect a bare look at first; the cover fills in over time.
Drainage and Wall Stability
Water pressure is what knocks over most retaining walls, so drainage deserves more attention than the face of the wall.
Behind the wall, backfill with gravel instead of plain soil, and run a perforated drain pipe through it so water has a way out.
A wall has 6 working parts: a compacted gravel or crushed stone base, the wall units, a top cap that locks the units in place, backfill, the hidden drain pipe, and, on taller walls, geogrid.
Geogrid is reinforcement laid between courses, and a tall wall without it is a gamble.
Compact the base before the first course goes down.
After heavy rain, walk the wall and look for cracks, worn spots, or water pooling at the base. Catching those early costs a lot less than rebuilding.
Permits and Professional Design
Permit rules change from city to city, and they depend on height and on what sits above the wall. Phone your building department first, since the answer on permits and height limits can change which blocks you even consider.
As one example, San Diego County requires no permit under 3 feet with no extra load, though the wall must still meet the minimum setback from the property line.
A wall that reaches 3 feet or more usually needs a building permit, plus structural plans signed and stamped by a licensed engineer.
Expect extra steps in some places.
Hillside zones there need a geotechnical report on top of the engineering, and large earthwork can need its own grading permit. Terraced projects often cross that line.
If your wall is tall, loaded, or complicated, hire a pro to design it. Do the digging yourself if you like, but not the engineering.
Choosing Materials and Budget
Your final cost swings with the material you pick, how tall and long the wall runs, how much site prep it needs, your soil, drainage, engineering fees, and labor.
Height drives the price more than anything else, since every extra foot adds material, engineering, and hours of labor.
Timber is the cheaper way in, but it won’t last as long as stone or concrete.
Natural stone usually costs more, and much of that premium is labor, since someone has to fit irregular pieces into a stable pattern. Block systems sit between them and come in a range of textures and finishes.
Without an engineer’s input, a dry-stacked stone wall generally tops out around 3 feet. Taller stone walls need mortar on a reinforced concrete footing.
Set money aside for the hidden work behind the wall as well, because digging, regrading, and weak soil can push the total up fast.
Skimping on drainage to save money is the most expensive shortcut, since repairs later cost far more than the pipe and gravel.
Frequently Asked Questions
How much does a retaining wall cost?
Cost depends on the material, the wall’s height and length, site prep, soil, drainage, engineering fees, and labor.
Treated timber costs the least to start, block systems sit in the middle, and natural stone runs highest because someone has to fit each irregular piece by hand.
In San Diego, one installer lists $35 to $55 per square foot of face for gravity block walls under 4 feet, installed.
Do I need a permit for a retaining wall?
Rules vary by city and by wall height, so call your building department first, ahead of any material purchase.
Phoenix draws a similar line at 3 feet, but it measures from the bottom of the footing up to the top of the wall, and a wall holding up a driveway or a slope above it can need review sooner.
At 3 feet or more, expect a permit and engineer-stamped plans in places like San Diego.
When is a retaining wall needed?
You need one when soil has to be held back: to stop erosion on a slope, manage runoff, make level ground for a patio or garden, or protect a downhill foundation from washing soil.
Not every slope needs a wall, though.
Wall height and anything built above it, like a patio or driveway, decide whether engineering is required. If erosion is near your home’s foundation, get professional advice.
How to make a retaining wall look nicer?
Give the wall a second job and a good partner material. Built-in seating, planting beds at the top, or LED strips along the top edge make a plain wall the feature of the yard.
Matching the wall to your patio pavers looks planned, and gravel or small shrubs at the base keep the edge tidy. Climbing plants on a freestanding grid can soften a hard wall.
Which retaining wall materials are most durable?
Natural stone and concrete block last longest. Stone lasts the longest but usually costs more.
Concrete block gives you even, strong units that handle freeze-thaw swings well. Of the three, timber is the cheapest and has the warmest look, yet it rots sooner than stone or block.
What is the 1/3 rule for retaining walls?
Plan to bury roughly a third of the wall’s overall height underground. That buried section anchors the wall against the push of wet soil behind it, and leaving it out is one of the most common reasons walls fail.