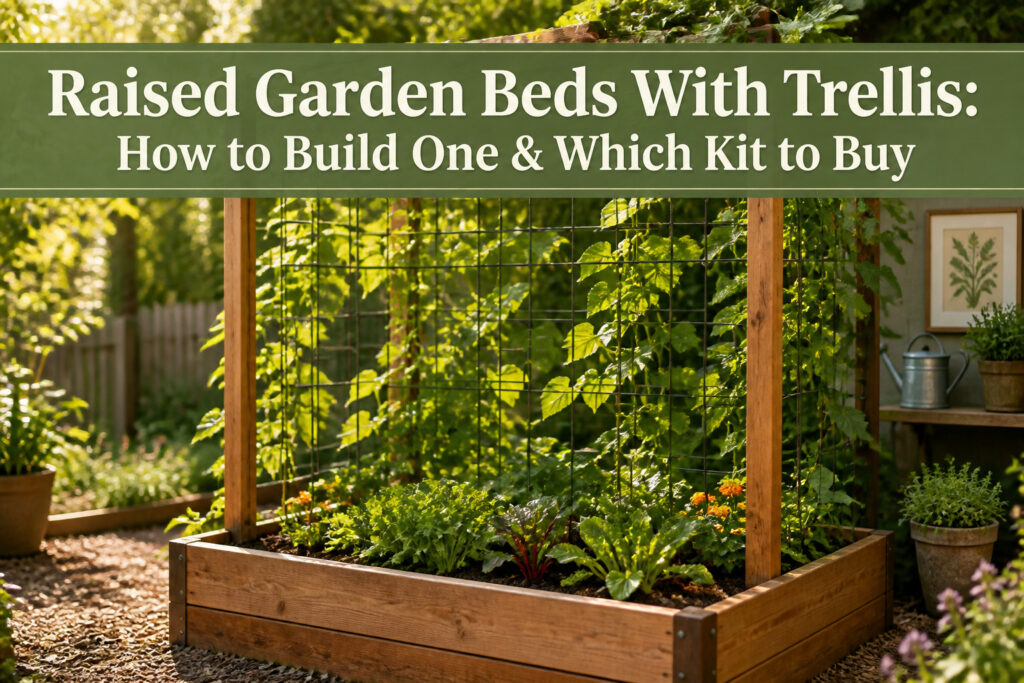
A raised garden bed with trellis is a planting box lifted off the ground with a vertical frame fixed to it so climbing plants grow upward instead of sprawling across your soil. The catch is timing: install the trellis before you plant, because driving posts or anchoring mesh once roots have spread risks tearing the very plants you’re trying to support. A 16-foot cattle panel and two T posts run about $33 if you borrow the post pounder, and that steel arch will outlast the wood beds it spans.
What a Raised Garden Bed With Trellis Is and Why It Works
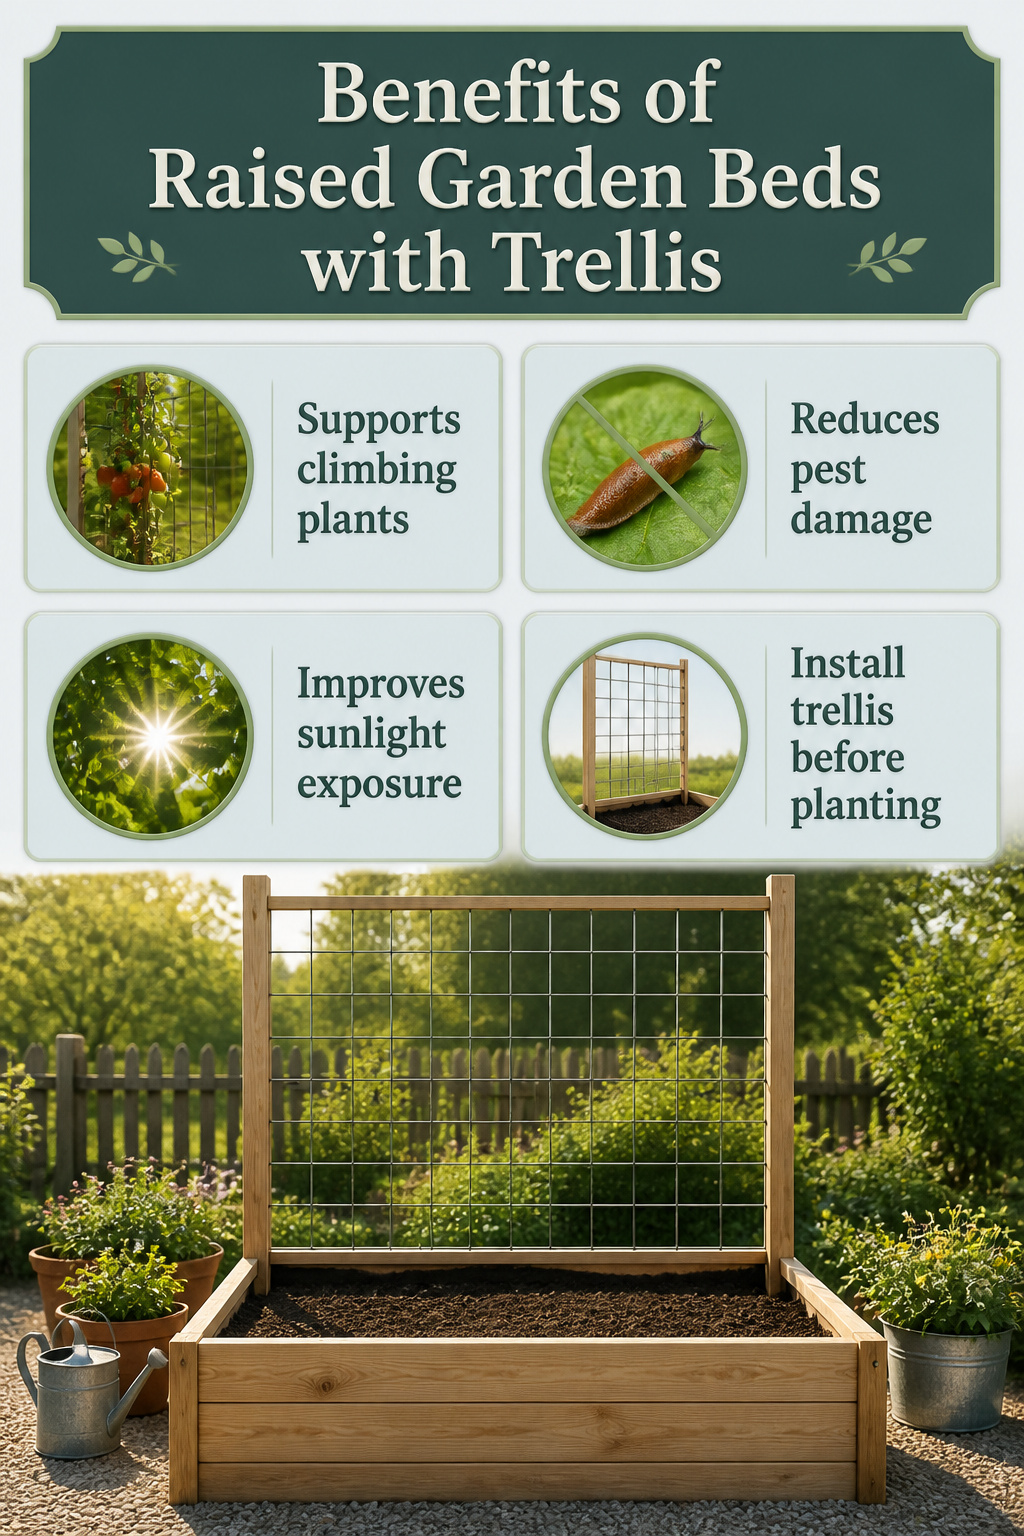
A raised garden bed with trellis is exactly what it sounds like: a planting box lifted off the ground with a vertical frame fixed to it so climbing plants have something to grab instead of sprawling across your soil. The bed itself might be a simple 4-foot-wide box, but adding that upward support changes how much you can actually harvest from the same footprint.
The trellis pushes plants into the air, which gives leaves more even sunlight exposure and lets air move freely through the foliage. That circulation matters more than I expected when I started reading into this; damp, crowded leaves invite the fungal problems that wipe out tomato crops by August. Keeping fruit and vines off the soil also cuts down on slug and snail damage, the kind of pest issue that turns a promising raised bed into a salvage operation by midsummer.
Install the trellis before you plant. Sources on this point are unanimous, and the reason is practical: driving posts or anchoring mesh once roots have spread risks tearing the very plants you’re trying to support. Temporary trellises come back out of the shed each spring; permanent ones stay in place year-round. Either way, the structure goes in while the bed is still empty dirt, not after you’ve got seedlings in the ground.

Durable Steel Construction: Made from thick, galvanized metal for long-lasting use.

Vegetable Trellis that Assembles in Minutes, No Tools or Frustration – Say goodbye to complicated setups. Our U-shape trellis includes easy-connect joints and step-by-step instructions for fast, hassle-free assembly

What You Get: Garden cucumber trellis X1, outdoor raised bed X1, tomato clips X20, leaf ties X100, twist tie X1, trellis netting X1, garden gloves X1, manual X2. If you're looking for a reliable and stable cucumber garden trellis, our arch trellis with raised bed are the ideal choice. Easy to install and reusable season after season.
Materials That Hold Up
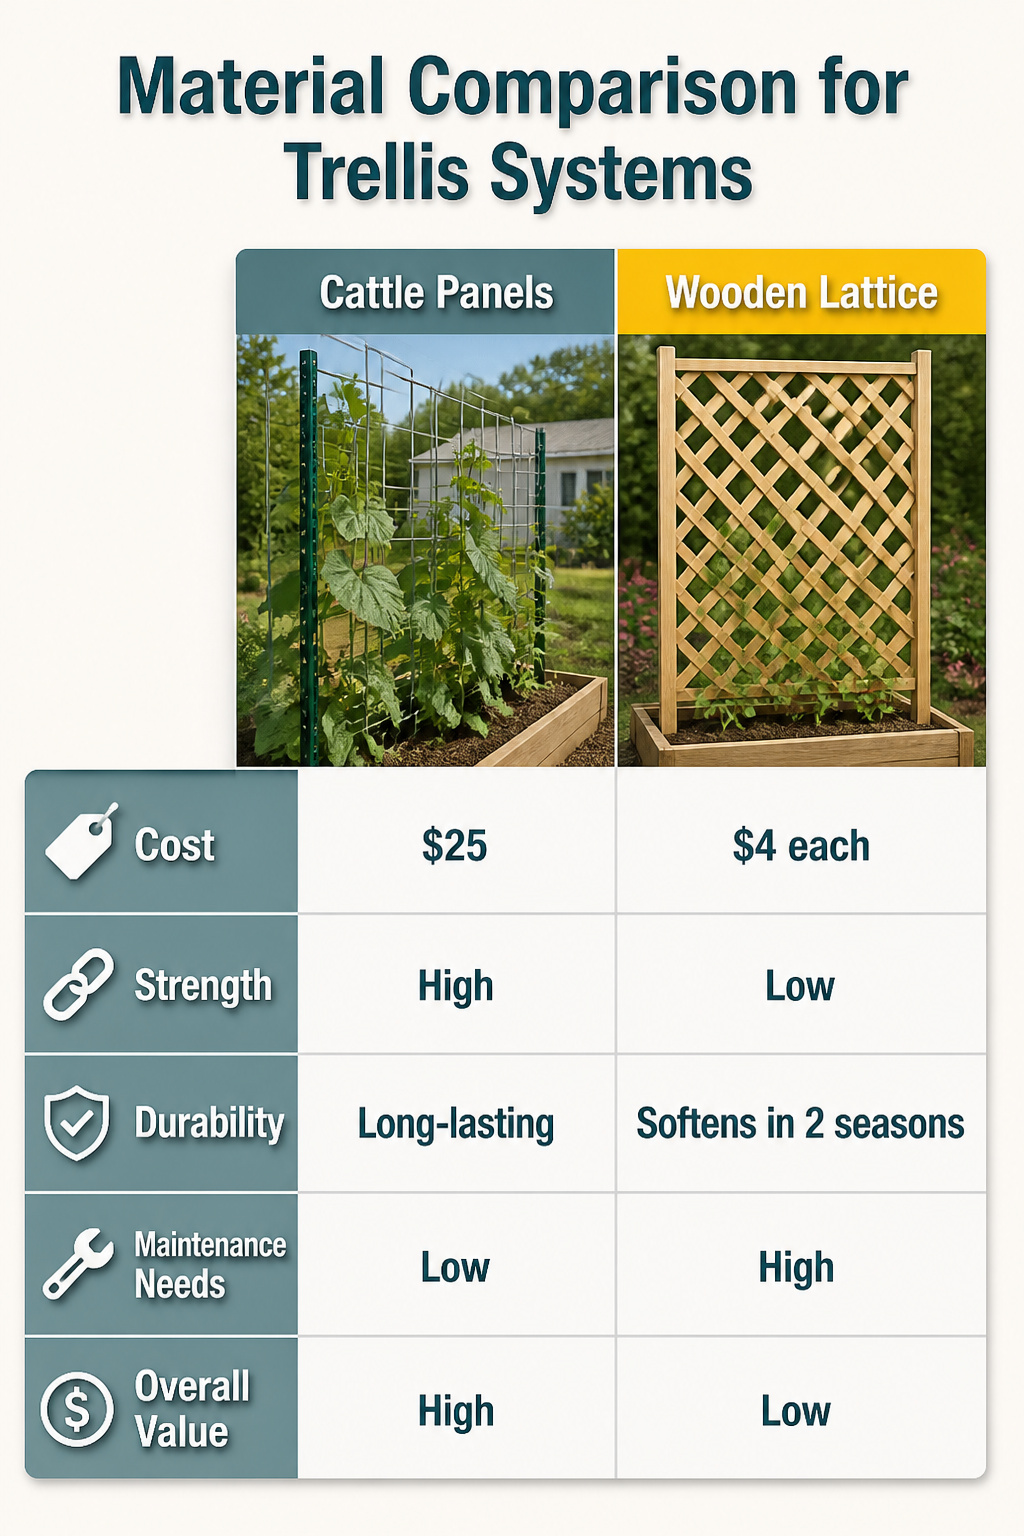
Cattle panels run about $25 for a 16-foot span at 34 inches tall, and four-foot T posts land near $4 each, which is why this combination keeps showing up in backyard builds. The steel panel carries beans, cucumbers, and squash without sagging once it is anchored, though the 50-inch width some farm stores stock can bow if the crop gets heavy before harvest. Wooden lattice reads nicer from the patio but softens in two seasons of soil contact and will not take the load of a mature gourd vine. Wire panels split the difference on strength, yet the grid spacing matters: too wide and young stems slip through instead of climbing. Composite boards for the bed itself resist rot but cost double what cedar does, and the hardware to mate them with a trellis is not always included in the kit price. For renters or anyone who might move the garden in three years, the T-post-and-cattle-panel setup comes apart with a wrench and leaves nothing in the ground.
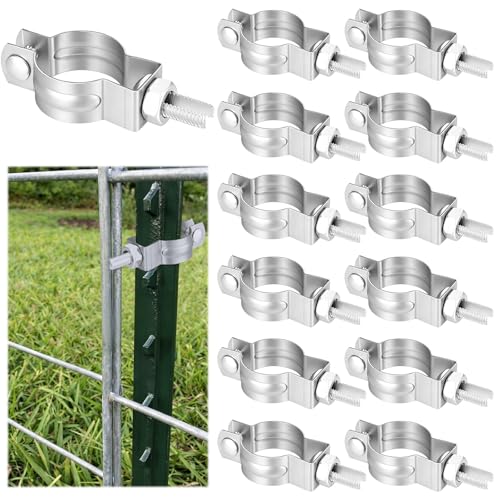
Value Set for Comprehensive Fence Projects: our livestock panel T-post connector set includes 12 reusable connectors designed to seamlessly join wire panels to T-posts or wooden posts; This ideal quantity supports fence repairs, pasture expansions, or trellis constructions, eliminating the need for extra fastening hardware

Value Set for Comprehensive Fence Projects: our livestock panel T-post connector set includes 24 reusable connectors designed to seamlessly join wire panels to T-posts or wooden posts; This ideal quantity supports fence repairs, pasture expansions, or trellis constructions, eliminating the need for extra fastening hardware

Value Set for Comprehensive Fence Projects: our livestock panel T-post connector set includes 12 reusable connectors designed to seamlessly join wire panels to T-posts or wooden posts; This ideal quantity supports fence repairs, pasture expansions, or trellis constructions, eliminating the need for extra fastening hardware
Spacing the Beds Before the Trellis Goes Up
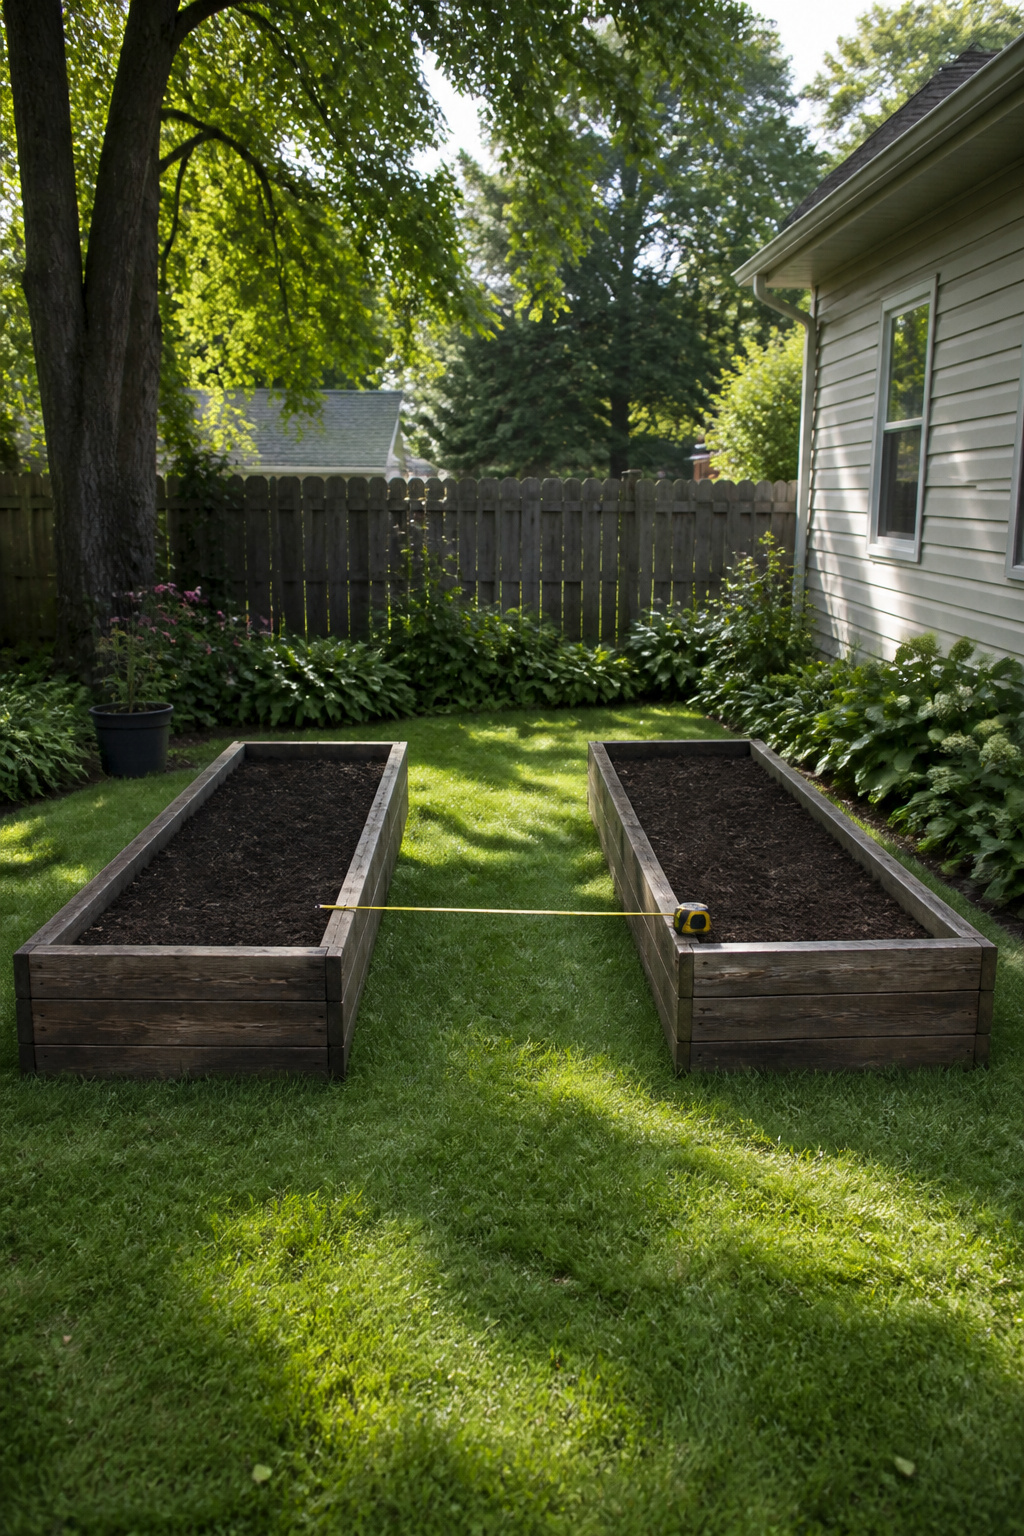
A 4-foot gap between beds is what you actually need if you plan to arch a livestock panel over the path, and that spacing has to be settled before a single board is screwed down. I learned this the hard way reading build logs: once the beds are filled with soil, shifting them even six inches means emptying them or working around a half-ton of dirt. The posts that will hold the trellis go into the outer back corners of each bed, so those corners have to land exactly where the panel will reach.
Depth matters almost as much. An 11-inch minimum wall height keeps the bed itself functional for most vegetables, but the real constraint is working room. You need clearance on both sides of the panel to tie tomatoes or untangle snap peas, and you need to walk that gap with a wheelbarrow when the beds are freshly mulched. The sources I found all set their panels by laying the cattle panel across the bed tops first, eyeballing the bend, then marking where the posts had to go. That only works if the beds are already fixed at the right span.
If your beds are going against a fence or a garage wall, you lose one side of access. In that layout, a trellis running the back edge of a single bed makes more sense than an arch between two, and the 4-foot rule no longer applies. The measurement that still holds is the 11-inch depth; shallow beds dry out too fast against a wall where rain already sheds.

【Package included】:Crafted from robust hollow steel, this garden stakes features a fade-resistant green plastic coating, offering reliable protection against wind, rain, and rust. This Trellis for Climbing Plants Outdoor comes complete with everything you need to get started: 17pcs metal stakes, 8pcs T shape connect pipe, 2 A-shaped connectors, and a 0.9x1.8meter bird net.
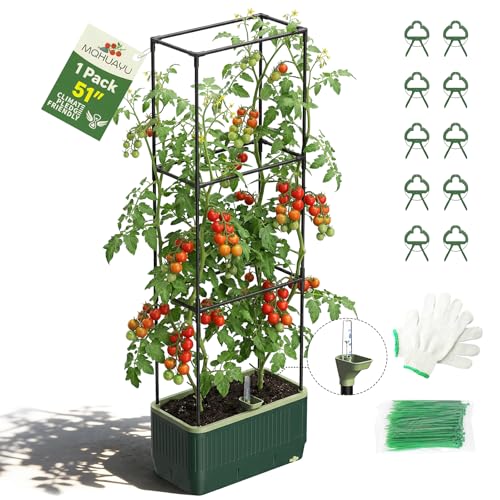
SMART SELF-WATERING & VISUAL GAUGE: Take the guesswork out of watering! Our innovative self-watering system features a deep water reservoir, cotton ropes, and a clear visual water level indicator. You can instantly see when to refill and when it's full, preventing overwatering or root rot. Perfect for busy schedules or weekend getaways, ensuring your plants thrive with minimal effort.

Package Includes: You will get 54 pcs plastic core stakes, 54 snap-on arms and 36 connecting pipes, 100 pcs 20 cm plant ties, it will provide ample space for plant growth, the green color makes them blend in better with the plants; This is a great choose for vegetables that are growing in the ground
Driving the Posts
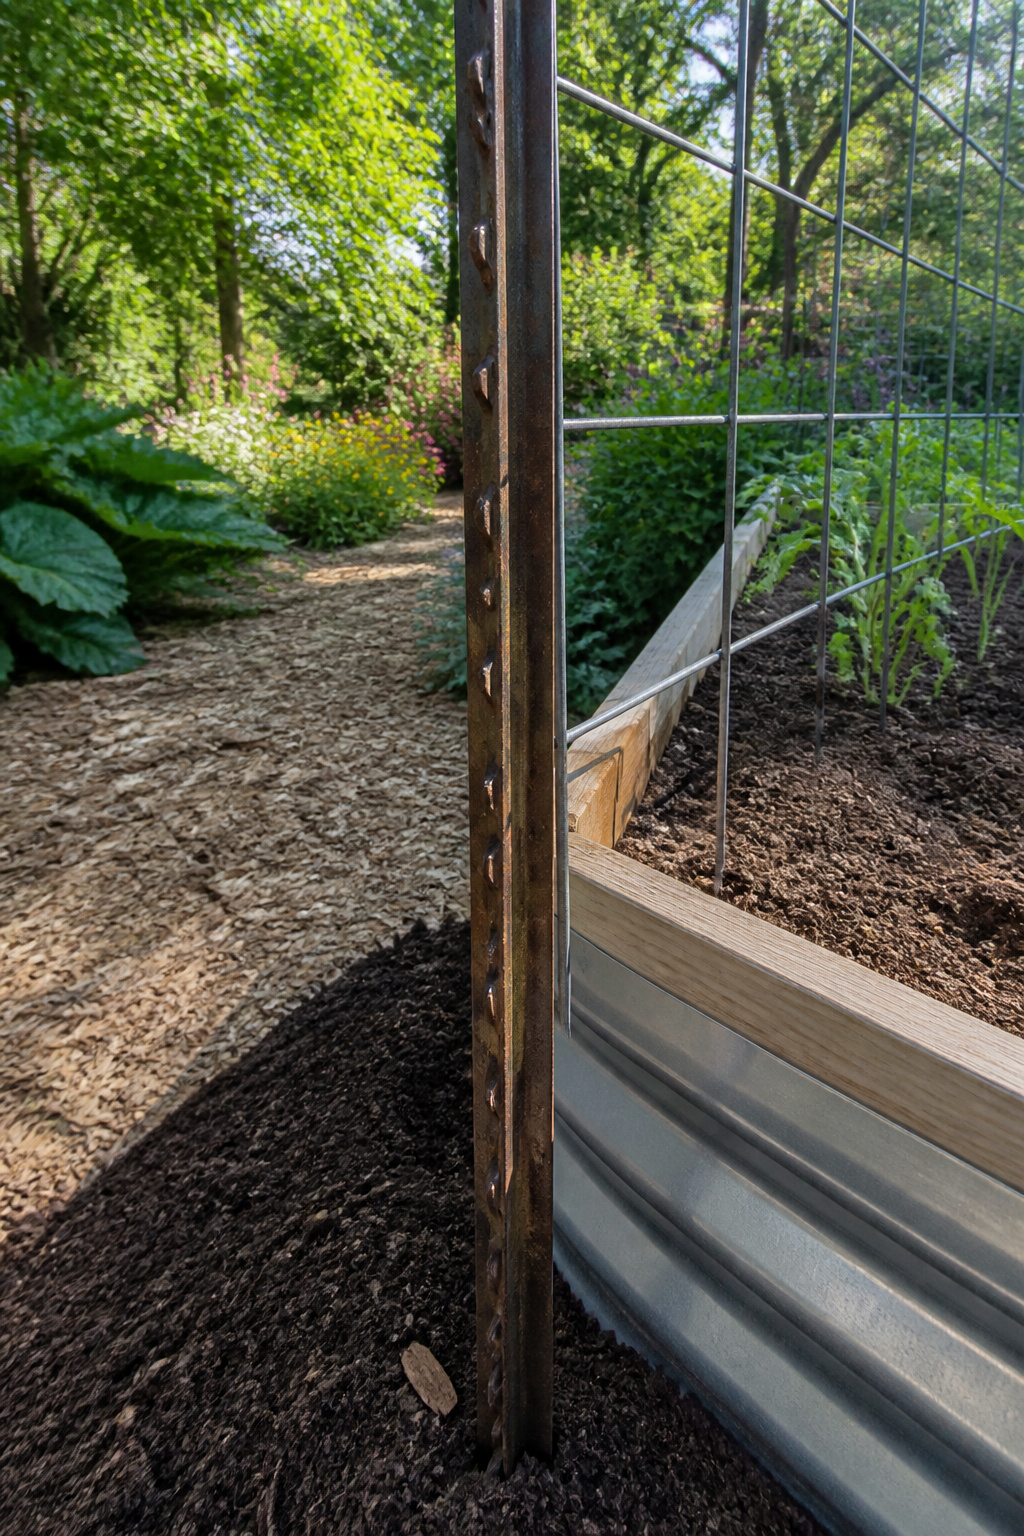
The 4-foot T post is the right height for a trellis that arches over a standard raised bed without turning into a sail. I set mine at the outer back corners, one post per bed, so the cattle panel can bend between them and the beds themselves act as braces. A foot below ground is the starting point, not the rule. In loose or sandy soil the post needs to go deeper and sit at a slight angle, leaning into the bed so the weight of the panel and the pull of mature vines drive it inward rather than prying it loose. Clay holds better but fights the post pounder every inch. I watched a neighbor assume one depth fits all ground and end up with posts that listed sideways by July under the load of a single tomato vine. The pounder matters too: a post driver concentrates force straight down, which is why it beats a sledgehammer for keeping the post vertical while you adjust.

【Package included】: This Trellis for Climbing Plants Outdoor comes complete with everything you need to get started: 17pcs metal stakes, 8pcs stainless wire connect pipe, 2 A-shaped connectors, and a 0.9x1.8meter Bird net.

【HIGH COST PERFORMANCE】Besides the frame trellis, we also provide multiple accessories for your need.Includes 8 x panel trellis, 12 x screw, 6 x ground stakes,20Pcs cable zip ties,a pair of gloves.You may assemble the unit according to the picture.It can also be combined into your favorite or suitable shape.

Simple Elegant Garden Obelisk Trellis: This 67 inch garden obelisk trelliscreates vertical growing space for climbing plants outdoor, flower vines, peas,beans, cucumbers, and tomatoes. The teepee trellis shape works as a tomatocage trellis and decorative plant support for raised beds, planters, pots,patios, and garden beds.
Attaching the Trellis to the Posts
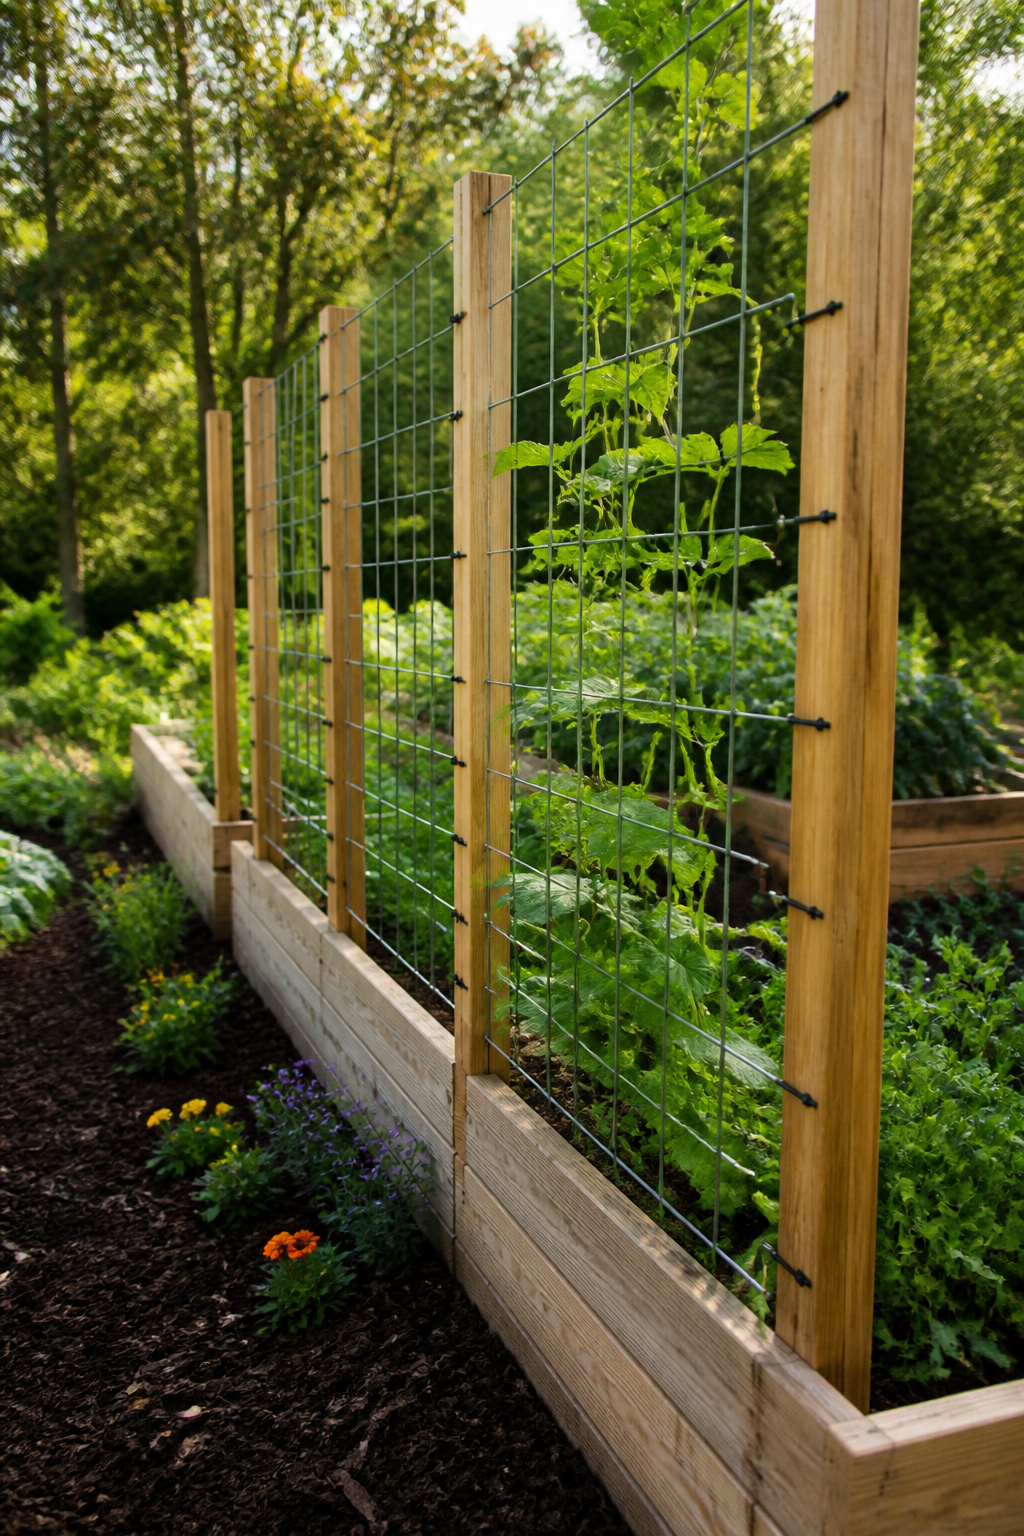
Zip ties work, but the spacing between them decides whether the trellis stays quiet or turns into a wind chime. For a 4-by-8-foot wire mesh panel, three wooden supports across the back of the bed give the frame enough anchor points that nothing bows outward once the vines load up. I fasten each support to the bed itself with 4-inch lag screws, three per post, then run the ties at roughly 12-inch intervals up each post. Tension matters more than tightness: pull the zip tie snug enough that the panel cannot shift, but stop before the plastic starts to distort the wire. Overtightened ties snap in summer heat; undertightened ones let the whole panel rattle against the posts every time the wind picks up.
Wire instead of plastic solves the heat problem, though it takes longer. The real difference shows up months later, when a heavy tomato vine or a tangle of cucumbers loads the grid. A trellis that rattled during installation will sag and twist under that weight. One that started dead flat and firmly fixed stays flat, and the harvest is easier because the fruit hangs where you expect it.

✅ Adjustable Height (17" to 50") – Grow from Seedlings to Giants! Start at 17" for delicate seedlings, then effortlessly extend to 50" as your cucumbers, tomatoes, beans, or towering vines flourish! Designed to match your plants’ growth cycle, this trellis adapts to raised beds, containers, or sprawling gardens.
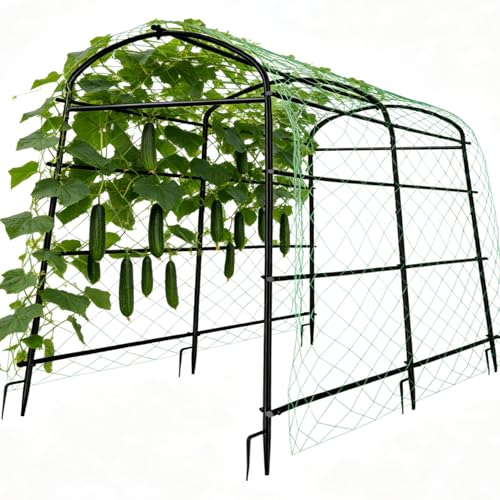
A plant climbing trellis is essential for maximizing yield and optimizing space, especially for vines plants like cucumbers, beans and morning glory. Our trellis provides the crucial vertical support needed for healthy growth and abundant harvests.
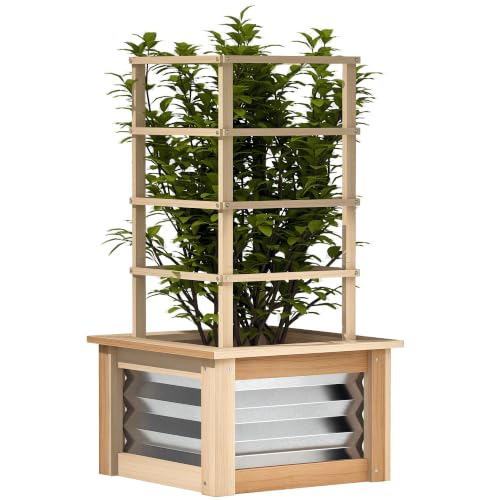
Upgraded Frame: Constructed from solid fir wood and reinforced with galvanized steel side panels, this flower box is designed for lasting durability and can withstand the elements season after season
Filling, Planting, and Training
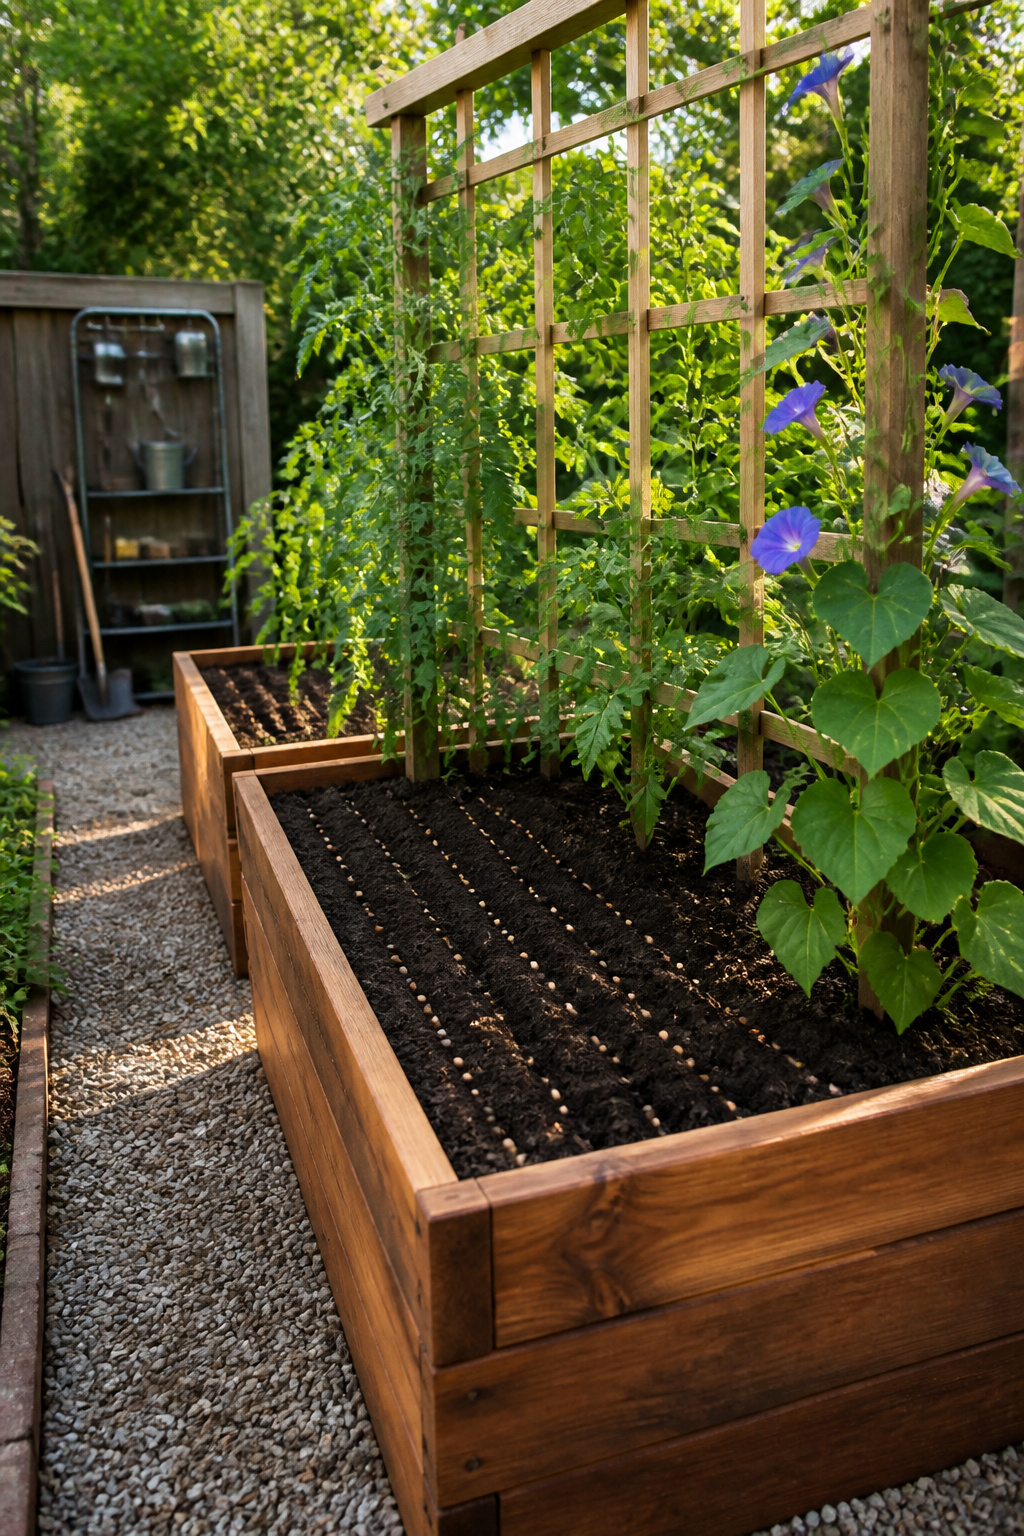
Soil goes in about twelve inches deep for most raised beds, though the roots of indeterminate tomatoes will chase nutrients farther down if you give them the room. I set seeds at 1/4 to 1/2 inch deep, pressing them in firm enough that a hard rain won’t wash them bare. Pole beans go in every 2 to 6 inches along the base of the trellis, not set back into the bed. A climber planted right against the grid finds the first rung with its first tendril; one even six inches back spends a week reaching across open soil, and that week costs you harvest at the end.
Indeterminate tomatoes, cucumbers, pole beans, morning glories, and nasturtiums all handle the vertical life differently. Beans and cucumbers twine on their own. Indeterminate tomatoes will not; they need tying to the trellis every 7 to 10 days with soft twine, or the stems slump and kink. Morning glories and nasturtiums fill the gaps between vegetables, and the nasturtiums will trail down the front if you let them, which looks better than bare cedar.


All-in-One Gardening System: This premium Garden Bed kit includes two spacious raised garden beds and a tall 87-inch arch trellis designed for climbing plants. Equipped with a climbing net for added stability, the complete set boosts both garden productivity and visual appeal.

Spacious Planting: Raised garden bed 8x4x1 FT can accommodate 32 CUFT / 239 gallons of soil. Raised garden bed 6x3x1 FT can hold 18 CUFT / 135 gallons of soil. With ample room to grow, our large garden bed provide you with the space needed to nurture a thriving garden. Whether it's vibrant vegetables fragrant herbs or beautiful flowers, you'll have the room to cultivate your favorite plants.
Checking and Maintaining Through the Season
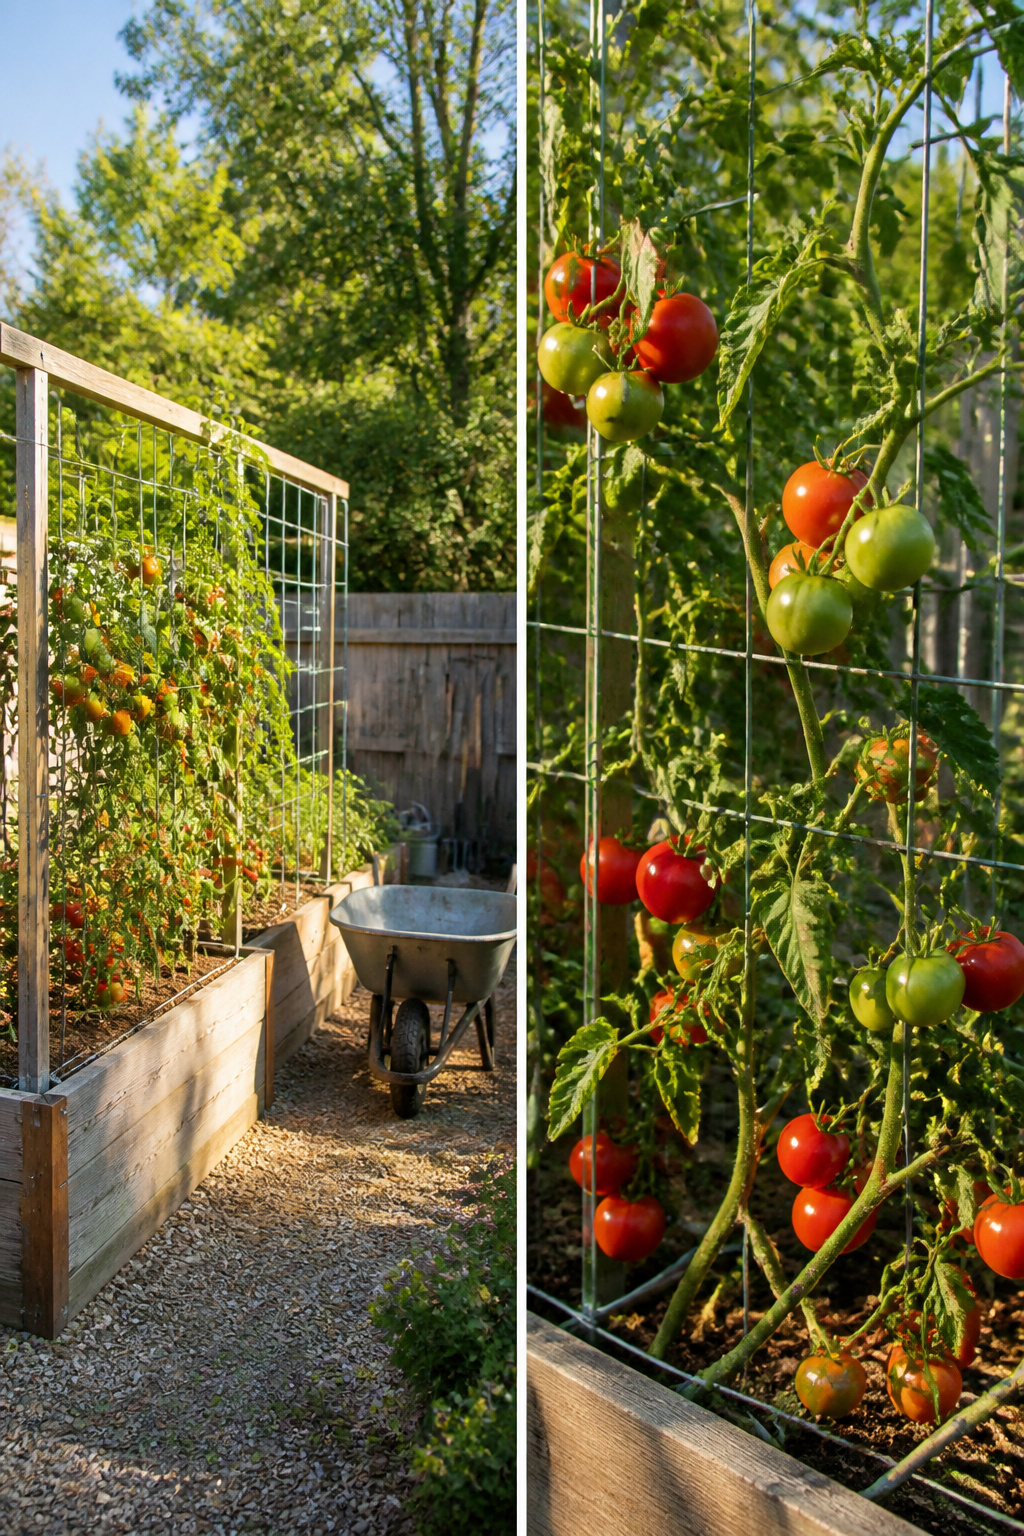
A trellis that looked rigid in May will sag by July if the wire was stretched too loose or the posts settled unevenly. Every week or two, push against the uprights and check whether the hardware cloth or mesh has developed a belly where the weight of foliage pulls it forward. Tighten or replace wire before the sag becomes a tear, because a snapped support mid-season means cutting the plant free and starting the training over.
Indeterminate tomatoes are the neediest crop on the structure. They do not twine or grip with tendrils like pole beans or cucumbers; they simply grow upward until they flop. The fresh growth wants tying to the trellis every 7 to 10 days with garden twine, looped loosely enough that the stem can still thicken. Miss that window and the branch escapes sideways, usually toward the path you walk, and by the time you notice it has already set fruit in a position where the weight will pull it down.
Other climbers give earlier warnings. Peas and pole beans announce trouble by reaching for open air instead of the grid. Redirect them while the tendrils are still soft. Squash and melons are heavier and slower; their fruits may need slings as they size up, but the trellis itself fails first at the joints where the posts meet the bed frame. Those are the spots to watch.
Value Set for Comprehensive Fence Projects: our livestock panel T-post connector set includes 2 reusable connectors designed to seamlessly join wire panels to T-posts or wooden posts; This ideal quantity supports fence repairs, pasture expansions, or trellis constructions, eliminating the need for extra fastening hardware

Fencing Panel Connector
Value Set for Comprehensive Fence Projects: our livestock panel T-post connector set includes 100 reusable connectors designed to seamlessly join wire panels to T-posts or wooden posts; This ideal quantity supports fence repairs, pasture expansions, or trellis constructions, eliminating the need for extra fastening hardware
Six Trellis Types and What Each Handles Best
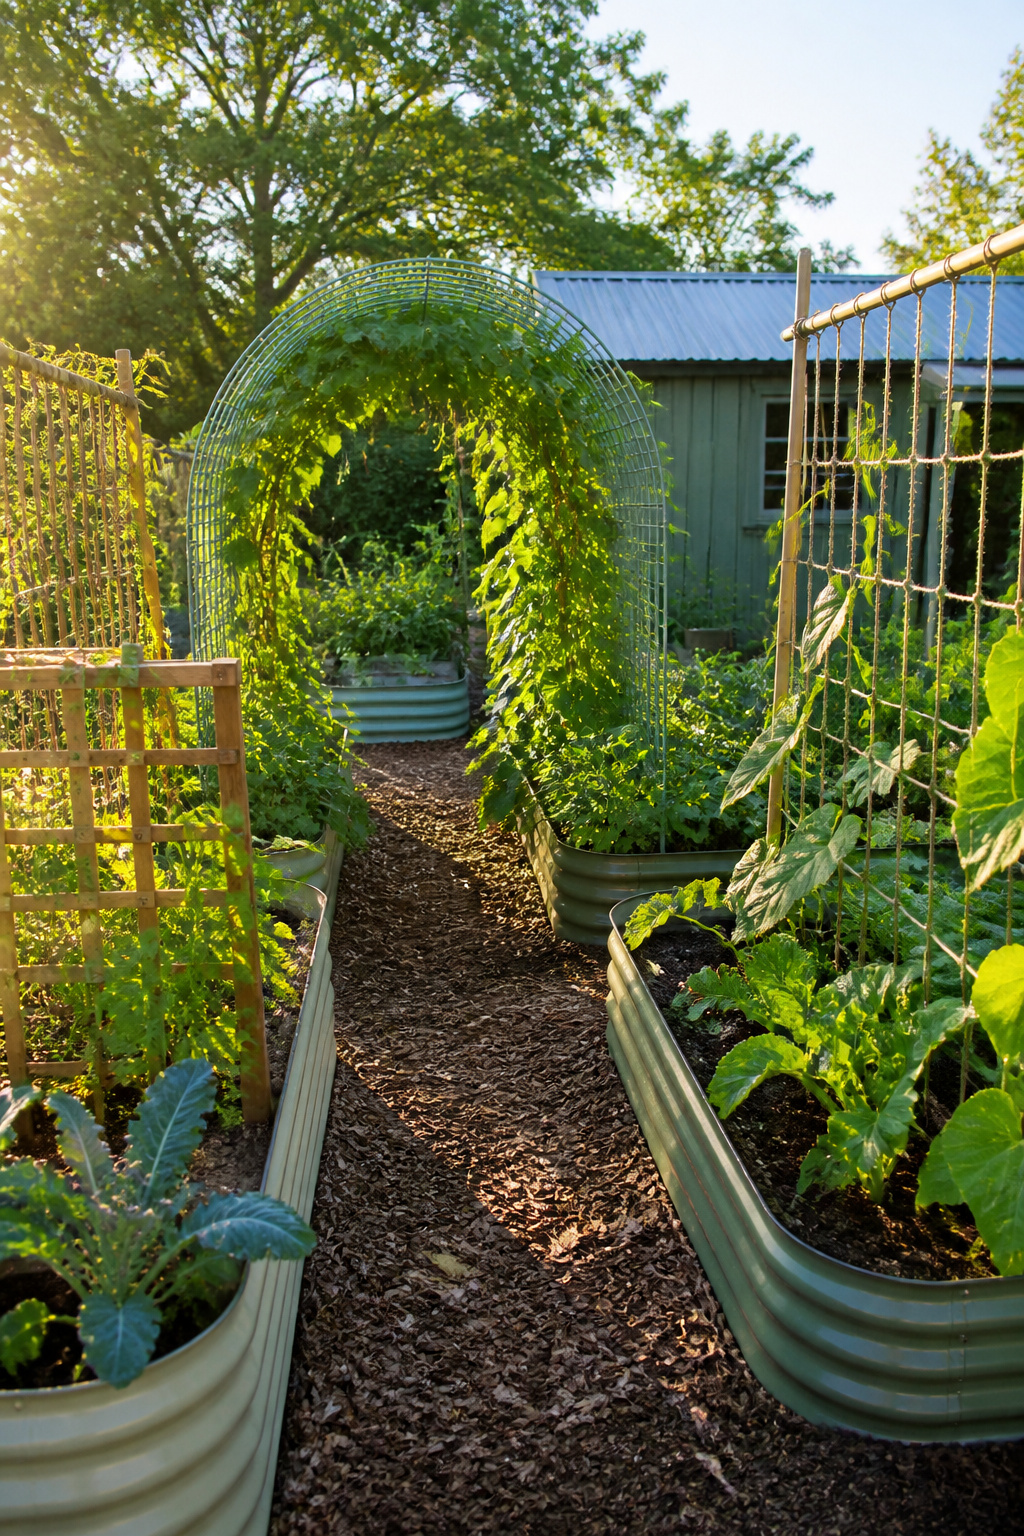
Cattle panel arches handle the heavy stuff for about $25 and last years. The 15 ft panels bend between two raised beds into a tunnel you can walk under to harvest pole beans, cucumbers, or squash. Shade-loving greens like chard and scallions grow underneath.
Wooden lattice trellises look finished from the street and give partial privacy. They suit lighter climbers and any bed backed against a patio or neighbor’s view.
Wire panel trellises mount flat against posts at the back of a bed, some kits clipping straight to the bed frame. The mesh grid holds tomatoes, squash, or any vine that pulls hard.
A-frames save square footage in small raised beds. Beans and peas climb both sides, and the height you build determines your yield. Metal or wood kits fold down; DIY versions use matching lumber.
Arch trellises dress up an entry or path while supporting vigorous climbers. Cattle panels work here too, though purpose-built garden arches come in narrower widths for single beds.
String trellises are the simplest build: top and bottom frames with twine or netting run through eye hooks. Peas, pole beans, and indeterminate tomatoes wind up the lines. Cut the twine with the plants each fall; the frame stays, the string goes.

Upgraded Self-Watering System: Tired of daily watering? Our self-watering planter features a built-in reservoir and a unique bottom grid design that utilizes the siphon effect for consistent hydration—preventing both root rot from overwatering and drought stress. Ideal for busy homeowners and frequent travelers who need low-maintenance planters.

Durable Material: Plastic outside and metal inside pole, The garden trellis are made of durable plastic-coated steel core for reliable strength, long-lasting performance. Not easy to rust or break.

SELF-WATERING SYSTEM: Self watering tomato planter with trellis has a built-in reservoir that ensures the plants receive consistent hydration. The bottom grid design utilizes the siphon effect, allowing the roots to pump water efficiently, minimizing the risk of under-draining or over-draining. There is a water injection port on the side, and the right amount of water is poured into the sowing box, without daily watering.
Wood, Metal, or Composite
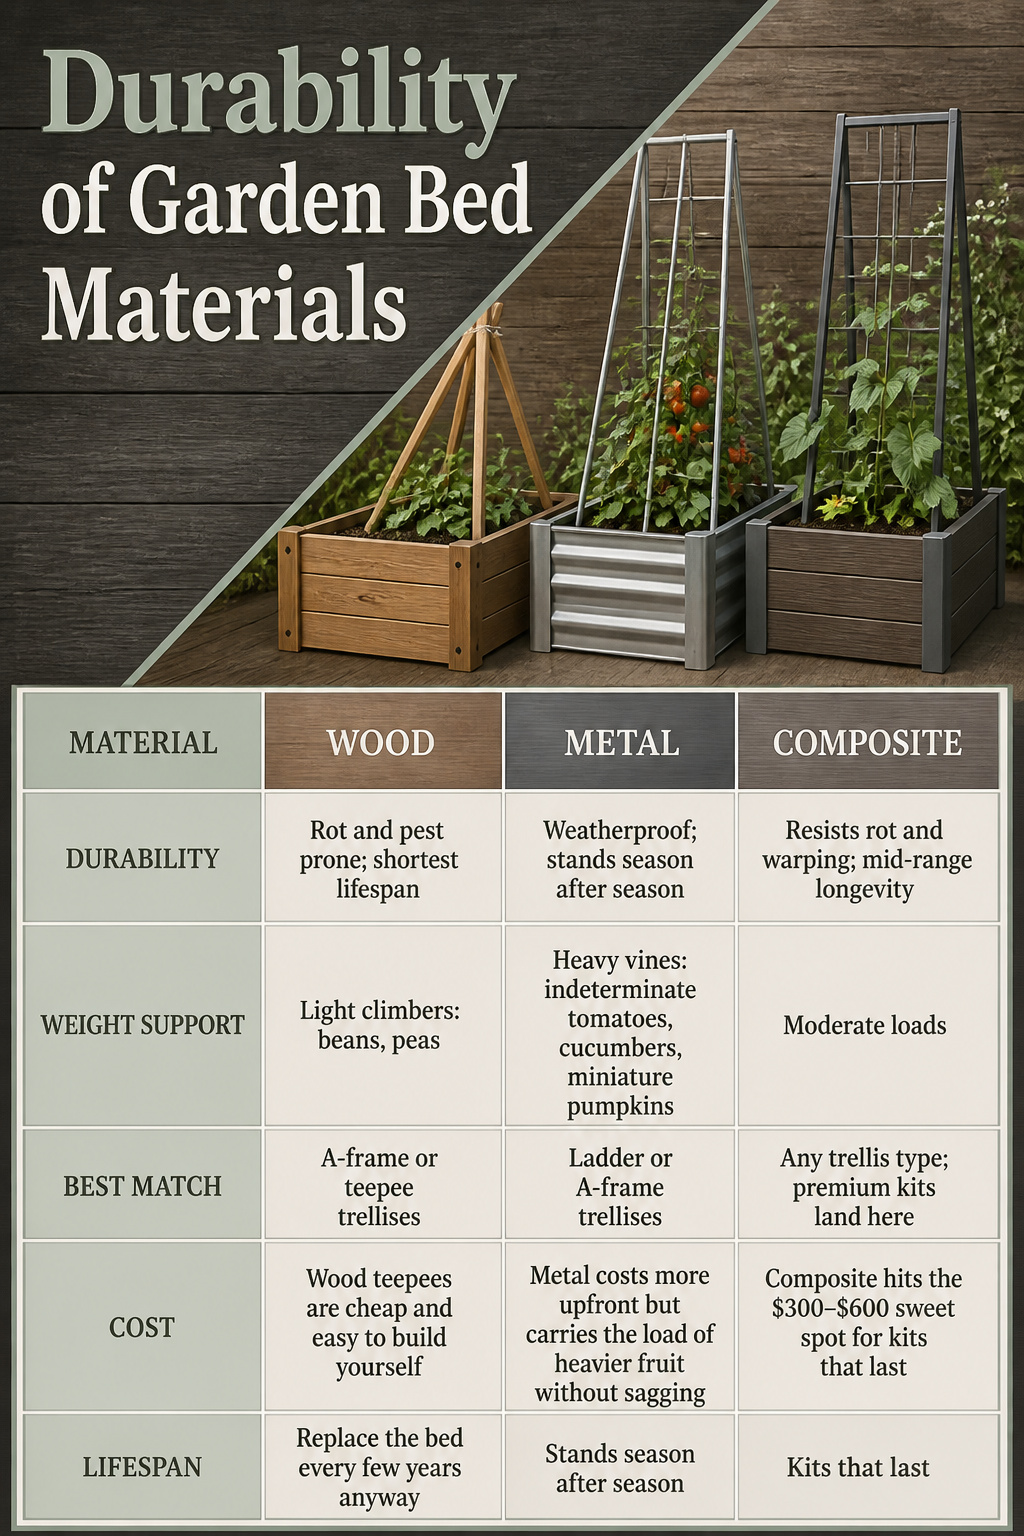
Raised garden beds with trellis live outside through sun, rain, and snow, so the material choice is where the project succeeds or fails. Traditional wood rots, warps, and draws pests over time. Metal outlasts it, especially rustproof stainless steel for the trellis itself. Composite boards split the difference: the look of wood without the decay, but at higher cost.
| Material | Durability | Weight Support | Best Match |
|---|---|---|---|
| Wood | Rot and pest prone; shortest lifespan | Light climbers: beans, peas | A-frame or teepee trellises |
| Metal | Weatherproof; stands season after season | Heavy vines: indeterminate tomatoes, cucumbers, miniature pumpkins | Ladder or A-frame trellises |
| Composite | Resists rot and warping; mid-range longevity | Moderate loads | Any trellis type; premium kits land here |
Wood teepees are cheap and easy to build yourself, which matters if you replace the bed every few years anyway. Metal costs more upfront but carries the load of heavier fruit without sagging. Composite hits the $300–$600 sweet spot for kits that last, though you pay for the privilege of not rebuilding.

Reliable Plant Climbing Support: Built for cucumber trellis, tomato cage for garden trellis, pea trellis for garden, bean trellis and green bean trellis use, this U-shaped garden trellis guides vegetable vines upward for cleaner growth, better airflow and easier harvesting in outdoor garden beds.

Garden Trellis Size for Raised Beds: This 48" L x 48" H cucumber trellis for raised bed adjusts from 16" to 26" wide, fitting many 4 ft raised garden beds. Use it as a trellis for raised garden bed layouts to save ground space while guiding vines upward.
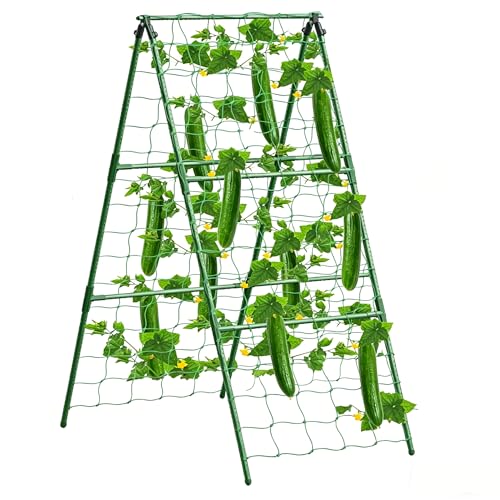
【Package included】:This Trellis for Climbing Plants Outdoor comes complete with everything you need to get started: 17pcs metal stakes, 8pcs T shape connect pipe, 2 A-shaped connectors, and a 0.9x1.8meter plant net.
DIY Against Store-Bought Kits
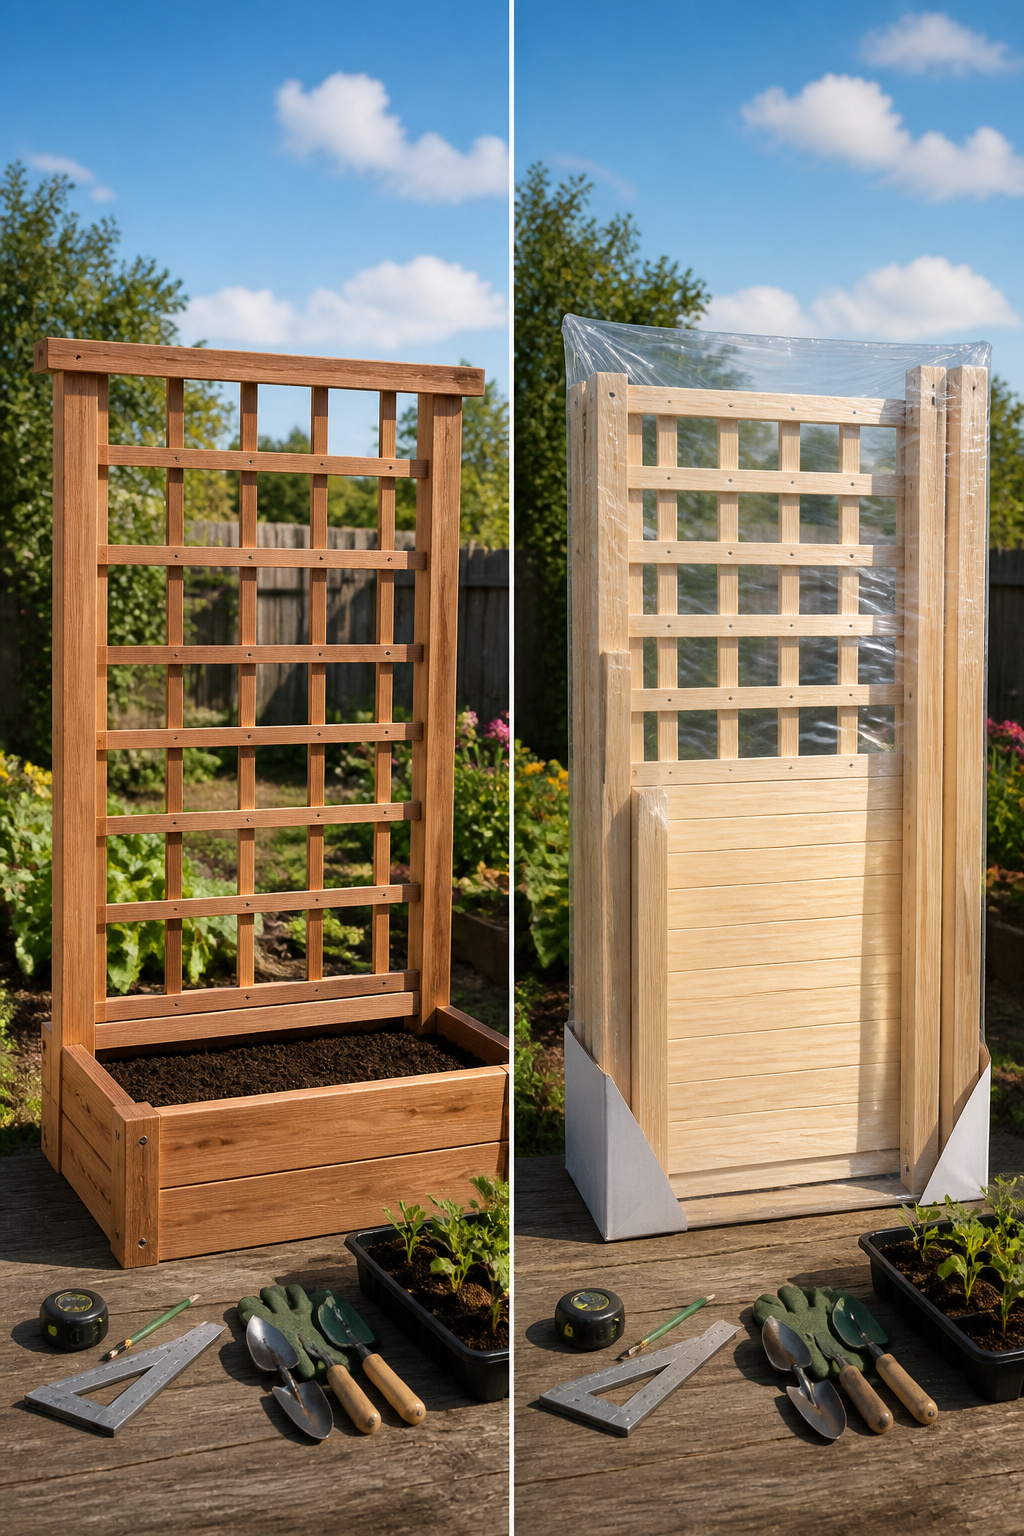
A 16-foot cattle panel and two T posts run about $33 total if you borrow the post pounder, or closer to $60 if you have to rent one. That is the floor for a trellis that will outlast the wood beds it arches over. Pre-made kits start higher and climb fast, but they arrive with pre-drilled holes, powder-coated finishes, and instructions that assume you own a screwdriver, not a farm store.
DIY saves money only if you already have the tools or the neighbor who does. The panel is rigid enough that bending it into an arch takes two people and some patience; driving posts straight without a pounder is nearly impossible. Kits skip that learning curve entirely. They also skip the rust. Galvanized cattle panels are raw steel underneath, and the coating scratches where the zip ties grip.
Skill level splits right here. The DIY route needs someone comfortable with a post pounder, willing to measure twice because the panel does not forgive, and able to transport a 16-foot sheet of steel mesh without folding it in a sedan. Kits need someone who can follow printed directions and level a box. If this is your first raised bed, the kit probably wins. If you have already built the beds and just need the arch, the panel pays for itself in one season.
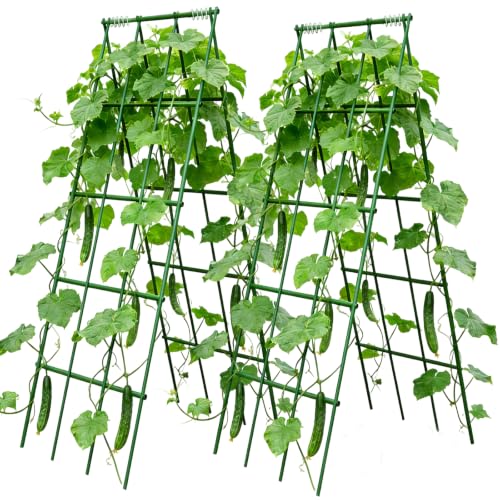
【No Assembly Required】Cucumber Trellis Out of the Box - From Packaging to Garden, Only 3 Minutes. While Other Bracket Kits Force You to Wrestle with More Than Ten Parts and a Wrench, Our No-Assembly-Required Bracket Panel Has Already Been Moved to the Garden for You, Providing a Simple and Quick DIY Erection Experience

【Rust-Resistant Material】: Cucumber trellis is constructed with high-quality galvanized steel inner pipes and an exterior plastic coating, forming a dual-layer rust-proof barrier to ensure long-lasting durability

A-Frame Design for Plant Growth: The garden trellis is designed to A-shape, allows you plant a row on the both side. And A-Frame design can maximizes the use of garden space
Climbing Plants That Actually Need the Support
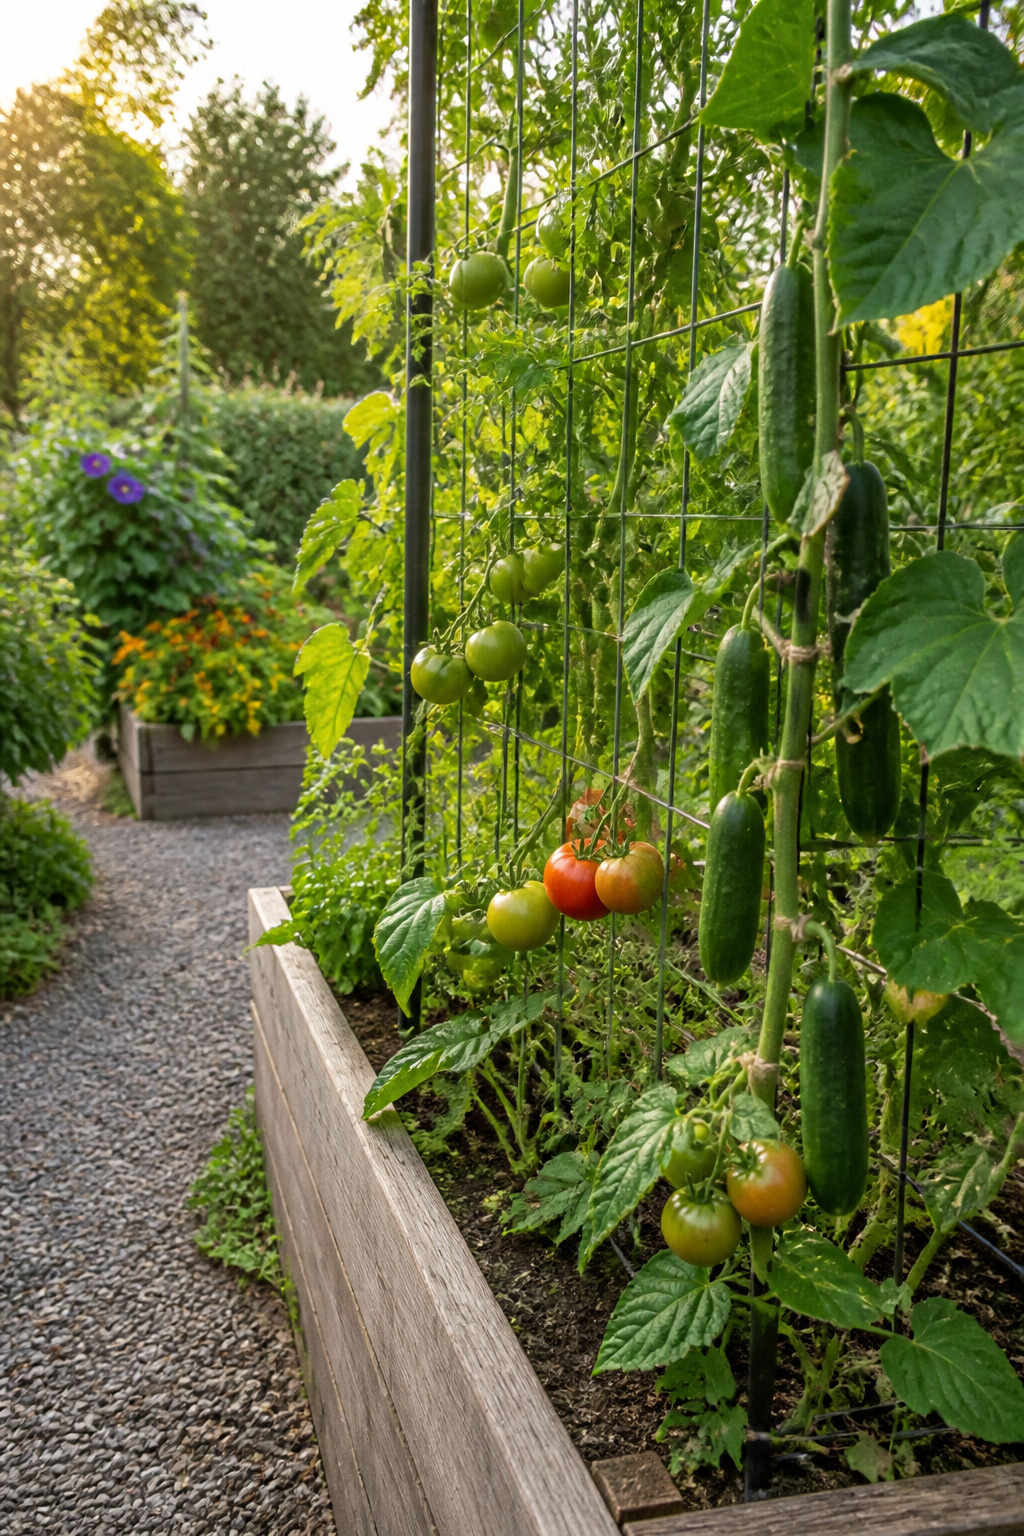
Not every vine will grab the trellis on its own, and the ones that do pull harder than you might expect. Heavy fruiting plants like indeterminate tomatoes, cucumbers, squash, and melons need the most structure. Indeterminate tomatoes can reach seven feet and keep producing all season, but they do not twine or cling. I tie fresh growth to the trellis every week or two with garden twine, and large fruits from squash or melon vines need slings to keep from snapping the stems. Light vining plants are easier. Pole beans and peas send out tendrils that wrap around supports without help; Emerite beans and Sugar Snap peas grow fast enough to cover a wire mesh trellis by midsummer. Annual flowers fill the gaps. Morning glories and nasturtiums climb on their own, and mixing them in brings pollinators to the vegetables. The key is matching the plant to the labor you want to put in: some vines need training, others just need something to grab.
Frequently Asked Questions
What is a trellis?
A trellis is a vertical frame fixed to a raised garden bed so climbing plants have something to grab instead of sprawling across your soil. It can be temporary, coming out of storage each spring, or permanent, staying in place year-round. The structure pushes plants upward, giving leaves more even sunlight and letting air move freely through foliage to cut down on fungal problems.
What types of plants can I grow on a trellis?
Pole beans, peas, cucumbers, indeterminate tomatoes, squash, and melons all grow well on a trellis. Beans and peas twine on their own, while indeterminate tomatoes need tying to the support every 7 to 10 days with soft twine. Morning glories and nasturtiums work too, filling gaps between vegetables and drawing pollinators.
How do you attach a trellis to a raised garden bed?
Drive T posts at the outer back corners of each bed, then fasten the trellis panel with zip ties or wire at roughly 12-inch intervals up each post. For a wire mesh panel, three wooden supports across the back of the bed, secured with 4-inch lag screws, give enough anchor points that nothing bows outward under vine weight. Tension matters: snug enough that the panel cannot shift, but not so tight the fastener distorts the wire.
When should I add a trellis to my raised garden bed?
Install the trellis before you plant. Driving posts or anchoring mesh once roots have spread risks tearing the very plants you are trying to support. This applies whether the trellis is temporary, stored over winter and brought back each spring, or permanent. The only window for positioning is while the bed still holds empty dirt.